Showing posts with label tomato. Show all posts

Tuesday, September 8, 2026

Dad's Stuffed Tomatoes


I am super excited to share the recipe for these stuffed tomatoes. Our dad came up with this recipe years and years ago and, of course, didn't write anything down. I have guestimated the amounts but there is some wiggle room for personal taste. 
Our dad always made it super garlicky, and we tend to as well! 
Since our dad passed, we try to make this at least once a year to let him know we still enjoy and appreciate his creativity. One of the other recipes he shared with us, his Cucumber Salad (recipe HERE), went viral and he was thrilled. We'll see if we can't get him famous for this delicious appie recipe too. <3 


Dad's Stuffed Tomatoes

Ingredients
cherry tomatoes
4 to 8 oz cream cheese, room temp
2 - 3 cloves garlic, minced
1/4 to 1/3 cup fresh basil, finely chopped
salt & pepper

Directions

Cut tops off the cherry tomatoes and gently scoop out the insides. Turn tomatoes upside down on a few pieces of paper towel to dry slightly. 
Place 4 oz cream cheese, garlic, basil, and salt & pepper into a food processor or blender and process until very smooth. If it is too strong with garlic or basil, blend in a bit more of the cream cheese. (Start with 4 oz and go from there). Scrape sides as necessary. 
*Start with the lesser amount of the ingredients and add as needed. It is easier to add more than to try and take something out!* 
Scoop out the mixture into a piping bag or Ziplock bag with the corner snipped off. 

Pipe filling into each tomato. 


Keep chilled, covered with plastic wrap, until ready to serve. 


I like to place them on spinach or lettuce leaves to make them look a little fancier, and to help them not slide all over the serving tray. 
This recipe is perfect for Canada Day, Christmas, pretty much any family gathering, or if you just have a lot of cherry tomatoes from the garden to use up! 
If your garlic is weak, then feel free to add more! 
We only ever make it with fresh basil, so I don't know that it would work with dried. 
You can use flavoured cream cheese - if you like. 
If you don't feel like scooping out cherry tomatoes, then you can use slices of large tomatoes. 
It can be used as more of a spread/dip with other veggies too. 
Be sure to give this a share and help our dad go viral! :) 


Saturday, January 4, 2025

Leftover Burritos


Burritos are a great way to use up leftovers because they are simple, fast, and delicious. There are a million different ways to fill them. I happened to have leftover pork and rice from a family dinner so decided to turn them into something I could prep and freeze for lunch and snacks later on. 
I have included measurements for the ingredients BUT these are pretty loose and can be altered A LOT to fit what you have on hand. Use them as a starting point. 


Leftover Burritos

Ingredients
Lime Cilantro Rice
juice of 1 lime
1/4 cup fresh cilantro, chopped

Pico De Gallo
4 tomatoes, seeded, diced
1/2 cup fresh cilantro, chopped
1 small red onion, finely diced (any onion will do in a pinch)
2 - 4 cloves garlic, minced
1 jalapeno, seeded, diced (or more if you like spicy)
juice of 1 lime

Burrito 
12 - 14 8 inch tortillas (or 10 large ones)
3 - 4 cups cooked pork, sliced 
(I used pork steak but you can use any cut of pork)
lime cilantro rice (recipe above)
pico de gallo (recipe above)

Directions
Prepare rice - heat up leftover rice and stir in lime juice and cilantro. Set aside.

 
Prepare pico de gallo - stir together tomatoes, cilantro, onion, garlic, jalapeno, and lime juice. 
Set aside. 


Mix leftover sliced pork with the taco seasoning and heat until warm. If you don't have taco seasoning then you can use chili powder and cumin OR leave it off. 
Assemble your ingredients together. 


Lay a tortilla on a flat surface. Layer a spoonful of refried beans, rice, pice de gallo, and meat in the middle of the tortilla. Be sure to leave space on either side for folding and rolling. DO NOT overfill. 


I found it helpful to watch a couple of you tube videos on how to roll a burrito so the filling doesn't spill out. The secret is to definitely DO NOT over fill them. 
If you are prepping these for eating later then you can wrap them in tinfoil for freezing. 


Plastic wrap will also work. I like tinfoil because it's a little sturdier if you are eating them right away. 


I believe I made 8 (8 inch) tortillas and 3 (10 inch) tortillas with the amounts above. 
We had half for dinner and then froze the rest. 


To reheat them: remove from tinfoil, place in microwave for 2 - 3 minutes to thaw and warm, then place in a lightly oiled pan and fry until golden brown on both sides to crisp up. 


I will often fry them when I first prepare them too. I like the tortilla to be a bit crispy. I then rewrap them in the tinfoil to eat them. 
It takes a little practice to be able to wrap the burritos up nice and snug. I highly recommend watching a few videos if you are unfamiliar with making them. It also helps to warm your tortillas if you find they are cracking when you wrap them. 
If you have a lot of leftovers, burritos are always a good way to use them up!

Wednesday, May 1, 2024

Mediterranean Brown Rice Salad


Sometimes you need to step outside your comfort zone and just try something new. 
We don't generally eat rice in salads but after trying this recipe that will be changing. The textures and flavors and colors of this salad are amazing. It does take a little bit of prep but nothing too crazy. 
If you are looking for something different to bring to a potluck or family dinner, try this! Mom brought it to her church dinner and they loved it. A healthier alternative to the usual heavy macaroni or potato salad. 


Mediterranean Brown Rice Salad

Ingredients
Dressing
3 Tbsp olive oil
2 Tbsp apple cider vinegar
1 Tbsp honey
2 cloves garlic, minced
2 tsp dried dill 
juice of 1 lemon
salt & pepper

Salad
1 cup brown rice, uncooked
2 bell peppers, diced
1/2 cucumber, diced
1 1/2 cups cherry tomatoes, halved
1 (341 ml) can corn 
1 small purple onion, diced
1 (540 ml) can chickpeas, rinsed and drained
3 cups spinach, chopped
1 (210 ml) jar sundried tomatoes, drained and chopped
1/2 cup feta (divided)
1/2 cup pine nuts (divided)

Directions
Whisk together dressing ingredients until well mixed. Set aside.
Cook brown rice as per package instructions. Let cool.
In a large bowl, mix together cooled rice, peppers, cucumber, tomatoes, corn, onion, chickpeas, spinach, sundried tomatoes, and 1/4 cup of the feta and pine nuts. 


Drizzle the dressing over the salad and toss gently to coat. 


Chill, covered, until ready to eat - at least 2 - 3 hours. When ready to serve, sprinkle with remaining 1/4 cup feta and pine nuts. 


Easy peasy, good for a crowd, full of healthy ingredients, and, most importantly, super delicious!
As with most salads, you can sub ingredients or switch them up to suit your preferences. Throw in some olives if you like olives, add more spinach or less corn.... you get the point! 
The next time I make this I might at some chicken and just have it as a meal instead of a side. 

Monday, November 15, 2021

Keto Tomato Soup


We are well into comfort food weather here in BC. 
And what better comfort food is there than soup? We have an amazing Tomato Soup recipe (HERE), but it is a bit time consuming and it's not keto friendly. It really is THE BEST though so if you want a delicious, from scratch, tomato soup you can can for the winter.... make that one!
This keto friendly tomato soup recipe only takes about 10 - 15 minutes from start to finish. Not even lying. Plus it's delicious. Try both, see which one you like better!


Keto Tomato Soup

Ingredients
24 oz jar of Rao's marinara sauce
1 cup chicken broth
1/2 cup whipping cream
2 Tbsp tomato paste
2 Tbsp Swerve granulated 
salt & pepper

Directions
Stir ingredients together in a pot over medium hot. Bring to a boil, reduce heat, simmer 5 minutes. 
Boom. 
Done. 


The nutritional counts for one serving (recipe makes 4) are: 220 calories, 19 fat, 8 carbs, 2 fiber, and 3 protein. So 6 net carbs! 
FYI - you can thin it a bit with more chicken broth if you feel you need to. It's very thick and luxurious (which is a weird word to use to describe soup but I can't think of another one right now). 


I like to serve them with a big scoop of Twin Peaks Nacho Cheese Protein Puffs. 
But I also love it with a delicious grilled cheese on Carbonaut bread to keep things keto friendly!


Either way, it's low carb, keto friendly, delicious, comfort food. 
You will never be able to convince me that tomato soup and grilled cheese isn't the greatest food pairing in the history of comfort food. 
Yes, I will fight you over this. 


Tuesday, March 3, 2020

Keto Lasagna (Hearts of Palm Noodles)


I discovered this great website where I can order all sorts of keto friendly products called Naturamarket.ca. One of the things I found on their list of keto products was Natural Heaven Veggie Pasta Noodles made from hearts of palm.  


Have you ever tried them? They reminded me of artichoke with the smell and texture...


That being said, they are very noodle-y and work amazingly well in lasagna. I will be ordering more of these to experiment with for sure. Being as they are made from hearts of palm, a vegetable, they are naturally vegan and gluten free. I made my own simple tomato sauce for this lasagna but you could easily use a sugar free, store bought tomato sauce if you prefer. 


Keto Lasagna (Hearts of Palm Noodles)

Ingredients
Noodles
2 containers Natural Heaven Veggie Pasta Noodles (or similar)

Meat Sauce
1 can (398 ml) diced tomatoes with garlic
1 slice onion, diced
1 lb lean ground beef

Cheese Layer
1 container (500 gr) Ricotta cheese
1 egg
2 Tbsp Parmesan, shaved
1/2 cup mozzarella, shredded

Topping
1/2 cup mozzarella, shredded
2 Tbsp Parmesan, shaved

Directions
Preheat oven to 350. 
Prepare meat sauce - In a large frying pan over medium heat, simmer the tomatoes and onions about 5 minutes. 


Push them to the side of the pan, add in the ground beef, and cook the beef until it is browned. Stir the tomatoes and ground beef together near the end when the beef is almost done. Set aside. 
Prepare cheese layer - stir together the ricotta, egg, first amount of mozza and Parmesan until well mixed. 


Assemble the lasagna - In a 9 X 13 oven safe dish, layer a single layer of the veggie noodles. Drop 1/2 of the cheese layer on top by the spoonful. 


Gently spread the cheese layer out with the back of a spoon.


Drop half of the meat sauce on top of the cheese layer by the spoonful and spread out as well as you can. Don't worry if there are gaps, you will be doing a second layer.  


Place another layer of the veggie noodles on top and then layer with the remaining cheese and meat sauce. Top with the last of the veggie noodles and then sprinkle with the remaining mozza and Parmesan. 


Bake at 350 for about 30 minutes - until heated through and cheese is melted. Remove from oven and let sit for about 5 - 8 minutes before serving. 


Slice into 6 pieces and serve immediately. 


The nutritional counts, if you cut this into 6, are: 481 calories, 18.5 fat, 12.4 total carbs, 1.8 fiber (10.6 net carbs), and 28.6 protein. (As always, if you are counting for dietary reasons we recommend you enter your totals into a nutritional calculator yourself to be totally accurate.) 


This looks and tastes aaaaaaalmost exactly like a "regular" lasagna. I found the hearts of palm to have an artichoke-y flavor to them and the texture was fabulous. I'm pretty sure if you used a store bought, sugar free tomato sauce you'd be able to fool everyone into thinking they were eating "regular" lasagna. 
I love finding new ingredients to play with; like the hearts of palm, and can't wait to experiment some more! Any suggestions? Leave them in the comments below! :) 

Monday, January 6, 2020

Keto Frybread Tacos


Whether or not you follow a keto eating plan, you need to try this bad boy. 
Around here (Lillooet) these are called Indian Tacos and they are usually made on fluffy, chewy bannock and they are addicting. 
According to MyFitnessPal the nutritional counts on our keto version are: 400 calories, 10 carbs, 22 fat, 39 protein, 2 fiber, and 2 sugar per serving. The recipe makes 4 big servings. BIG. Huge. (FYI - if you are cautious about counting your macros then be sure to enter the ingredients into your own counter. Numbers can vary by brand and size of produce!)
Since I have learned that fathead dough is magic once it is deep fried I have been experimenting like crazy. I'm hoping to come up with some sweet-type recipes using deep fried fathead dough so be sure to check back for that! In the meantime, try our Keto Corn Dogs (recipe HERE) or this delicious taco!! 


Keto Frybread Tacos

Ingredients
Fathead Dough
1 1/4 cup shredded mozzarella cheese
3/4 cup almond flour
1/2 tsp baking powder
pinch salt
1 egg

oil for frying (about 2 inches deep in pot)

Taco
1 lb ground beef, scramble fried
1/4 cup shredded cheddar cheese
1/4 cup finely diced red onion
4 slices tomato, diced
1/2 cup shredded lettuce
4 Tbsp sour cream

Directions
Prepare fathead dough - Place oil in a deep pot and heat to 350 degrees. 
While oil is heating: place shredded mozza in a microwave safe bowl and microwave 30 seconds. Stir well. If not totally melted, microwave for another 10 - 15 seconds. Stir until smooth. Add in the almond flour, baking powder, salt, and egg. Stir vigorously (or beat with electric mixer) until stiff dough forms. 


Divide into 4 equal pieces and roll out between two pieces of parchment paper to about 1/4 inch thick. Be sure to use the parchment paper - it will be too sticky otherwise. 
Carefully place one round of dough into the oil once it has reached 350 degrees. Cook for about 25 - 35 seconds and then carefully flip over. Cook another 25 - 35 seconds on the other side. FYI - it cooks very fast so don't leave it alone or it will taste burnt! Using slotted spoon or tongs, remove the bread from the oil and place on paper towel. Continue with remaining 3 pieces. 


Top each taco with 1/4 of the fried ground beef, 1 Tbsp of the cheddar, 1 tbsp red onion, 1 slice tomato, and 2 Tbsp lettuce.


And then dollop on a Tbsp of sour cream!


That is a work of art right there. 


Let's go in for a closer look...


The bread is airy and chewy yet crispy - just like bannock should be. Okay.... it's not going to be the same as bannock.... but it is a REALLY good substitute if you are cutting carbs. 


I have frozen the deep fried dough to use later - and it works great. I froze them in a single layer on paper towel. To thaw them I just popped one of them in the microwave for about 30 - 40 seconds just to warm it up. 
I am definitely adding these to my rotation. Deep frying is a bit of a pain but now that I know they freeze okay I'm going to make up a double batch to freeze half! For only 8 net carbs these are so filling and a fun keto meal! 

Saturday, February 3, 2018

Giant Bacon Cheeseburger


One of my friends at work does not like sweets so whenever her birthday comes around I get to come up with fun savory dishes for her. I've made a cute Sushi Cake (HERE), a tasty Savory Southwest Cheesecake (HERE), and a very cake-looking Smorgastarta (HERE). 
This year I went big. 
Like... really big. 


Although, to be fair, she is pretty tiny so in comparison it looks even bigger. 
Anyway, this burger is sooo much fun to make. The bread recipe I use here makes enough for 2 large buns so you can always make one bun and then make regular sized buns from the other half if you like. I made 2 large buns because I wanted to make sure I had a back up in case something went wrong. 


Giant Bacon Cheeseburger

Bun
1/2 cup hot water
1 Tbsp sugar
1 1/2 Tbsp dry active yeast
4 cups warm water
1 Tbsp sugar
2 Tbsp oil
1/2 tsp salt
7 to 9 cups of flour

1 egg white, beaten
2 Tbsp or so of sesame seeds

Burger
4 lbs extra lean ground beef
4 eggs
1 Tbsp HP sauce
2 Tbsp prepared mustard
2 tsp garlic granules (or 4 cloves minced garlic)
1/4 onion, finely diced
1/2 cup fine breadcrumbs 

Toppings
condiments: mustard, mayo, ketchup
5 - 6 leaves of lettuce
1 large tomato, sliced
1 lb bacon, cooked
1 jar sliced sandwich pickles
1/2 onion, sliced
8 to 10 large slices of cheese (I used jalapeno jack)

Directions
Prepare bread: In a small bowl place the 1/2 cup hot water, the first 1 Tbsp sugar, and the yeast. Don't stir, set aside and let stand for 10 minutes to activate the yeast.
In a large bowl, place the 4 cups of warm water. Add in the remaining 1 Tbsp of sugar, 2 Tbsp of oil, and salt. Add in 3 cups of flour, mixing as you are adding, stir until smooth. 
Next, stir the yeast mixture into the flour mixture until smooth. Add flour, 1 cup at a time, until dough is sticky and forms a ball (you may or may not need the entire 9 cups). Place dough onto a floured work surface and knead until dough feels soft and light to the touch - about 5 minutes or so. Add a little more flour if dough seems too sticky. Don't add a lot more flour though or your bread will be tough instead of fluffy. 
Oil a mixing bowl and place the dough in the bowl.


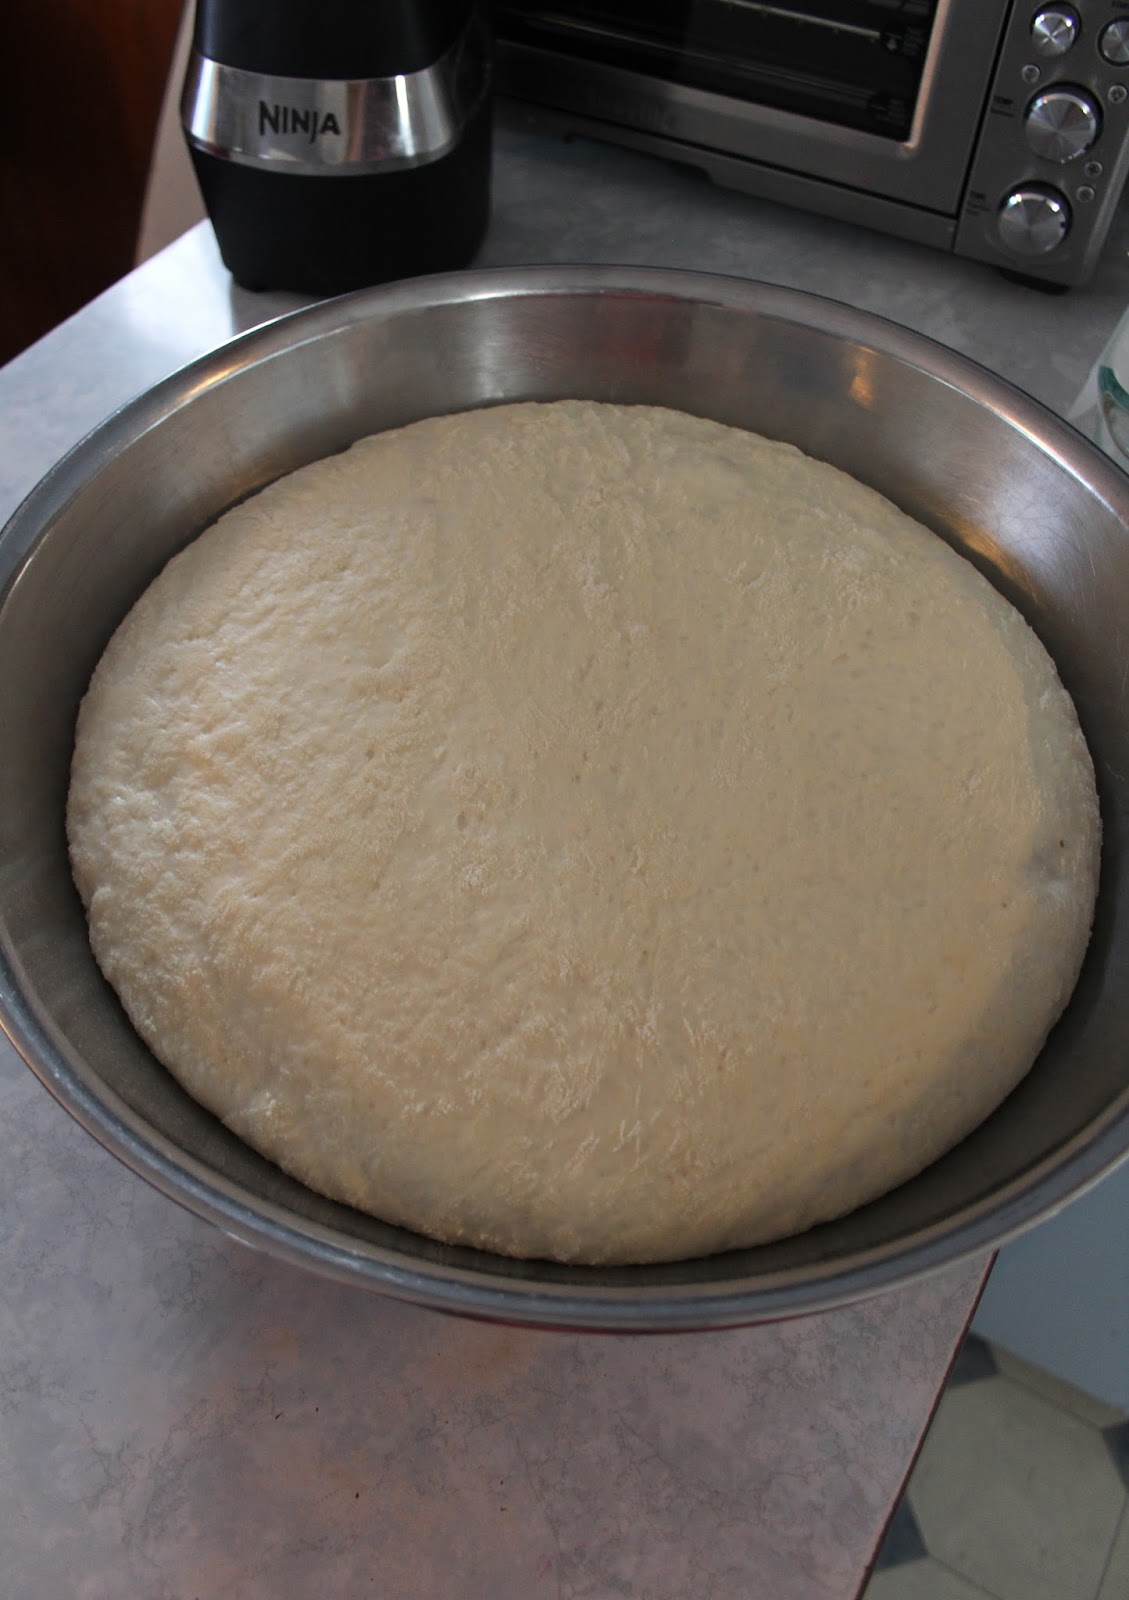
Cover the bowl with a towel and put in a warm place to rise until doubled, about 1 hour. 


After an hour, punch dough down and cut in half. Roll each half into a large ball and place in a large pan with very short sides, or on an oven safe dish, or a cookie sheet. Be sure to spray the dish you use with cooking spray OR line with parchment paper. 


I used a tart pan and serving platter with curved sides. Cover the dough with a towel and set somewhere warm to rise for another hour until doubled in size. 


When dough is risen, preheat oven to 375. Brush the tops of the bread with beaten egg white and then sprinkle generously with sesame seeds. Bake until bread is well browned and sounds hollow when tapped - about 45 minutes or so. 


Let cool for about 8 minutes and then remove the bread from the pans to a wire rack to cool completely. You may need to run a butter knife around the edge off the pan to loosen it.


Set aside until burger is ready. Bread can be made ahead of time and frozen, then simply thawed when you are ready to make the burger. You need to cut the bun in half, horizontally. I found using a serrated knife works best. 

Prepare burger: In a large mixing bowl combine the beef, eggs, HP sauce, mustard, garlic, onion, and bread crumbs.


Mix until very well combined - it helps to get in there with your hands. 
On a cookie sheet lined with a silpat or parchment paper, Pat out the burger mixture until it is a little bit bigger than the bun you made. As you can see from the photo below, I used the bottom of my tart pan that I baked the bread in as a guide for how big to make the patty. 
You want to make it a little bit bigger than your bun to allow for meat shrinkage from cooking. 


Bake in 350 oven for about an hour - until meat is thoroughly cooked. The best way to tell if it is cooked is to use a meat thermometer. 


Assemble your burger: Place the bottom of your bun on a serving tray. Spread mustard, ketchup, mayo - whatever your favorite condiments are - on the bun. Top with lettuce. Carefully place the burger patty on the lettuce.


Now top with your favorite toppings. I used jalapeno jack cheese, bacon, pickles, tomato and onion. 


Spread more condiments on the top bun and then place on top.


Serve immediately!
Note - you can make the bun ahead of time and you can also make the burger patty ahead of time. The burger patty can be reheated in either the microwave or in the oven. 


You can cut the slices are big as you like but, trust me, a little slice goes a long way.


I managed to snap a few pics with my phone at the office before it was devoured. 
Now, I just wanted to say: for me, the meat was a little thick. I used 4 lbs of ground beef but I think the next time I make it I would cut back to 2.5 to 3 lbs. A few of my coworkers agreed with me and a few said the meat-to-bun ratio was perfect. It comes down to your own preference!


I apologize for the weird lighting in some of these pics. I assembled everything together first thing in the morning to bring to work so it was pitch black outside and there was no natural light at all. 
Also, this would be a smashing idea for Super Bowl party time. Am I right? Imagine how happy your guests would be if you showed up with this for the game!


Looking for more fun foody links? Pop over to Carole's Chatter!