Showing posts with label chocolate chip. Show all posts

Sunday, June 28, 2026

Chocolate Chip Cheesecake Bars


I've been wanting to post this recipe for a while now but I never seem to be able to get any photos of the finished product. It's usually eaten up before I get the chance! This is a fairly simple bar to put together, even though there are three layers to it. Totally worth the few dishes you will have to clean up, IMO. 
You can cheat a bit and use a roll of Pillsbury chocolate chip cookie dough for the top layer if you don't want to make your own. 


Chocolate Chip Cheesecake Bar

Ingredients
Bottom Layer
1 3/4 cup graham cracker crumbs
1/2 cup melted butter
1/4 cup brown sugar

Cheesecake Layer
2 - 8 oz pkgs cream cheese, softened
1/2 cup sugar
1/4 cup sour cream
1 egg
1 tsp vanilla

Cookie Dough Layer
1/2 cup butter, softened (can use margarine)
1/2 cup white sugar
1/2 cup brown sugar, packed
1 egg
2 tsp vanilla
1 1/2 cup flour
pinch salt
1 1/4 cup mini chocolate chips

Directions
Preheat oven to 350. Line a 9 X 13 pan with parchment paper, set aside. 
Bottom layer - Mix together graham crackers, butter, and brown sugar. Press evenly into the prepared pan. Bake at 350 for 5 - 8 minutes, until lightly browned. Remove from heat and set aside. 
Cheesecake layer - beat cream cheese until smooth, scraping bowl as needed. Beat in sugar, sour cream, egg, and vanilla. Spread over crumb layer in pan. 
Cookie dough layer - Beat butter and sugars until light and fluffy, about 3 - 4 minutes. Beat in egg and vanilla. Add in flour, salt, and chocolate chips. Beat until stiff dough forms. Evenly crumble the dough over the cheesecake layer. It's okay if a bit of the cheesecake shows through in places. 
Bake at 350 for about 12 minutes, rotate pan, then bake another 10 - 15 minutes, until top is lightly golden brown and bar appears set. Remove from heat and let cool to room temperature before attempting to cut. You can also let it chill in the fridge before cutting. 


This bar has so many flavors and textures that combine in the most amazing way. The buttery, caramelly crust, the smooth cream cheese middle, and the chocolatey cookie top are an unbeatable combo. 


Store them in the fridge after they have cooled. They also freeze very well if you want to make them ahead of time. They might look like a simple square but they are SO FLIPPIN' GOOD!!. 
After school snack or fancy dessert after dinner? 
This can be both, and so much more! 


Thursday, September 10, 2020

Big Batch Chocolate Chip Cookie Cupcakes


I've been on a bit of a cupcake making bender lately. 
Remember when cupcakes were at the top of the social media dessert food chain? Cupcakes...everywhere...
Let's bring those days back. 
I mean... cupcakes are everything. Cake you can hold in your hand... the perfect dessert. And options? holy heck the choices cupcakes offer! There's a million bazillion. 
I know you're on my side. #cupcakesforever


Chocolate Chip Cookie Cupcakes with Cookie Dough Frosting and Mini Chocolate Chip Cookie

Ingredients
Cookies
1/2 cup melted butter
1/2 cup sugar
1/4 cup brown sugar
1 egg
1 tsp vanilla
1 cup + 3 Tbsp flour
1/2 tsp baking soda
pinch salt
2/3 cup mini chocolate chips

Cupcakes
3 cups flour
2 1/2 tsp baking powder
pinch salt
1 cup butter, softened
1 3/4 cup sugar
4 eggs
1 cup milk
1 tsp vanilla
1 cup mini chocolate chips

Cookie Dough Frosting
1 cup butter, softened
1/2 cup brown sugar
2 cups icing sugar
2/3 cups flour
pinch salt
2 Tbsp cream (milk will also work)
1 tsp vanilla
1 cup mini chocolate chips

Directions
Prepare cookies - Preheat oven to 350. 
Beat together butter, sugar, egg, and vanilla until smooth. Add in the flour, baking soda, salt, and chocolate chips and beat briefly to combine. Finish stirring with a wooden spoon a dough will be very stiff. 
Scoop with a small cookie scoop (about 1 Tbsp) on to a large cookie sheet lined with parchment paper. Bake at 350 for about 8 - 10 minutes, cookies should be ever-so-slightly brown at the edges but still appear a little under done in the middle. Take them out and let them cool on wire racks. 


Prepare cupcakes - Preheat oven to 350. In a bowl, stir together flour, baking powder, and salt. In a separate bowl, beat butter and sugar until light, scraping bowl as needed. Beat in eggs, one at a time. Beat in vanilla. Alternately beat in dry ingredients with the milk until just combined. A few flour streaks may remain. Stir in the chocolate chips. Scoop into 24 muffin tins lined with muffin cup papers.
Bake at 350 until toothpick inserted near center comes out clean and top is light, golden brown - about 15 - 20 minutes. Let cool completely on wire racks. 


 Prepare cookie dough frosting - Beat together butter and both sugars until smooth, scraping sides of bowl as needed. Beat in flour and salt, cream, vanilla, and chocolate chips. You may have to finish with a wooden spoon as frosting gets very thick. (FYI - if you are worried about using "raw" flour then simply toast it at 350 for about 5 minutes before adding it to dough.)
Scoop about 2 Tbsp of frosting onto each cupcake and then flatter slightly with your fingers. 


I used a medium cookie scoop and had just enough for the 24 cupcakes. 


Lightly press a cooled cookie on top of the frosting. 


24 delightful, handheld treats that are going to make ALL THE PEOPLE happy. 
Well, maybe not all.... some people just want to watch the world burn...
I mean... who doesn't love chocolate chips... *sigh*


I love using mini chocolate chips for these but feel free to use regular, butterscotch, mini m&ms, peanut butter, skor bits, or even white chocolate chips. 


You can half the recipe for only 12 cupcakes, if you like, but these do freeze very well so making a bigger batch is always a good idea! :) 
Can't decide between vanilla and chocolate? Split the difference and go with chocolate chip!

Tuesday, June 23, 2020

Brownie Ice Cream Sandwiches


Is there anything better than ice cream sandwiches? Seriously... 
I mean you take two delicious things and sandwich a third delicious thing in the middle.... basically heaven, am I right? 
These bad boys only take about an hour to whip up, if your using store bought ice cream, and are sure to be a big hit with friends and family! Use any flavor ice cream you like - I went with vanilla and chocolate, but I imagine salted caramel, maple walnut, mint chocolate chip or pretty much anything would be delicious as well. 


Brownie Ice Cream Sandwiches

Ingredients
Brownie Cookies
8 oz chocolate chips (about 1 1/3 cup)
1/2 cup butter
3 eggs
1 cup sugar
1/4 cup brown sugar
1 Tbsp vanilla
1/2 tsp baking powder
salt
3/4 cup flour
1/4 cup cocoa powder
1 cup walnuts, chopped

Filling
Ice Cream

Directions
Make cookies - In a microwave safe bowl (or on the stove top), melt the chocolate chips and butter, whisking until smooth. Set aside.
In a large bowl, beat eggs for 2 minutes. Beat in sugars, vanilla, baking powder, and salt. Beat in the melted chocolate until combined, scraping sides of bowl as needed. 
Add in flour, cocoa powder, and walnuts, stirring until just combined. Chill batter for 30 minutes. (Do not skip this step!) 


When batter is chilled, preheat oven to 350. Line a cookie tray with parchment paper. Using a large cookie scoop, scoop batter about 2 inches apart onto prepared cookie sheet. They will spread. 


Bake at 350 for 10 - 15 minutes, until tops are crackled. Don't over bake or cookies will be crispy not chewy. If you make the cookies smaller then your cooking time will vary. 


Cool completely on wire racks before filling with ice cream. 
Let ice cream soften on the counter for about 10 - 15 minutes before scooping onto the flat side of one cookie. Flatten gently with a spoon before topping with another cookie. You need to work fairly quickly as the ice cream will start to melt and get very messy!


Store in freezer. 


You can wrap them individually to make storage easier. 


FYI - these go great at bake sales if you have a cooler with ice to keep them in! 
I made some with brownie cookies, some with chocolate chip cookies, some with vanilla ice cream and some with chocolate ice cream and they all sold in about 5 seconds! 
These are, as the little one Sue babysits would say, deeeeeeeeelicious. 

Sunday, May 24, 2020

Keto Sex In A Pan


I'm always on the look out for keto recipes that don't give off keto vibes, if you know what I mean. A lot of time low carb/gluten free recipes just aren't spectacular. For me it's generally a texture thing. 
Anyway, our Keto Nanaimo Bars (Recipe HERE) have pretty much been the peak of gluten free desserts for me to this point and I really wanted to try and convert our "normal" Sex In A Pan (Recipe HERE) dessert to keto because it's the peak of "normal" desserts when I'm not doing keto. 
Long story short.... this recipe is a hit. 
You'd never know it was keto/gluten free. It's a bit fussy to make because there are 4 layers but it's totally worth it. The portions are big (always a plus) and the net carbs are impressive - only 3.7 net carbs per serving, recipe makes 12 servings! (303 calories, 28.3 fat, 6.3 carbs, 2.6 fiber, 5 protein - keep in mind it is always best to enter your own brands/weights into a nutritional calculator to be exact.) 
Do you have a favorite keto/gluten free recipe that you love? Share with us in the comments below!


Keto Sex In A Pan

Ingredients
Crust
1 1/4 cup almond flour
1/3 cup unsweetened baking cocoa powder
1/4 cup powdered Swerve
pinch salt
1/4 cup butter, melted
1 Tbsp water

Cheesecake Layer
8 oz cream cheese, room temp
1/4 cup whipping cream
1/4 cup powdered Swerve
1/2 tsp vanilla

Pudding Layer
1 cup whipping cream
1 cup unsweetened almond milk
1/2 cup powdered Swerve
4 egg yolks
1/2 tsp xanthan gum 
1/3 cup unsweetened baking cocoa powder
3 Tbsp butter, cut up
1/2 tsp vanilla

Whip Cream Layer
1 1/2 cups whipping cream
2 Tbsp powdered Swerve
1/2 tsp vanilla

Chocolate Sprinkles
1 oz (approx 2 Tbsp) sugar free chocolate (I use Lily's chocolate chips)

Directions
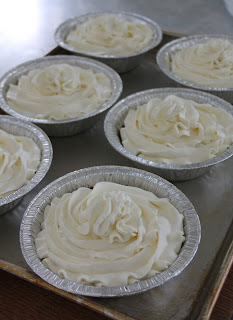
Prepare crust - Preheat oven to 325. Lightly spray the bottom of a 10 inch pan with cooking spray (OR, I used 6 X 5 inch individual mini pie pans) 
Mix almond flour, cocoa powder, Swerve, and salt together in a bowl. Stir in the melted butter and water until well combined. Spread evenly into prepared pan(s) and press down firmly. 


Bake at 325 for about 10 - 15 minutes. 10 minutes in the individual pans or 15 in one large pan. 
FYI - If you are using smaller pans it helps to place them on a cookie sheet for easier transportation. 
After the crusts have baked, remove them from the oven and place them into the fridge or freezer while you prepare the next layer. 
Prepare cheesecake layer - In a mixing bowl, beat the cream cheese until it is lump free, scraping sides as needed. In another bowl, beat the whipping cream, Swerve, and vanilla until stiff peaks form.
Slowly beat the whipping cream mixture into the cream cheese, until smooth. 
Spread evenly over the crust layer. 


Place in fridge or freezer while you prepare the pudding layer. 
Prepare pudding layer - In a saucepan bring whipping cream, almond milk, and Swerve to a simmer over medium heat. 
Whisk the egg yolks in a bowl and slowly whisk in the cream/milk to temper the eggs. Return everything to the saucepan and place back over medium-low heat. Sprinkle with the xanthan gum and whisk in. Whisk in the cocoa powder. Stir fairly vigorously over the medium-low heat until thickened. 
Once thickened, remove from heat and whisk in butter and vanilla. Stir until smooth. Set aside and let cool. (You can set in the freezer and stir every 15 minutes to speed the process.)
Once it reaches room temperature, spread evenly over the cheesecake layer. 


Chill until cool and set, about 2 hours. 
Prepare whip cream layer - Beat together whip cream, Swerve, and vanilla until stiff peaks form. Divide and spread evenly over the pudding layer.


Prepare chocolate sprinkle - Pulse 1 oz (approx 2 Tbsp) of chocolate in a blender or food processor until fine. Sprinkle evenly over the whipped cream layer. 


Chill until ready to serve. Can be made a day ahead of time. 


FYI - You want to keep it covered. 


The recipe makes 12 servings. Generous servings, if I do say so! 
This keto Sex In A Pan is rich, creamy, low carb, gluten free, and super de duper delicious. 


The crust has a hint of almond flour taste but I find by the third bite I'm tasting more chocolate and it's all good. Texture is pretty much spot on to our original Sex in a Pan, maybe a bit creamier, but I'm not complaining about that!. 
FYI - This will last a few days, covered, in the fridge. 
Feel like you are missing out by following keto or gluten free? You won't with this decadent dessert. It's got all the bells and whistles! 

Friday, May 8, 2020

Keto Chocolate Peanut Butter Waffles


It's been a while since we've posted anything keto. 
With everything that is going on in the world, I'll admit my eating healthy has gotten off course. I decided to get back on track by coming up with something fun, delicious, easy, and keto. These chocolate peanut butter waffles fit the bill perfectly. Like a peanut butter cup but not as sweet and more filling. This recipe makes 5 servings and each serving is: 186 calories, 18.2 fat, 5.9 carbs, 2.3 fiber, and 6.4 protein. That's 3.6 net carbs per waffle. (Of course, because of different brands, etc... the most accurate nutritional counts are found by entering them yourself into a nutritional tracker. I use MyFitnessPal!) 
I love to have one with my keto coffee in between lunch and dinner to cure those afternoon hunger cravings. 
FYI - These keep well in the fridge in an airtight container for 3 or 4 days. 


Keto Chocolate Peanut Butter Chaffles

Ingredients
Waffle
2 eggs
2 Tbsp whip cream (heavy cream)
2 Tbsp unsweetened cocoa powder
2 Tbsp powdered Swerve
2 Tbsp almond flour
1/2 tsp baking powder

Topping
1/4 whip cream (heavy cream)
4 tsp powdered Swerve
1/4 cup natural peanut butter

Drizzle
2 Tbsp no sugar dark chocolate chips (I use Lilly's)

Directions
Whisk together eggs, cream, cocoa powder, Swerve, almond flour, and baking powder. Cook in a mini waffle maker (I use the Dash Mini Waffle Maker) for 3 minutes per waffle (of course you can do them longer if you want them a bit crispier, just watch they don't burn). 


Let cool completely on wire rack. 


Prepare topping - beat whip cream and Swerve until you get stiff peaks. Add in peanut butter and beat just to combine. 
Divide evenly and spoon on top of each cooled waffle. Spread to edge of waffles. 


Prepare drizzle - place chocolate chips in a small bowl and microwave in 20 second increments, stirring in between, until melted and smooth. 
Place melted chocolate in a small plastic baggie, snip off a small piece of the corner of the baggie, and pipe chocolate evenly over the peanut butter cream layer. 


Eat now, or chill until ready to eat.


Once the chocolate has set, you can stack the waffles for easier storage. 


Following keto, one of the things I miss most is chocolate bars and candy. These chocolate and peanut butter waffles are a pretty darned good substitute for peanut butter cups. At only 3.6 net carbs I am able to fit them in to my eating plan no problem. 


These are great if you have a sweet tooth but are trying to cut back on sugar. They are also gluten free so work for a grain free diet too. 
They're also just what you need when you want a chocolaty peanut buttery snack. 

Wednesday, February 26, 2020

Bourbon Chocolate Chip Cookies


Maybe you're looking for a cookie for the adults in the room? Maybe something for dad for father's day or mom for mother's day? Maybe something to bring to the poker game? Ladies night? The big game? I think you see where I'm going with this.... not for kidlets....definitely for adults. 
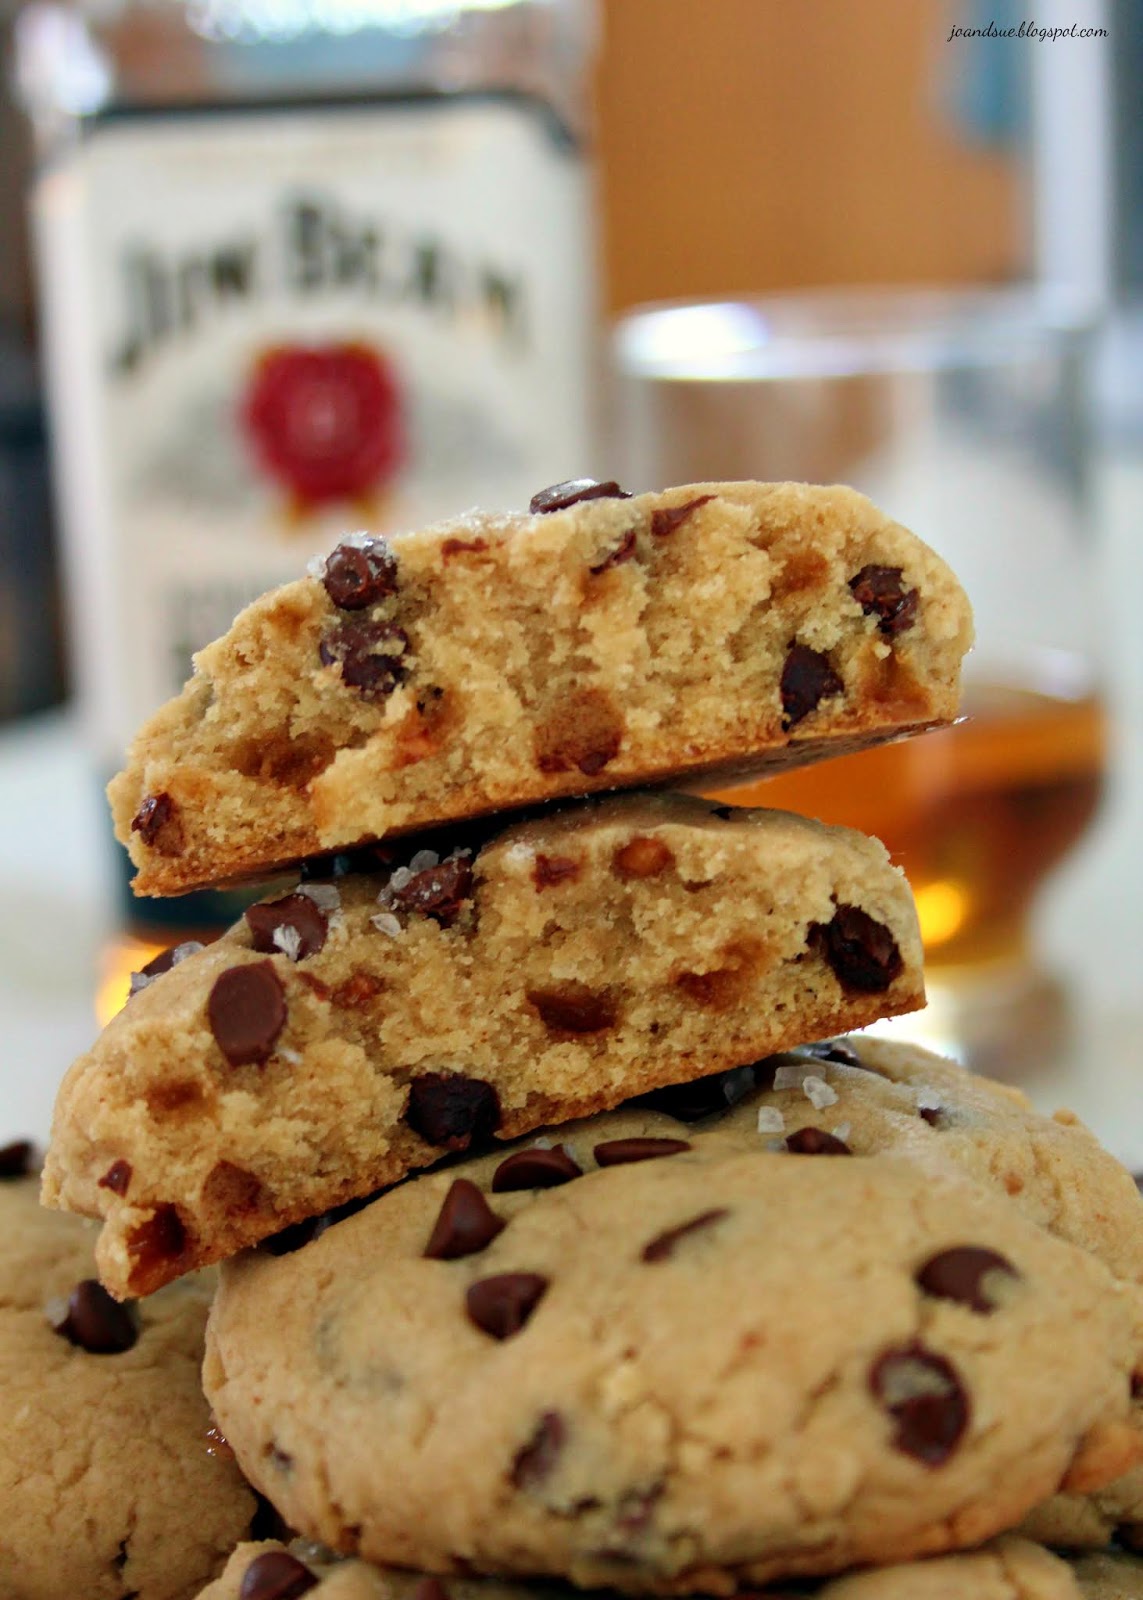
I find most alcohol cookies only have a pinch of alcohol that didn't really impart much flavor to the cookie... these bad boys though.... you taste the bourbon. I also browned the butter and added toffee bits because obviously these are the most over the top ridiculously delicious chocolate chip cookies on the planet. These have to be tasted to truly understand how amazing they are!


Bourbon Chocolate Chip Cookies

Ingredients
3 1/2 cups flour
pinch salt
1 1/2 tsp baking powder
1 1/4 tsp baking soda
1 cup butter, browned and cooled
1 1/2 cups brown sugar
3/4 cup sugar
2 tsp vanilla
1/4 cup bourbon
2 eggs
2 cups chocolate chips (divided)
1 cup toffee bits

Optional
coarse sea salt for sprinkling

Directions
**Before starting make sure your butter is browned and cooled**
In a medium bowl, whisk together flour, salt, baking powder, and baking soda. Set aside.
In a large bowl, cream the browned butter and sugars until creamy, scraping sides of bowl as needed. Add in the vanilla, bourbon, and eggs and beat well. Beat together the dry ingredients and wet ingredients - if it gets too thick then finish by stirring with a wooden spoon. Stir in 1 1/2 cups chocolate chips and the toffee bits. Scoop dough into balls and press slightly between the palms of your hands. Press a few more chocolate chips into the top of each cookie. 
Place on a cookie sheet or tray. Repeat until all the dough has been formed into slightly flattened balls. Cover with plastic wrap and chill for at least 2 hours (can be frozen in Ziploc bags at this stage, if desired). Note - I used a large cookie scoop (a scant 1/4 cup) and got about 15 - 17 cookies. Photo below shows a double batch. 


After dough has chilled, preheat oven to 350. Line a cookie sheet with parchment paper and place cookies about 2 inches apart on the cookie sheet. 


Place in preheated oven and bake until edges are lightly browned and top looks "dry" - about 11 - 13 minutes. It's okay if the center looks a little under done - you want the cookie to be soft, not crunchy.. Rotate the cookie sheet half way through baking. 


When you remove the cookies quickly sprinkle with a pinch of coarse sea salt. This is optional but I love a little salt with my chocolate chip cookies! Let sit on the cookie sheets for about 5 - 8 minutes to cool off before removing to wire rack to cool completely. 


Try them warm out of the oven if you want a real treat, FYI. Just don't eat them all... trust me, you'll be tempted.


Serve with your favorite bourbon or coffee or milk or, you know, on their own is fabulous too. 
These smell SO GOOD when they are baking! Very bourbon-y and chocolaty. I found the bourbon flavor was much stronger once the cookies have cooled completely. Its far more subtle when they are warm. 
You don't have to brown the butter, of course, you can use "regular" butter but the cookies won't be as rich and caramel-y. I recommend browning 100%. 


Browned butter, toffee bits, chocolate chips, bourbon all make for the best adult chocolate chip cookie ever. 
NOTE - pressing the extra chocolate chip cookies onto the top of the cookies before baking ensures the cookies look nicer. It's an optional step but I always do it so the cookies look a little more chocolate chippy. 
NOTE - if you froze the cookie dough before baking: when you are ready to cook them all you have to do is take them out of the freezer and place them on a cookie sheet while the oven preheats. You may have to add 1 minute or 2 to the cooking time, just keep an eye on them. 

Monday, February 17, 2020

Keto Nanaimo Bars


You guuuuuuuys! 
These Nanaimo Bars are going to change your life! Okay.... maybe not... but they might. You don't want to not try them and take the chance you're missing out. 
They taste like "normal" Nanaimo bars, they look like "normal" Nanaimo bars, and the texture is totally like "normal" Nanaimo bars. You'd never know they were keto/gluten free/diabetic friendly. 
I even had some taste testers say they preferred these over "normal" Nanaimo bars because they weren't quite as overwhelmingly sweet. 
I wanted to keep some of the Bird's Eye pudding powder in the recipe because that is what makes a Nanaimo bar a Nanaimo bar. It adds the most carbs to the recipe but also adds the authentic flavor and color. Per bar (recipe makes 24) the nutritional counts are: 191 calories, 17.5 fat, 5.9 carbs, 3.2 fiber, 2.7 protein. That's 2.7 net carbs per slice.
Doing keto you often can feel like you are missing out. Not with these bars. These keep well in the freezer so you can just pop one out whenever you need a keto friendly sweet treat!

Keto Nanaimo Bars

Ingredients
Bottom Layer
1/2 cup butter
1/4 cup Swerve brown sugar 
1 egg
5 Tbsp unsweetened baking cocoa
1/4 cup chopped walnuts
1 cup almond flour
1 cup unsweetened coconut, toasted

Middle Layer
3/4 cup butter, room temp
2 Tbsp Bird's Eye custard powder
1 cup Swerve icing sugar
4 Tbsp whipping cream

Top Layer
3 Tbsp butter
6 oz (scant 1 cup) sugar free milk (or dark) chocolate chips
2 Tbsp Swerve icing sugar

Directions
Prepare bottom layer - In a heat safe bowl, stir together butter, brown sugar Swerve, and egg. Place over a pan of simmering water over medium heat (or in a double boiler). Stir until well mixed. Stir in the cocoa powder. Stir until thickened. 
Remove from heat and stir in walnuts, almond flour, and coconut until well mixed. Press into a 10 X 10 pan lined with tinfoil. Set aside. 


Prepare middle layer - beat together butter, custard powder, and Swerve icing sugar. Beat in the whip cream until smooth. Drop by the spoonful over the crust.


Use the back of a spoon to spread the layer evenly. Note - it helps to dip the spoon in water and shake it off, then spread to prevent sticking. You can also use your fingertips dipped in water to help spread it out. 


Chill the two layers for at least half an hour before doing the last step - or pop in the freezer for 20 minutes. It is very important you do not skip chilling it!! Spreading the chocolate layer on top will be almost impossible if the bottom layers are not chilled. 
Prepare the last layer - Melt butter and chocolate chips in a microwave safe bowl in 20 second increments, stirring well in between, until smooth. Stir in the Swerve icing sugar. 
Working fairly quickly, drop the chocolate in spoonfuls over the yellow layer and then spread it with the back of a spoon. This can be a little tricky because the chocolate starts to melt the middle layer, making it difficult to spread. Don't worry if your chocolate isn't completely even - just do the best you can. 


Chill until set. 
Use the tinfoil to remove the bar from the pan - this will make it much easier to cut. 
Cut into 24 pieces. You can keep these in the fridge or on the counter. I tend to leave them in the fridge in a lidded container and take them out about half hour before serving them. 


Only 2.7 carbs per slice!!


Look me in the eye and tell me that doesn't look EXACTLY like a "normal" Nanaimo bar. 


I love one of these with my keto coffee for those days I'm craving sugar. Totally satisfies the need for sweets. 


Texture is a big thing for me when it comes to replicating recipes to a keto friendly format. The texture of these, IMO, is spot on. A healthified, gluten free, keto friendly, diabetic friendly treat that I guarantee everyone will enjoy. 


FYI - you can also make these in mini muffin tins - I got 30. Just spoon about a tablespoon of the base into each muffin tin and press it down, then a Tbsp of the filling, spread it out, and then about 1 tsp of the chocolate topping, and spread it over the filling.