Showing posts with label biscuits. Show all posts

Sunday, April 29, 2018

Lavender Scones


Our local U-pick farm, Old Airport Gardens, in Lillooet has some of the best produce ever. 
True story. 
Something else they grow that is amazing? 
Lavender. 
Until I saw it at the farm I had never considered cooking with lavender. Once I saw the rows and rows of beautiful purple flowers however, I knew I had to give it a try. I previously made Lavender Lemon Shortbread Cookies (link HERE), which I adored, so I decided to give some scones a go.
Scones, as we all know, are one of the most perfect foods on the planet. Add in some vanilla bean and lavender and *voila* they move to the top of the list. 


Lavender Scones

Ingredients
Scones
3/4 cup cream
2 Tbsp honey
1 egg
2 cups flour
1 Tbsp baking powder
pinch salt
1 Tbsp lavender
1 vanilla bean, scraped and pod discarded
6 Tbsp butter, cold

Glaze
1/2  to 1 cup icing sugar
2 tsp to 1 Tbsp milk

Decoration
lavender

Directions
Preheat oven to 400. Line a cookie tray with parchment paper, set aside. 
In a small bowl, whisk together cream, honey, and egg. Set aside.
In a separate bowl, whisk together the flour, baking powder, salt, lavender, and vanilla bean seed.  Using 2 knives or a pastry blender, cut in the cold butter until mixture resembles coarse crumbs. 
Stir the wet ingredients into the dry ingredients until just mixed. 


Lightly flour a work surface and place the dough on it. Roll out to about 1 inch thickness. Cut out scones using a biscuit cutter (or sharp edges cookie cutter). Place on prepared cookie sheet.


Bake at 400 for about 15 - 20 minutes, until tops are golden brown. Remove from heat and let cool on cookie sheet for 5 minutes before removing to wire rack.


Prepare glaze - whisk together icing sugar and milk until it is the consistency of white glue. While scones are still warm, brush the glaze on top using a pastry/basting brush and then sprinkle with a little more lavender. 


FYI - I doubled the recipe to get all the scones pictured above. 
Serve warm or room temp. These also freeze very well.


Light and airy and a perfect snack. 
The lavender lends just enough of a flavor to balance the vanilla bean. 
Like I said - one of the most perfect foods on the planet. 

Monday, November 6, 2017

Crunchy Cookie Butter and Coconut Biscotti


Sue and I received 2 jars from Penotti Canada the other day as a gift - one was Duo Penotti Cookies and Milk Spread, the other was Cookie Notti Crunchy Cookie Butter (click here to see Penotti products)
We used the Cookies and Milk Spread to make some adorable Halloween no bake cookies. (Check back for that link!) But.... the Cookie Notti Crunchy Cookie Butter sat on my counter while I debated what to make with it. I then made the mistake of taking a spoon to sample it. Needless to say I have no self control when it comes to delicious treats and had to have Sue wrestle it from my hands. 
I did save enough to make these tasty biscotti though. Thank goodness. 
The world needs these cookies. #TrueStory
The flavor of the cookie butter lends itself very well to a biscotti cookie. Perfect for dipping in coffee, tea, or (in my case) hot chocolate!


Crunchy Cookie Butter and Coconut Biscotti

Ingredients
1/2 cup butter, melted
1/2 cup sugar
2 eggs
1/2 cup Cookie Notti Crunchy Cookie Butter  (or original would work too)
1 tsp coconut extract
1 tsp vanilla
pinch salt
2 tsp baking powder
3/4 cup toasted coconut
2 cups flour
1/2 cup Skor bits

Directions
Preheat oven to 350. Line a cookie sheet with parchment paper, set aside. 
In a mixing bowl, beat together melted butter, sugar, eggs, Cookie Notti Crunchy Cookie Butter, coconut extract, and vanilla extract. 


Beat in salt, baking powder, and coconut until well combined.
Beat in flour and Skor bits until no flour streaks are visible. 
Take the cookie dough and divide it in half. Form each half into a log about 12 inches by 4 inches. (Note - it helps to make little measurement marks on your parchment paper so you know how big the logs should be.)


Bake at 350 for 25 minutes.
Remove from oven and let cool 10 minutes. Slice the logs into 1 inch slices. (Note - a serrated knife works best.) You should get 12 slices per log.


Place the the slices, cut side down, back on the cookie sheet. When all the slices are back on the tray, return to 350 oven for 10 minutes. Flip all the slices over, then bake 10 more minutes.  
Remove tray from oven and let sit for 5 minutes, then remove biscotti to a wire rack to cool completely. 


To store, place in an airtight container, they do not need to be refrigerated. 


Biscotti are also a great choice for gifts! Tie them up in a see-through bag and tie with a pretty ribbon. Package them up and they ship very well. Need an idea for a Christmas cookie exchange? Look no further - the cookie butter flavor with the coconut is lovely for the holidays. 


My favorite cookies are soft and squishy but every now and again a good crunchy biscotti with some hot chocolate (or chai tea!) just can't be beat. 

Tuesday, August 1, 2017

Custard Cream Cookies


I always buy a container of Bird's Eye Custard Powder to make Nanaimo Bars (recipe HERE) and then have a tin of it sitting in my cupboard until I decide to make more Nanaimo Bars. Ever had a Nanaimo Bar? You really should. 
Homemade, not store bought. 
Just do it.
Anyway.... 
I went on the lookout for other recipes using Bird's Eye Custard Powder that didn't have "Nanaimo Bar" in the title somewhere. I found these lovely cookie sandwiches over at Christina's Cucina (Visit HERE) and knew I had to give them a try! Not only are they super adorable, they are super tasty. 
Perfect for tea time, snack time, after school, movie night, or... well.... you get the picture. Any time is cookie time, am I right or am I right?


Custard Cream Cookies
(Ever so slightly adapted from Christina's Cucina

Ingredients
1 1/3 cup flour
1/2 cup Bird's Eye Custard Powder
1/4 tsp baking soda
pinch salt
3/4 cup butter, softened
1/2 cup icing sugar

Filling
2 Tbsp butter, softened
1/2 cup icing sugar
1/4 tsp vanilla

Directions
Preheat oven to 350. Line a cookie tray with parchment paper or Silpat mat, set aside. 
Prepare cookies - Sift together the flour, Bird's Eye, baking soda, and salt in a bowl and set aside. In another bowl, cream the butter and icing sugar for about 3 minutes, scraping sides of bowl as needed. Beat in the dry ingredients until well combined.


Using a small cookie scoop (or pinch of an amount the size of a ping pong ball), place rounds on prepared cookie sheet about 1 inch apart. Press the tops with a fork to slightly flatten the cookies. 


Bake at 350 for about 15 minutes, until bottoms are very lightly browned. 


Remove from heat and let cool on cookie sheet for 5 minutes. Then move to wire rack to cool completely. 
When cookies are room temp, prepare filling. 
Prepare filling - Whisk together butter, icing sugar, and vanilla until smooth. 


Spread a little of the filling on the bottom of one cookie and press the bottom of another cookie on top to make a sandwich.


Repeat until all the cookies have been used. Store in an airtight container. They also freeze very well! 
A very simple cookie with simple ingredients. In fact, except for maybe the Bird's Eye, you probably have all the ingredients on hand! I've heard you can substitute vanilla pudding mix for the Bird's Eye Custard Powder if you can't find it. I've never tried it myself but you can give it a go in a pinch if need be. It will probably change the flavor though as Bird's Eye Custard Powder has a lovely distinctive flavor that is different from vanilla pudding. 

Sunday, June 4, 2017

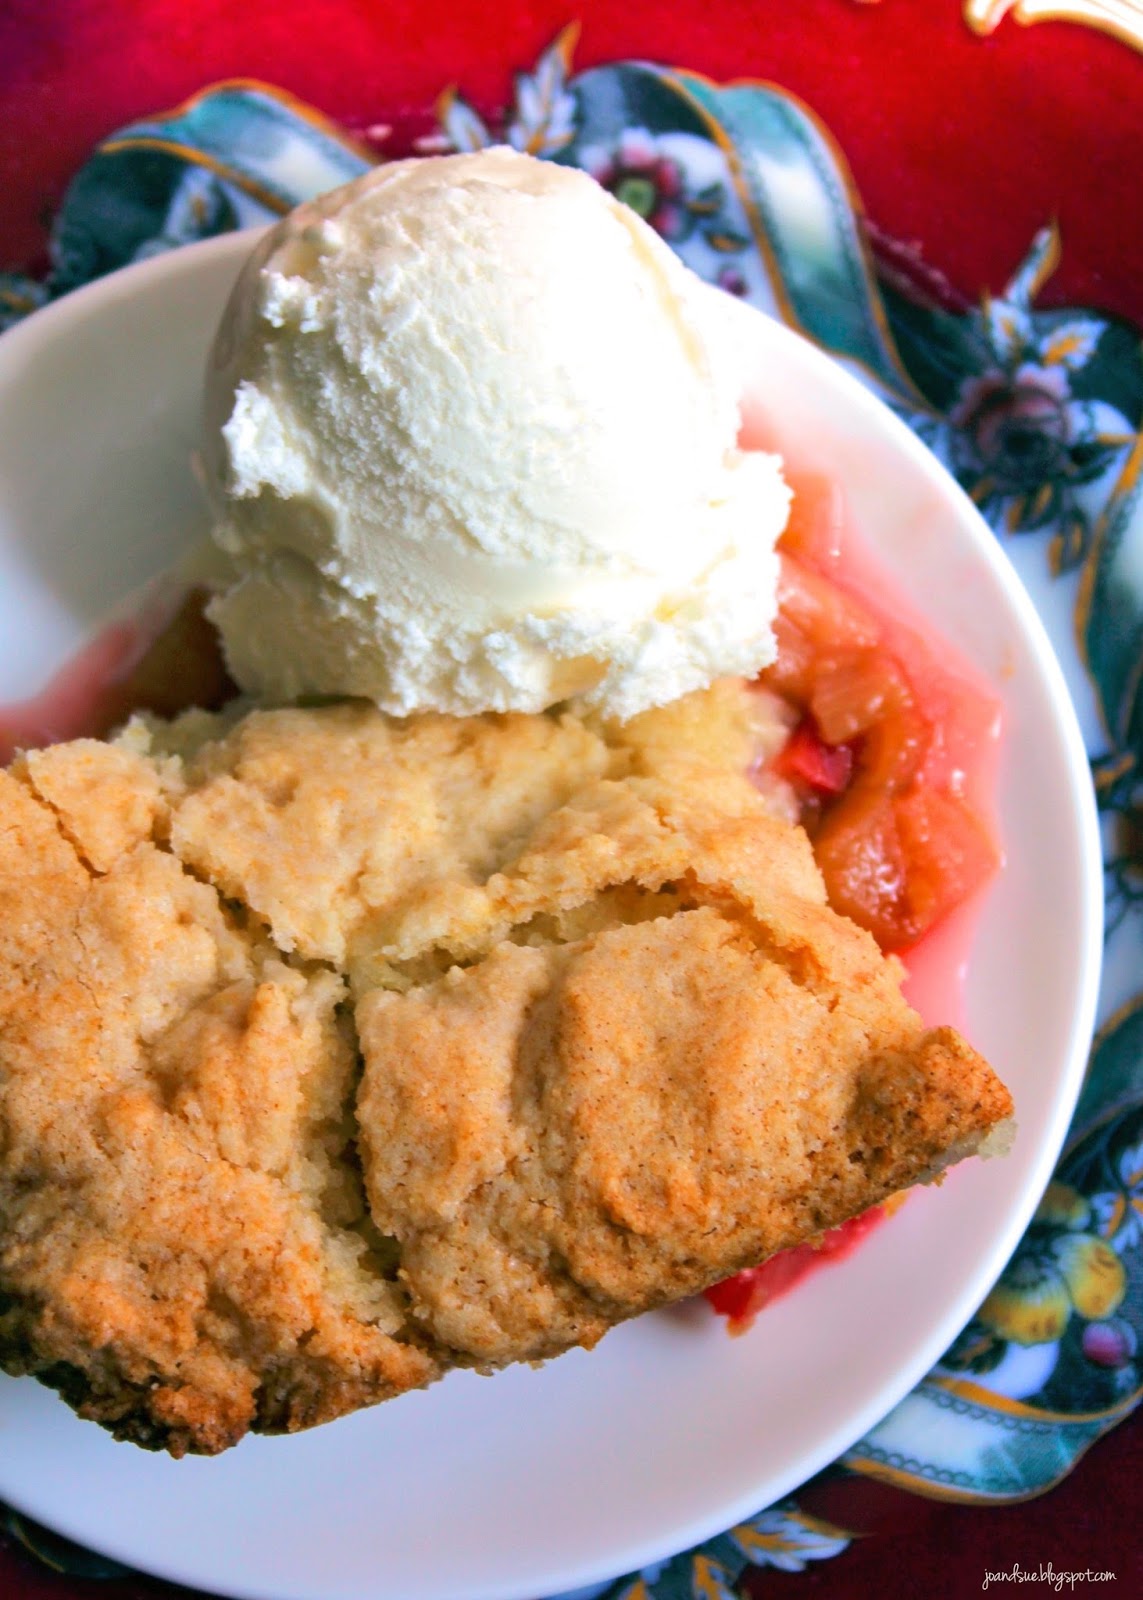
Rhubarb Marshmallow Cobbler


We love rhubarb around our place. Which is a good thing because, as you are probably aware, once it starts showing up there is a LOT of it. Like.... sooooo much...
That's okay though. It just means we get to experiment with tons of rhubarb recipes. 
The one we are sharing here, for example, is adapted from a recipe our mom found in a Taste Of Home magazine. It has marshmallows in it, which just seemed weird. Of course, we had to give it a try! We drastically cut the sugar in this recipe. The original called for a cup and a half to be mixed in with the rhubarb. We only added 1 Tbsp. Seriously. That's all it needs. 


Rhubarb Marshmallow Cobbler
(Adapted from Taste Of Home, Simple & Delicious)

Ingredients
Bottom Layer
4 cups rhubarb, diced
1 Tbsp brown sugar
1 cup mini marshmallows

Cobbler
1/2 cup butter, room temp
1 tsp vanilla
1 cup sugar
1 3/4 cup flour
3 tsp baking powder
pinch salt
1/2 cup milk

Directions
Preheat oven to 350. Lightly spray a 9 X 9 pan with cooking spray, set aside.
Place diced rhubarb in the prepared pan. Sprinkle with the brown sugar and marshmallows.


Prepare cobbler - In a mixing bowl, cream together the butter, vanilla, and sugar until smooth. In a separate bowl, whisk together flour, baking powder, and salt. 
Beat the dry ingredients into the wet ingredients, alternating additions with the milk. 


Spoon the batter over the rhubarb.


Bake at 350 for approx 50 - 55 minutes, until top is golden brown and it is bubbling. 
Remove from heat and let sit on a wire rack for at least 15 - 20 minutes. 


Serve hot or warm.


The outside pieces are a bit crispier than the inside. 


Of course, the addition of ice cream is a must. 


We found that the with all that lovely cobbler on top the rhubarb did NOT need anywhere near 1 1/2 cups of sugar. The marshmallows add a layer of sweetness without making the cobbler gooey. 


It can be difficult to tell if the cobbler is cooked through - just make sure the top is a dark, golden brown before removing it from the oven, and when tapped it sounds hollow. 


Be sure to stop by Carole's Chatter for more tasty links!

Monday, May 22, 2017

Rhubarb Roll Up Cobbler


Once again I am terrible at coming up with a name for a recipe. This dish is what would result if rhubarb crisp and scones had a baby. Crazy good! But what to call it?
I went between rhubarb cranberry roll ups, rhubarb crisp with biscuits, and a bunch of other terrible names that you don't even want to know about. 
Rhubarb Roll Up Cobbler seemed to be the most favorable name.
It is the perfect combination of tart and sweet and, with ice cream, will make your brain explode. Not even lying. Serve it hot, warm, or chilled. Whatever you prefer. All three ways are amazing (if I do say so myself). 
I first created this dish back in 2008, before we started the blog, and had forgotten about it in my old recipe book. When I came across it the other day I thought it would be a brilliant way to use up some of the massive amount of rhubarb in Sue's garden. #BrilliantIndeed


Rhubarb Roll Up Cobbler

Ingredients
Syrup
1 cup white sugar
1/2 cup cranberry juice
1/4 cup water

Rhubarb Base
4 cups rhubarb, cut into about 1/2 inch pieces
2 tsp cornstarch

Scone Topping
2 1/2 cups flour
1 1/2 Tbsp baking powder
pinch salt
1/2 cup butter, cold
2 Tbsp brown sugar
1/2 tsp nutmeg
1/4 tsp cinnamon
1 Tbsp oil
1/2 cup milk

Scone filling
1/4 cup butter, softened
4 Tbsp brown sugar
2 Tbsp white sugar
2 cups rhubarb, finely diced

Directions
Preheat oven to 425. Spray a 9 X 9 pan with cooking spray, set aside.
Prepare syrup - stir together sugar, cranberry juice, and water in a medium saucepan.


Place over high heat and bring to a boil, stirring constantly. Boil for 2 minutes, stirring the whole time. Remove from heat and set aside while you continue the cobbler. 


Prepare rhubarb base - Toss the 4 cups of rhubarb with the cornstarch and spread in prepared 9 X 9 pan. (You should also prepare the 2 cups of finely diced rhubarb so it is ready when you make the scone topping.) 


Prepare scone topping and filling - In a mixing bowl, stir together the flour, baking powder, and salt. Cut in the cold butter until mixture resembles course crumbs. Stir in the brown sugar, nutmeg, and cinnamon. Lastly, stir in the oil and milk until a soft dough forms. (If it is too dry, add in a few spoonfuls of milk. If it is too wet, add in a few spoonfuls of flour.)
On a floured work surface, roll out dough to a 10 inch square. 
Spread the softened butter over the dough, sprinkle with the brown and white sugars. Lastly, sprinkle with the finely diced rhubarb.


Roll up, jelly roll style and press gently to seal.
Cut into 9 equal rolls. Place on top of the rhubarb in the pan. Drizzle the rolls evenly with the cranberry syrup.


Bake at 425 for approx 25 - 30 minutes, until scones are golden brown. (If tops appear to be browning to quickly then place tinfoil on top and continue to cook until the scones are done.) 


Let sit for at least 15 - 20 minutes. Serve hot, warm, or chilled. (Personally I like warm so when you top it with ice cream or whipping cream it starts to melt!) 


Of course, whipping cream or ice cream is a necessity. 


That color tho. 


Tart and sweet, flaky and squishy, there are all sorts of things going on in there. 
This is best eaten the day it is made but will survive until the following day without getting too soggy. 
A great recipe to use up rhubarb if you have it filling up your fridge. I put 4 cups for the base but I may have added closer to 5. I measured 4 cups in the pan but it seemed a little low so I cut up 2 more stalks (just an FYI). 


Be sure to pop over to Carole's Chatter for some foodie links. 

Wednesday, October 5, 2016

Lemon Coconut Scones


Just when you think there can't possibly be any more scone flavors, along comes another fantabulous one. We've done caramel apple scones, apricot scones, chocolate zucchini scones, Guinness scones, vanilla bean pumpkin scones, strawberry shortcake scones, cream scones, maple bacon scones, and on and on and on.
But today we bring you the lemon coconut scone.
*taaah-daaaah*
Lemon and coconut go together smashingly well. 
And, as we all know, scones are super easy peasy to whip up so you could be in coconut and lemon heaven in a very short period of time. 
Go.
Hurry.
Thank me later.


Lemon Coconut Scones

Ingredients
4 cups flour
2 Tbsp baking powder
1/3 cup sugar
zest of 2 lemons
pinch salt
3/4 cup shredded coconut
3/4 cup butter, cold
2 cups whipping cream (or half and half cream)
2 Tbsp lemon juice
1 1/2 tsp coconut extract
1 tsp vanilla

Glaze
1 cup icing sugar
juice of 1 lemon

Topping
1/2 cup shredded coconut, toasted

Directions
Preheat oven to 400. Line a cookie tray with parchment paper, set aside.
In a large bowl stir together the flour, baking powder, sugar, lemon zest, salt, and coconut. Using 2 knives or a pastry blender, cut in the cold butter until mixture resembles coarse crumbs. (NOTE - you can also place in a food processor or blender and pulse briefly until you get coarse crumbs.)
In a separate bowl, whisk together cream, lemon juice, coconut extract, and vanilla extract. 
Using a fork, stir the wet ingredients into the dry ingredients until dough just comes together. Dump out of bowl onto a floured surface.
Roll or pat out to 1 inch thickness. Cut out with a biscuit cutter or cut into triangles (see photo below).


Place on prepared cookie sheet.
Bake at 400 until lightly golden brown and puffed up, about 15 or so minutes. Remove from oven and set cookie tray on wire rack.
Prepare glaze by whisking the icing sugar and and lemon juice together. Using a pastry or basting brush, coat the tops of the warm scones with the glaze.
Sprinkle with the toasted coconut.


Remove from the cookie tray and place on wire rack to cool completely.


Best eaten the day they are made BUT they do freeze very well. Simply remove from freezer and bring to room temp and enjoy. 
I love them warm but the lemon and coconut flavors really shine through at room temperature.

Be sure to pop over to Carole's Chatter for tons of fun links!

Tuesday, May 24, 2016

Buttermilk Biscuits


Everyone needs an easy, go-to biscuit recipe. I've made several biscuit recipes for the blog (Type "biscuit" in the search bar to see them all!) And, I keep coming back to this one.
It's classic, it's easy, it's flaky, and it's delicious.
All the things a good biscuit should be. 
I tend to use butter for my biscuits but you can sub shortening for an even flakier biscuit. 
Give them a try - you'll see why I use this as my go-to. I still attempt other recipes just out of curiosity BUT I'm saving this one forever, 
and ever...
and ever...
P.S. - this makes a fairly large batch but is easily halved. 


Buttermilk Biscuits

Ingredients
4 cups flour
2 Tbsp baking powder
pinch salt
4 Tbsp sugar
1 tsp cream of tartar
1 cup butter, cold (or shortening will work)
1 1/2 cups buttermilk
2 eggs

Directions
Preheat oven to 450. Line a cookie sheet with parchment paper, set aside. 
In a large bowl, stir together flour, baking powder, salt, sugar, and cream of tartar. 
Cut in the cold butter (or shortening) using a pastry blender or 2 butter knives. (NOTE - You can also pulse the dry ingredients and butter briefly in a food processor/blender) Mixture should resemble coarse crumbs. 
In a separate bowl, whisk together buttermilk and eggs. 
Stir the wet ingredients into the dry ingredients until just combined. Do not over mix.
Roll or pat out dough to 1/2 inch thickness. Fold the dough in half and gently press to 1 inch thickness. (Folding the dough will result in the lovely split in the biscuit so it is easy to pull apart.)
Cut out dough using a sharp edged cookie or biscuit cutter.
Re-roll the scraps to 1 inch thickness and cut out as many more biscuits as you can get. (If you re-roll more than once your biscuits will start to get tough!)


Place on prepared cookie sheet.
Bake at 450 until biscuits are risen and tops are golden brown, about 10 - 15 minutes. 
Remove from oven and serve warm or room temp.


Biscuits can be frozen and reheated and are almost as good as fresh out of the oven!


Don't forget the melty butter on top.
*so gooooood*
I got about 2 dozen biscuits out of this recipe using a 2.5 inch biscuit cutter.