Showing posts with label St. Patrick's Day. Show all posts

Sunday, May 24, 2020

Mom's Macaroni Salad (AKA: Best Macaroni Salad Ever)


I know you saw the title of this recipe and came here to see what makes it the best macaroni salad ever. 
You're skeptical, I get it. 
Thing is.... it's ridiculously simple and delicious and has absolutely nothing but the basics in it but it's magic and will have you hooked in 1 bite. Maybe 2 bites...
There are no measurements, you've got to make it like mom does... with your heart. 
Ha. Sappy. But accurate. 
Eyeball it. You got this. 


Mom's Macaroni Salad

Ingredients
elbow macaroni
green peas
radishes
pickles
green pepper
onion
aged cheddar cheese
mayo or miracle whip
salt & pepper 

Directions
Boil macaroni as per package directions until soft. (Mom likes hers a little more well done than al dente so do it up right!) At the end of cooking, throw in a handful of frozen green peas and let cook for a minute. Drain and let cool to room temp. 
Cut up a few radishes into slices. About 2 - 4, just enough to add some color to the pasta.
Cut up one or 2 pickles into tiny cubes. 
Cut up about 1/4 of a green pepper into tiny cubes.
Finely dice about 1/4 of an onion.
Cube up aged cheddar cheese into tiny cubes. (Do NOT shred it, that is not mom's way. Cube it.)


Give it a good stir. Can you see little bits of all the different color ingredients?
If yes, you're good to go. If no, add a bit more of whatever ingredient isn't showing up enough. When you think it looks good, stir in the mayo.
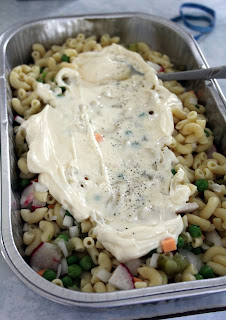

Make it good and creamy. Stir it well then let it sit for 5 minutes so the pasta can soak up some of the mayo. Creamy enough? Ok. Still seem dry? Add in more mayo a spoonful at a time. 


Chill until ready to eat. Definitely give it at least an hour or two in the fridge. Just before serving, season with salt and pepper!
Word of advice - if you want to make this ahead of time: mix in the ingredients but DO NOT mix in the mayo. Cover and chill until ready to serve. Mix in mayo about half an hour before serving and place back in fridge until ready to use.


One of the best things about this salad is you can make a little bit or a huge amount. 
For those of you insisting on measurements. *Sigh* I get it. I'll do my best to guesstimate here, but you really do have to go by how it looks. 
For about 4 cups cooked macaroni I'd say 1/3 cup peas, 3 radishes, 2 baby pickles, 1/4 of a green pepper, 1/3 cup onion, 1/2 cup cheese, and 1 cup mayo. Totally guesstimating here guys.... use your mom-senses to make sure it feels right. 
You should be able to see all the ingredients every time you give it a stir. And if you're unsure about the mayo, start low and add slow. You can't take it out after if you've added too much. 
Let us know if you give it a try! We're pretty sure you'll fall in love with it! 

Monday, March 18, 2019

Keto Reuben Skillet


Following a keto plan has been pretty easy thus far; specially with super easy dishes like this one. 
With only 5 ingredients, it is fairly inexpensive AND it literally takes 15 minutes to make. THAT'S IT! I made it for about the 110th time for St. Patrick's Day - corned beef and all that...
Even if you aren't following keto this is a great meal for those busy weekdays or for on the weekend when you don't want to have to do a lot of prep! 
According to MyFitnessPal, a serving is (recipe as written is 4 servings): 439 calories, 8 carbs, 28 fat, 39 protein, 4 fiber, and 3 sugar. This, of course, will vary according to what brands you use, etc... But for 8 carbs (plus 4 fiber = 4 net carbs), it is one of my go to keto dinners!


Keto Reuben Skillet

Ingredients
1/4 cup butter
20 oz (about 600 gr) deli sliced corned beef, coarsely chopped
1 jar (20 oz) sauerkraut (rinsed and drained)
2 Tbsp prepared mustard
8 oz Swiss cheese

Directions
Melt butter in a large skillet over medium heat. Add in the chopped corned beef and fry for a few minutes. Add in the sauerkraut and stir to combine. Cook until heated through - about 4 - 5 minutes, stirring occasionally. 


Drizzle the top with the mustard and then lay the Swiss cheese on top. 


Reduce heat and cover the pan until cheese is melted - about 2 - 3 minutes.


Serve immediately. 


Serve with a few slices of pickle!


Easy to reheat for lunch the next day or freeze and reheat later. 
Super simple, am I right? Can all dinners be this easy and delicious, please?
I'm not even that huge of a sauerkraut fan but I enjoy this for dinner. Something different and filling and easy, what's not to love?

Friday, March 15, 2019

Kilkenny Glazed Doughnuts


St. Patrick's Day always means we break out the Guinness (or, in this case, the Kilkenny Irish Cream Ale) and start baking. I've been on a bit of a donut baking bender lately so I figured making a beer donut would be the perfect thing. I was originally going to use Guinness as that is my go to Irish beer but I saw this lovely new Irish Cream Ale and had to give it a go. 
I think Homer Simpson would be proud of this one. It is probably the lightest and fluffiest donut I've made to date with a hint of the Kilkenny and not as much sweetness as the usual donuts I make. 
I'm filing these ones in the "must make again" pile. I'm thinking of trying it with a good old Canadian beer for Canada Day to see how they stack up!


Kilkenny Glazed Doughnuts

Ingredients
Dough
1/2 cup hot water
4 1/2 tsp yeast
4 - 5 cups flour
1/2 cup sugar
2 tsp salt
1 tsp vanilla
3 eggs
1/2 cup heavy cream
1/2 cup softened butter
1 cup Kilkenny Irish Cream Ale (heated about 1 1/2 minutes in the microwave)

Glaze
3 cups icing sugar
1/2 cup Kilkenny Irish Cream Ale

Oil for frying (about 1 liter) 

Directions
Place hot water and yeast in a small bowl and set aside for 5 minutes to let yeast bloom.
In the bowl of a stand mixer add 4 cups of flour, sugar, and salt. 
Turn the mixer on low and add in the vanilla, eggs, heavy cream, and softened butter. Add in the proofed yeast. Then add in the heated Kilkenny. Turn the mixer to medium speed and mix until dough pulls away from sides of bowl. Add in enough flour so it is not sticky. 
Place dough on floured work surface and knead for about 2 - 3 minutes more. Place into an oiled bowl, cover, and set somewhere warm to rise for an hour. 
After an hour - roll out the dough on a floured work surface to about 1/2 inch thick. Cut with round biscuit or cookie cutters, and then take a smaller round cutter and cut out the center. Reroll the dough scraps for more donuts. Place on parchment paper lined cookie sheets, cover with a clean tea towel, and set somewhere warm to rise for another hour. (NOTE - a handy tip to make things easier: cut your parchment paper into individual squares and it is much easier to lift each donut off the tray and slide it into the oil.) 
At about the 45 minute mark, start heating your oil to cook the donuts in. You want the temperature to be 350 degrees. (If you don't have a deep fryer then a large, deep pot will also work.) 
When oil is ready your donuts should also be risen and ready to deep fry.


Fry 3 or 4 donuts at a time, but don't crowd the pot or it will lower the temperature of the oil too much. It's best to use a thermometer to monitor the temperature of your oil. (Too low and the donuts absorb too much grease, too high and the outside will burn while the inside remains raw.) 350 degrees is where you want to stay. 


Cook for approximately one minute on each side. 
Remove from the oil using a slotted spoon and place on paper towel lined cookie sheets. 


Continue until all donuts are cooked. Let them cool to room temp before applying glaze. 
Prepare glaze - in a mixing bowl, whisk together icing sugar and Kilkenny Ale until smooth. 


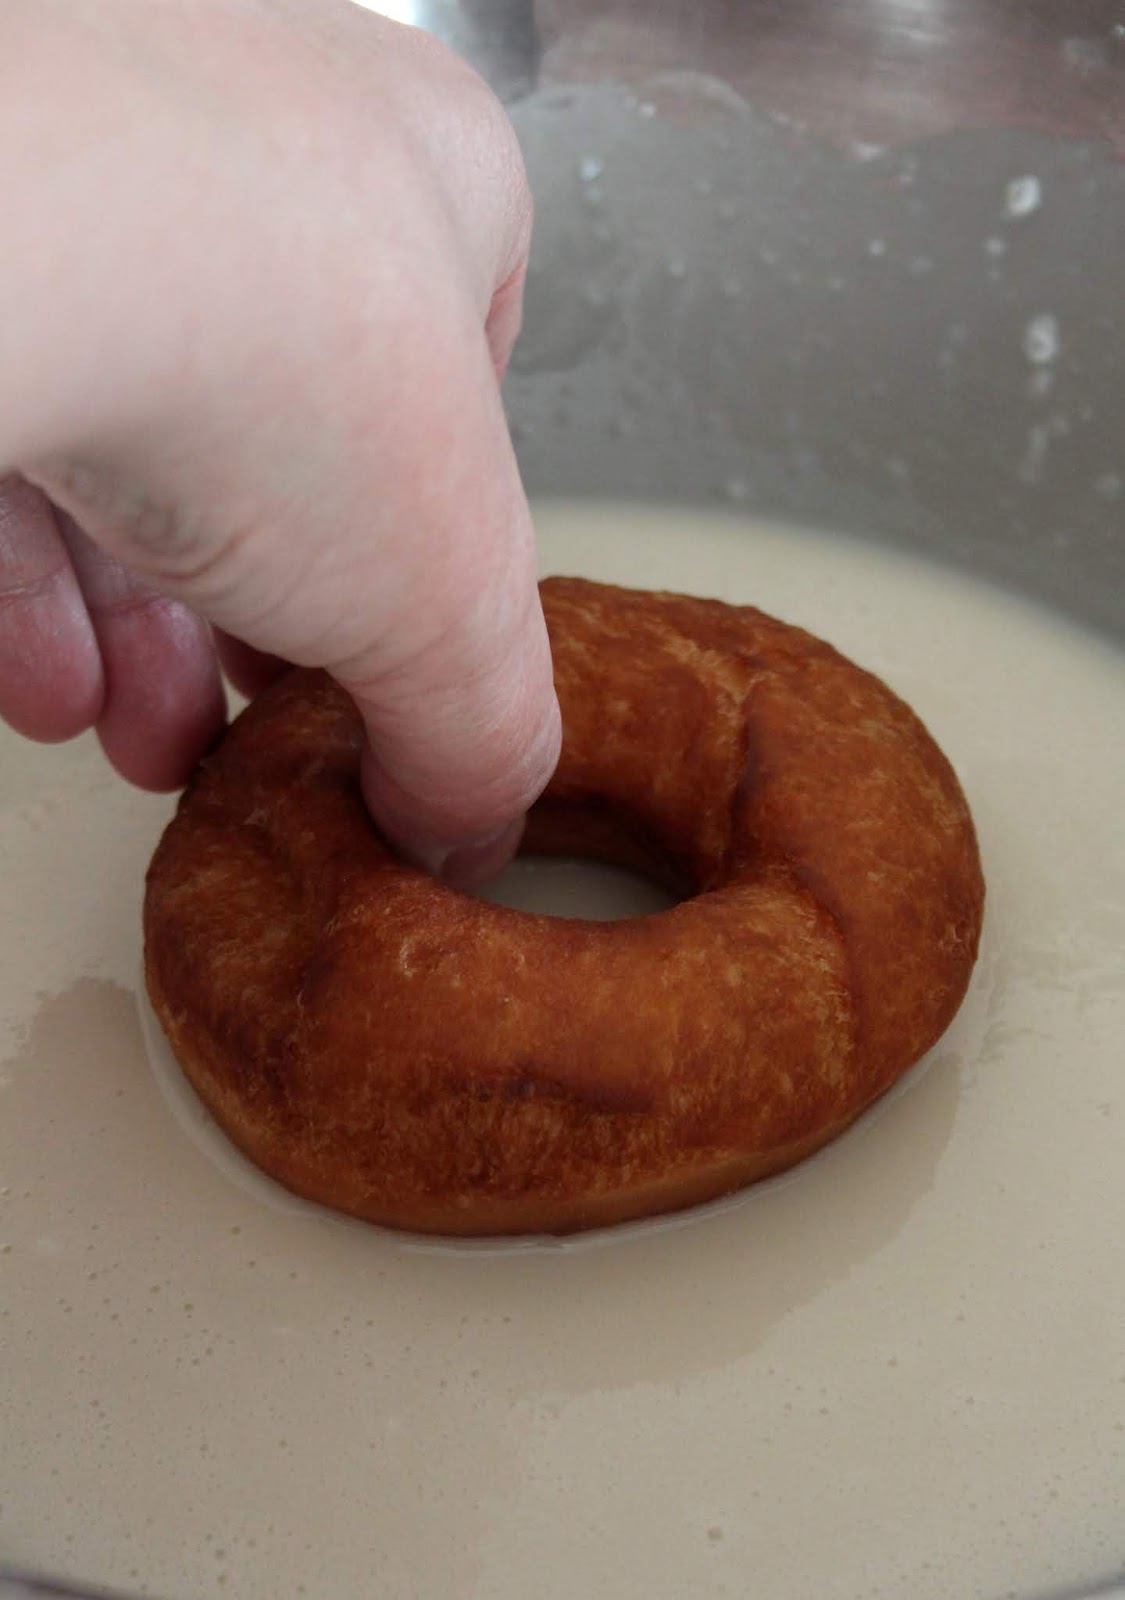
Dip the tops of each donut in the glaze...


Then flip and let sit on a tray so the excess glaze can drip off. 


Continue until all donuts are dipped.


They look so glossy.


I can't believe how squishy and light these are. 


The Ale adds a little tang that is a nice contrast to the sweet glaze. 


These also freeze quite well, in case you want to make up a batch ahead of time.
I believe I got about 32 palm-of-your-hand sized donuts from one batch - which is quite a large amount - you could easily half the recipe if you wanted to. (But, really?)


These have earned themselves a top 5 placement on my favorite donuts list. The unique flavor and the amazing texture just can't be beat. Plus... beer + donuts = *fireworks* 
A definite must to celebrate St. Patrick's Day. Sure, they take some time to complete BUT they are totally worth it. 
FYI - If you are going to freeze them: freeze them in a single layer so the glaze doesn't stick them together. 

Saturday, July 15, 2017

Kale and Feta Dip


This time of year we have a lot of kale coming from the garden. A LOT OF IT. We try our best to use it up but there is only so much kale salad one can eat. We made a Kale Artichoke Dip for the Slow Cooker (Find it HERE) that uses a huge amount of kale but we were still looking to make a recipe that was even easier to whip up. 
Enter this tasty kale and feta dip. It is soooo ridiculously easy to put together and tastes better the longer it sits so you can make it ahead of time if you are having a get together. Serve it with veggies or crackers or bread PLUS any leftovers make a great burger spread. Seriously. Put it on your burger. You won't regret it. 


Kale and Feta Dip

Ingredients
2 cups lightly packed, torn kale leaves
1 300 gr (about 2 cups) bag Feta (reserve 1/2 cup for topping)
1/2 cup 0 fat, plain Greek yogurt
1/2 cup olive oil
1/4 tsp oregano
salt & pepper
1/4 tsp garlic powder
1/4 tsp garlic granules
juice of 1/2 a lemon (about 2 Tbsp)

Topping
1/3 cup feta
1/4 cup purple onion, finely diced

Directions
Bring a saucepan of water to a boil. Throw in the kale and cook for ONLY 15 seconds - just until it is bright green and wilted. Immediately drain and rinse under cold water until cool. Pat with a paper towel to dry any excess moisture. 
Add the kale and the remaining ingredients (except for 1/2 cup of the feta and the purple onion for the topping) to a blender or food processor. 


Process until smooth, scraping sides of container as needed.


Pour into a serving bowl. 


Sprinkle the remaining feta and the purple onion on top.


Serve with your favorite veggies, bread, or crackers. (Chill until ready to serve!)


A couple of notes - I used Kraft Feta with Oregano and Sun Dried Tomato but any crumbled feta would work. The longer this sits the longer the flavors have to mingle so you can serve it right away but you can also make it a few hours ahead of time. If you don't have garlic powder and garlic granules then just use 2 - 3 cloves of fresh, minced garlic. 
Literally 10 minutes to make which makes it perfect for those last minute invites to gatherings.

Thursday, March 16, 2017

Corned Beef Leprechaun Cheese Ball


I was looking for something to make for our mom's seniors center and came across Handmade In The Heartland (Link HERE) and an super cute leprechaun cheese ball. It was too impressive to pass by. I tweaked the recipe a little to suit our tastes and what ingredients I had on hand but otherwise followed her recipe pretty close. You can see her version HERE (and I recommend you do, her pics are amazing!) 
How perfect is a corned beef cheese ball that looks like a mischievous leprechaun for St. Patrick's Day?? I thought my guy looked a little creepy (kind of like the horror movie version) but he is still perfect. 
If you are on the lookout for something fairly quick and easy to whip up for the office or a party or the fam-damily on March 17th, look no further.  


Corned Beef Leprechaun Cheese Ball
(Ever-so-slightly adapted from Handmade In The Heartland)

Ingredients
Cheese Ball
2 pkgs cream cheese (8 oz each), room temp
110 gr deli corned beef, finely diced (about 1 cup)
3 green onions, finely diced
1 cup walnuts, finely chopped
1 tsp horseradish
1 Tbsp prepared mustard
1/4 tsp onion powder
1/4 tsp garlic powder
dash of salt & pepper

Decorations
1 green pepper
1 yellow pepper
1 red pepper
1 parsnip
1 medium carrot 
2 olive slices (ends work best, the pieces that look like stars)

Directions
Place softened cream cheese in a large mixing bowl and beat until smooth, scraping sides as necessary. Add in remaining cheese ball ingredients. 


Beat until well combined. 


Using a spatula, scrape cheese ball together and form into a large ball. Place on serving platter. Chill for an hour. 


When it has firmed up, cut the decorations out of the vegetables using the photo as a guide:
green pepper as the hat, yellow pepper for the square buckle on the hat, red pepper for the smile, parsnip for the nose and the ring around the hat, carrot for the hair and beard, and olive slices for the eyes. 
Use a carrot peeler to take off the outside layer of the carrot and discard it. Then, peel off enough carrot for the hair and beard. 


As you can see, I didn't use olives for the eyes as I didn't have any. What I did have, however, was a little bit of black and white fondant left over from decorating a cake. I just made little balls of fondant and pressed them flat to make the eyes. It is a little weird to put the sweet fondant on a savory cheese ball BUT you don't have to eat the eyes. We just picked them off when we went to eat it. 
FYI - if you do use fondant - DO NOT put the eyes on until you are ready to serve. If you leave the eyes on for a long time the color starts to bleed due to the moisture of the cheese ball. 
If you need help getting the parsnip and yellow pepper bits to stick to the hat, simply spread a very, very thin layer of cream cheese on the back of them and press them onto the pepper. They will stick better. 


Store, covered loosely with plastic wrap in the fridge until ready to serve. 
Serve with your favorite crackers or vegetables. 

Saturday, March 19, 2016

Reuben Balls with Spicy Thousand Island Dipping Sauce


It's been quite a while since I (Sue) have posted a recipe as Jo has been hogging the blog. 
I'm sharing these tasty little appetizers because they are so easy and SO SO delicious. We whipped them up for St. Patrick's Day but these would be perfect for any time of year. We made them in our Bake Delicious Cake Pop Pan but you can easily make them in mini muffin tins as well - they just won't be round. 
The combination of corned beef and sauerkraut is classic and makes for a perfect appie with the zippy dipping sauce!


Reuben Balls With Spicy Thousand Island Dipping Sauce
(Adapted from Party Food To Go

Ingredients
Sauce
1/4 cup mayo
1/4 cup ketchup
2 tsp relish
1/2 tsp onion powder
1/2 tsp garlic powder

Reuben Balls
1 egg
2 Tbsp oil
1 tsp baking powder
1/2 tsp baking soda
pinch salt
1/2 tsp paprika
1 cup flour
1 cup cooked corned beef, chopped fine
1/2 cup shredded Swiss cheese

Directions
Preheat oven to 350. Lightly spray your cake pop pan with cooking spray, set aside. 
Prepare dipping sauce - whisk together mayo, ketchup, relish, horseradish, onion powder, and garlic powder until well combined. Cover and refrigerator until ready to serve. 


Prepare Reuben Balls - In a large mixing bowl, whisk together egg and oil. Add in baking powder, baking soda, salt, caraway seeds, paprika, and flour. Whisk again until just mixed. 
Add in the corned beef, sauerkraut, and cheese.


Stir to combine. 
Drop by spoonfuls into prepared cake pop pan - filling bottom cups just a little over full (see pic below).


Top with other half of ban and place clamps to seal. Bake at 350 until cake pops are cooked through - toothpick inserted in the top will come out dry - about 20 - 25 minutes - keep an eye on it.


Remove top of pan and check to see that they are browned. 


If they aren't you can always cover and pop back in the oven for a few more minutes. 
If they are - remove to a wire rack to cool slightly.
Repeat with remaining batter. (We got 1 1/2 pans full - about 24 balls)


You can break into them now...


Or place them on a serving plate and serve with the dipping sauce (and some Bailey's and Guinness for St. Patrick's Day!)


They are just so cute.


Okay, last one, I promise...


We used all purpose flour to make these but you could do half and half with rye flour to make them even more reuben-y. You can also freeze these and simply reheat in the oven before serving. (Or microwave them but they won't be as crispy.) They are also good at room temp - just not quite as good as warm in my opinion. 
Bring these to the next family gathering, game night, tailgating party, luncheon, potluck, etc.... and you will be everyone's new favorite person. 
Just sayin' 


We're sharing over at Carole's Chatter! Be sure to click over for a visit!