Showing posts with label carrot. Show all posts

Wednesday, February 11, 2026

Yorkshire Pudding Burrito (Aka Handheld Roast Beef Dinner)


Okay. Before anyone wants to complain about it "not being a burrito". 
We know.
We know it's a Yorkshire pudding that is just wrapped up. 
The thing is...it just sounds more intriguing... and fun...
Basically you are making a giant yorkie, filling it with a roast beef dinner, rolling it up and eating it with your hands. 
Is it messy? Yes. 
Is it complicated? No.
Is it delicious? Yes.
Should you try it at least once in your life? Yes. Definitely. 
Also, this is a fabulous way to use up leftovers as it would work for a turkey dinner as well! Just sayin'
The recipe here is for one giant Yorkshire pudding burrito. You will need to double or triple it if you want 2 or 3. One is massive btw, and would easily serve two people. 
Links to purchase pans to make these if you are interested are at the bottom of this post!


Yorkshire Pudding Burrito
Aka Hand Held Roast Beef Dinner

Ingredients
Yorkshire Pudding
3/4 cup flour
1/2 tsp salt
sprinkle of pepper
3 eggs
3/4 cup milk
1/2 cup (scant) oil (for pan)

Filling
1/2 to 1 cup of mashed potatoes
1/2 to 1 cup chopped, cooked roast beef
1/2 to 1 cup cooked peas and carrots
1/2 to 1 cup gravy

Directions
Prepare Yorkshire pudding - Stir together flour, salt & pepper. In a separate bowl, whisk together eggs and milk. Whisk dry ingredients into the wet ingredients until just mixed. Let sit in the fridge for an hour, up to overnight. When ready to cook: preheat oven to 450. Fill a 9" baking pan with the scant 1/2 cup of oil and let heat in the oven until oil is smoking. 
Carefully remove the pan from the oven and pour in the batter. Immediately return to the oven, turn heat down to 425, and let cook for approximately 20 minutes - until puffed, dry looking, and deep golden brown. DO NOT open the oven to peek during the cooking process. Cold air hitting the yorkies can cause them to fall if they are not done. 

The edges may go quite dark but that's okay - you want the center to be cooked through. 


Let the yorkies sit while you heat up your fillings. 


I cooked my fillings ahead of time and then just reheated them when we were ready to eat. You can, of course, make everything and have it sitting on the stove while you cook the Yorkshire puddings. You don't have to make them ahead of time - I just prefer to do so for ease of clean up. 
Place a pudding on a serving plate and fill with the mashed potatoes, veggies, and beef.


About 1/2 cup to 1 cup of each should be plenty. FYI - we learned that we probably should have spread the potatoes on the bottom AND THEN topped with beef and veggies as the potatoes would have helped keep everything sturdier in the wrap. Not necessary but just a tip for you to keep in mind!! 


Then top with a generous amount of gravy - about 1/2 cup to 1 cup. 


Now, you could stop here and just enjoy this amazing roast beef dinner in a giant yorkie. We served it to our mom like this and she was thrilled. She had never seen a Yorkshire pudding that big so she loved it! 


You COULD... but you should probably try the burrito version.


Who doesn't want to have a hand held roast beef dinner? Crazy people, that's who.
Lay a piece of parchment paper (or paper towel) that is bigger than the yorkie down on a flat surface. Place the Yorkshire pudding on the paper and gently fold the sides together, overlapping one another. Wrap the paper around the wrap to help hold it together. 


Don't fill your pudding too full or you won't be able to wrap it up.


FYI - it's messy, the gravy is going to drip. This makes it taste better. 
#science


I have to say; after food blogging for over 16 years there aren't a lot of recipes or food trends that get me excited. When I saw a version of this on Instagram I knew I wanted to try it. 
I love Yorkshire puddings so taking them from a small dinner accompaniment to make them the star of the show.... I was sold. This is so much fun. Oh, and yes, delicious. 
I hope you try it! Use up your leftovers OR make a special dinner so you can do it. You won't regret it! 

*Reminder - the recipe, as written, is for one giant wrap. You will need to double or triple it to make 2 or 3. Filling amounts are estimated and you can put in less or more as per your preference*

Need a pan to try this in? Try this one - 9" pan LINK , you can also use a cast iron pan link this one - 9" cast iron LINK

*We are members of the Amazon Affiliate Program and, as such, receive a small commission if you buy products using links we share. Thank you for your support*


Saturday, October 17, 2020

Keto Beef Stew


Looks like a regular beef stew, doesn't it?
It tastes like a delicious, comforting, beef stew but it is keto friendly! How? Well, we left out the potatoes and put in a few turnips instead. You could also use daikon if you have it. We used a little xanthan gum as a thickener instead of flour as well so as well as being low carb it is also gluten free!
I love making stew when the cold weather sets in. It only takes about 15 minutes of prep and then it bubbles on the stove top for a couple of hours making your house smell amazing! 


Keto Beef Stew

Ingredients
1 1/2 lbs beef, cut in small chunks
1 tsp salt
1 Tbsp oil
4 1/2 cups beef broth
2 Tbsp red wine vinegar
2 Tbsp tomato paste
1 Tbsp Worcestershire
1 bay leaf
1 lb turnip, cut in chunks
2 medium carrots, cut in chunks
1 onion, diced fairly large
1 celery stalk, diced
2 cloves garlic, chopped fine
1/2 tsp xanthan gum
1 Tbsp parsley, garnish

Directions

First step - chop all your veggies. 


In a large pot, cook the beef and salt in the oil until browned over medium heat. Remove the beef and set aside. 
Deglaze the pan with 1/2 cup of the beef broth. Add in the red wine vinegar, tomato paste, Worcestershire, and bay leaf. Stir well. Pour in the remaining beef broth. Place the beef back in the pot and let simmer on low heat for an hour. 
After an hour, add in all your vegetables. 
Remove 1/2 cup of the cooking liquid and whisk in the xanthan gum. Stir this into the stew.
Continue to simmer for another hour or so - until nice and thick and veggies are tender.


Remove bay leaf and discard. 
Serve hot, sprinkled with a little parsley. 


The recipe, as written, makes 6 servings. According to MyFitnessPal the counts are: 341 calories, 20 fat, 9 carbs, 3 fiber, and 31 protein. So 6 net carbs per serving. 
This is one of those meals that no one will notice isn't "normal" stew. I promise. 
My mother insists on having barley in all her soups and stews so I just boiled her up a little bit in a separate pot and added it to hers when I served it and she was none the wiser. 

Wednesday, April 15, 2020

Masala French Toast (Savory French Toast)


I don't know why I have never thought to attempt a savory french toast until now. I know "regular" French toast is delicious and doesn't really need any improving BUT making it savory is just brilliant. 
This version is a popular Indian toast that I discovered while searching Pinterest for some ideas. Sue and I have been running a "Chopped" style contest for everyone on Facebook while we are all self isolating and the ingredients for one particular challenge were eggs and carrots. 
I took inspiration from several recipes and came up with this version here. It only takes about 2 minutes to whip up and would be great for breakfast, lunch, or dinner. 
While I didn't win our Chopped: Quarantine Edition with this recipe, I have added it to my weekly rotation as it is totally addicting. Serve it with some raita for an extra special treat! (Our Raita recipe can be found HERE but there are tons of simpler ones out there if you Google them!)


Masala French Toast

Ingredients
2 eggs
2 Tbsp finely diced onion
3 Tbsp shredded carrot
1 clove garlic, minced
pinch curry powder
pinch coriander
1/4 tsp cumin
2 Tbsp flour
pinch salt & pepper
2 - 3 slices of bread
1 - 2 Tbsp butter for frying

Directions
In a small bowl, whisk together the egg, onion, carrot, spices, and flour. 


Heat a frying pan over medium (to medium low) heat and melt the butter in it. Place your slices of bread in the pan and top evenly with half of the mixture, spreading it over the entire surface. Carefully flip the bread over and top the other side with the remaining mixture. Spread it evenly over the bread. 


Cook for about 3 - 5 minutes, until golden, and then flip the bread over and continue to cook the other side for another 3 - 4 minutes. 


Serve immediately. You can sprinkle a little cilantro on top, if desired. 
Or serve with a dollop of raita. 


I can't decide if I like sweet French toast better or savory. They are both equally delicious. I find that French toast works best with a grainy or seedy bread... but that is a personal preference. This will cover 2 larger pieces of bread or 3 smaller. It is super easy to double or tripe if you are making it for more than one person. I count this as one serving! 

Thursday, November 29, 2018

Easy Dinner Packets


What's that? You're looking for a delicious and hearty dinner idea that will leave you without any dishes? Have we got a deal for you!
These easy dinner packets have everything you need: meat, potatoes, vegetables, gravy, all in one no-muss, no-fuss what-do-you-mean-there's-nothing-to-clean-up dish. 
It's easy to customize with your favorite veggies and you can swap out sweet potatoes for the potatoes if you like. You can use ground beef or pork or turkey. Throw in some cheese or even sprinkle with hot sauce to spice things up. 
Like I said, no-muss, no-fuss. 


Easy Dinner Packets

Ingredients
Meat Patties
1 lb lean ground beef
1 pkg vegetable soup mix

Vegetables
5 medium potatoes, sliced
2 cups carrots, cut into 1 inch pieces
2 cups Brussels sprouts, trimmed
1 large onion, sliced
3 Tbsp oil
1 tsp garlic powder
1 tsp dried parsley
1 tsp garlic granules (or 2 cloves fresh garlic, minced)
salt & pepper

Gravy
1 can condensed mushroom soup

Directions
Preheat oven to 375. 
Prepare meat patties - mix together the ground beef and the soup mix. Separate into 5 equal pieces. Roll each piece into a ball and then flatten between the palms of your hands. Set aside.
Prepare vegetables - Place the vegetables, oil, and spices in a large bowl. Toss gently to coat the vegetables. 


Prepare packets - Tear off a large strip of tinfoil and place it on a flat work surface. Scoop up 1/5th of the vegetable mix and place it in the center of the tinfoil. 


Top with a meat patty.


Place 2 Tbsp of the condensed mushroom soup on top of the patty. 


Fold up the long sides of the tinfoil and pinch to seal. Fold over the other sides of the tinfoil and pinch that as well so no steam escapes. Repeat with remaining veggies and meat patties - you should get 5.
You can place the packets directly into the oven on the oven rack OR you can place them on a large cookie sheet. You may have to squish things around to get them to fit if you use a cookie sheet.


Bake at 375 for 45 minutes. Carefully open one packet (steam will come out) and prick the potatoes with a fork - they should be tender. If not, reseal and continue cooking until they are done.


I serve them in the tinfoil packages on top of a plate. You can scoop the contents directly onto a plate if you prefer. 
I put them on a cookie sheet just in case one springs a leak - it saves having to clean up the oven. You don't need to though if you are careful not to tear the tinfoil. I also serve them in the tinfoil because that means your plate won't be dirty either - it just gives them more stability. 
Don't like carrots and Brussels sprouts? Use green beans, turnips, beets, broccoli, cauliflower.... you have a lot of choices here. This is one of my favorite meals to cook when it is a particularly busy day. You can make the packets up ahead of time and refrigerate them until ready to cook. 

Wednesday, October 24, 2018

InstaPot Split Pea Soup


Sue and I shared our Crock Pot Split Pea Soup recipe (HERE)  and it turned into a family favorite. 
It just made sense when Sue bought me an InstaPot this year for our birthday to try it in the new machine. It's basically the exact same recipe with a few slight adjustments to fit the new cooking method. In the pressure cooker you go from start to finish in under 40 minutes. 
I usually use green split peas but our local grocery store was out so I used yellow split peas. It actually is a much prettier color than the green. The taste is the same though, in case you were wondering. 


InstaPot Split Pea Soup

Ingredients
3 Tbsp butter
1 onion, diced
2 celery stalks, diced
3 medium carrots, diced
2 cloves garlic, minced
1 ham bone
1 lb split peas, rinsed
6 cups chicken broth
1/2 tsp thyme
2 bay leaves
salt & pepper

Directions
Turn InstaPot to saute. Melt the butter and saute the onion, celery, carrots, and garlic for about 5 minutes - until vegetables soften. 
Add in the ham bone, split peas, chicken broth, thyme, bay leaves, and salt & pepper. 


Cover the InstaPot and set to manual high for 17 minutes. 
When complete, allow pressure to release naturally for 10 minutes.
Remove ham bone from the pot and cut off any ham from the bone.


I like to then take a hand blender and puree the soup for a few seconds. You want to leave some chunks so a few pulses in the soup should do the trick. (You don't have to do this, I just like the texture better.) Now place the ham back into the soup and discard the bone.
Serve hot with a little hot sauce, if desired.


Remember to save your ham bone from the next big dinner so you can make a batch of this! It freezes very well too so no need to worry about making too much. 
My favorite way to eat it? With soooo many crackers, of course. 


Split pea soup is hearty and healthy and delicious and inexpensive. It's also a great recipe to introduce you to cooking in an InstaPot. 
The perfect cold weather meal!

Tuesday, July 31, 2018

Thai Inspired Sliders


Before this month I had never tried Thai food. 
Is that weird? I feel like that might be weird. I mean.... I'm all about food so why wouldn't I have tried all the food from everywhere? Okay. So I haven't tried ALL the food yet but I'm slowly getting there. I'm a trooper like that. No need to thank me. 
Although you might want to thank me after trying this burger. I love that is has subtle hints of Thai flavors and is so different than the usual summer burgers. 
It was inspired by the flavors in our Thai Dinner we had earlier this month. (Click HERE to see those recipes!) I fell in love with the Peanut Sauce (Recipe HERE) I made to go with our chicken satay. I wanted to come up with another recipe that I could use the sauce with. It totally elevates these sliders from "average" to "whaaaaaaaaaaaaat the heck is this I want to marry it". 
Not even lying. 


Thai Inspired Sliders

Ingredients
Peanut Sauce
1/2 cup chicken broth
2 1/2 Tbsp peanut butter
1/2 Tbsp honey
1/2 Tbsp soy sauce
1 tsp fish sauce
1 tsp sriracha
1/2 tsp ginger paste (or minced)
1 clove garlic, minced
1/2 Tbsp lime juice

Pickled Vegetables
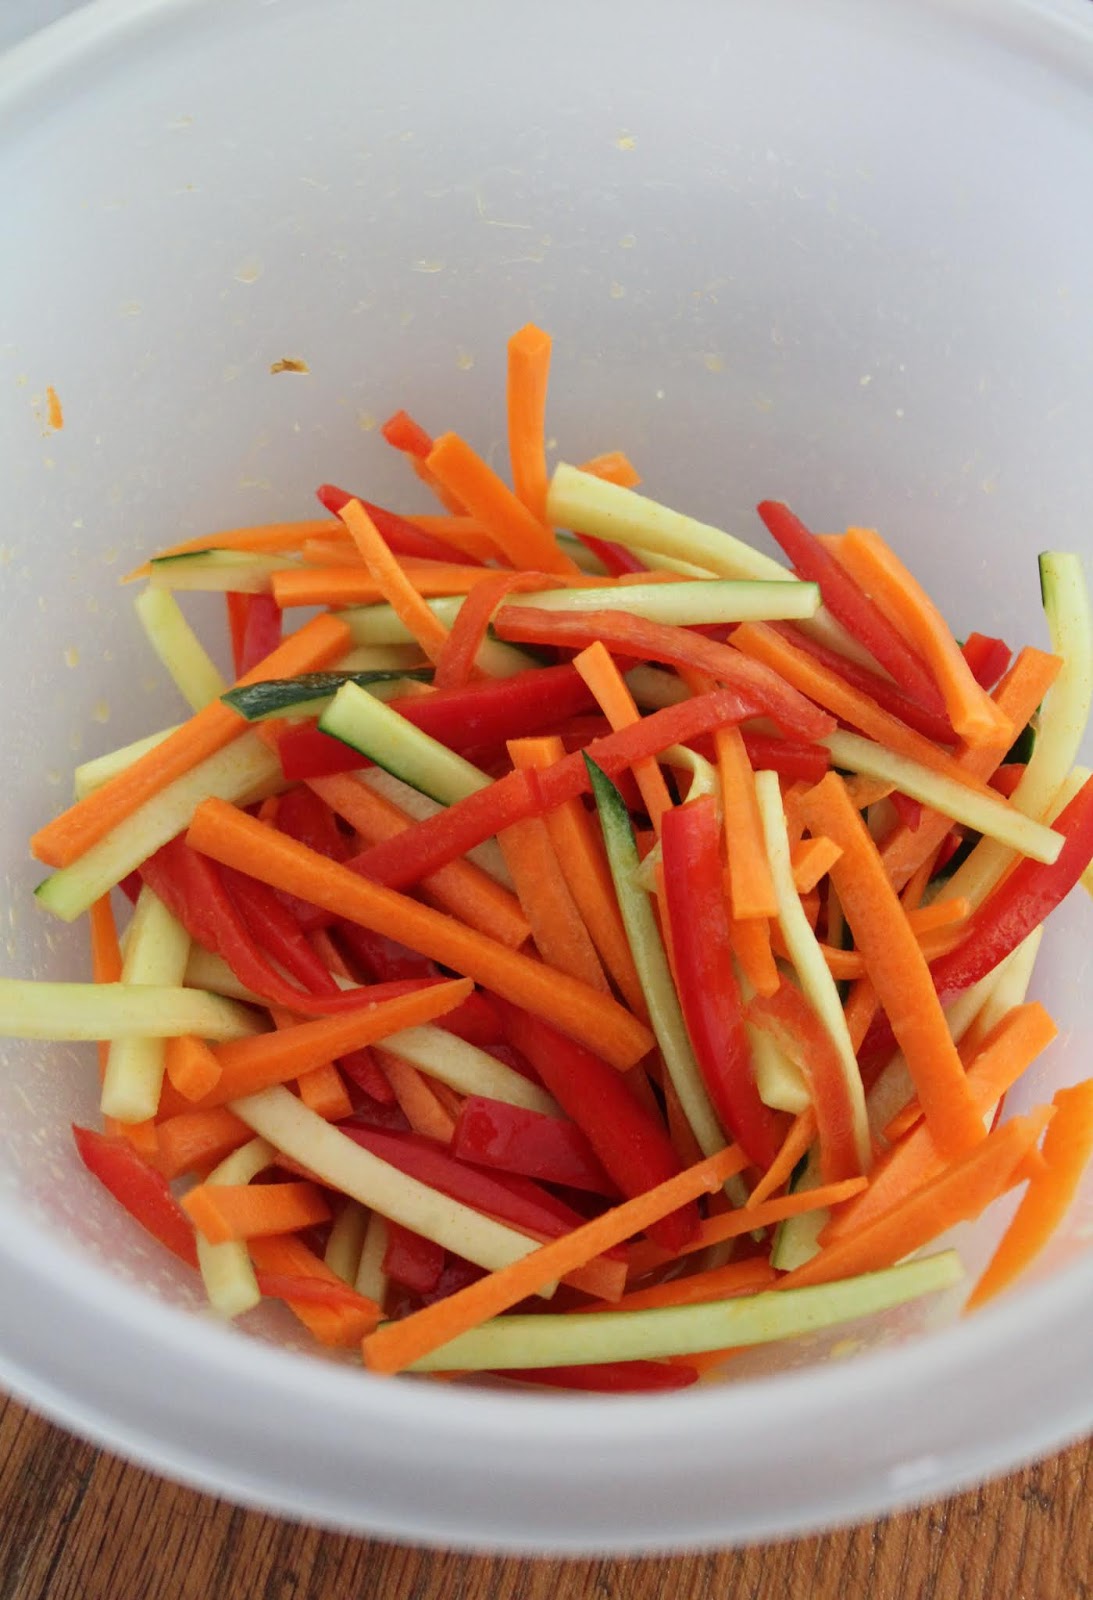
1 red pepper, julienned
1/2 cucumber, julienned
1 carrot, julienned
1 Tbsp sugar
1 tsp salt
3 Tbsp cider vinegar
1 Tbsp water
1/4 tsp ginger paste (or minced)
1/2 tsp ground turmeric

Slider Patties
1 lb lean ground pork
1 lb lean ground beef
1 Tbsp fish sauce
1 Tbsp chili paste
1 Tbsp soy sauce
3 tbsp bread crumbs
1/4 cup red onion, finely diced
1/4 cup cilantro, finely chopped
1/2 tsp ginger paste (or minced)
salt & pepper

Also Need
16 mini dinner roll buns
lime wedges
cilantro

Directions
Prepare Peanut Sauce - Mix all ingredients EXCEPT lime juice in a saucepan. Bring to a boil over medium heat, reduce heat to low, and simmer for 6 minutes, stirring constantly. 
Remove from heat and stir in lime juice. Let cool completely. (Can be made ahead of time and kept in fridge, covered, for several days.)


Prepare Pickled Vegetables - julienne your veggies.


In a bowl, whisk together sugar, salt, cider vinegar, water, ginger, and turmeric. Add vegetables and toss gently. 


Refrigerate at least 4 hours, stirring every so often to evenly marinate. Can be made a day ahead. 
Prepare Slider Patties - In a mixing bowl, combine the slider ingredients.


I like to start mixing with a wooden spoon and then use my hands to really make sure everything is combined. Form into 16 patties - I use a round cookie cutter to help shape my patties. I place the cookie cutter on a work surface and then press 1/16th of the meat into it with my fingers.
You can weigh them on a kitchen scale to make sure they are all equal but I never do - I just go by look and feel to make sure they are close to being the same.  


You can cover and chill the patties for up to a day ahead of time.... or go ahead and cook now. 
NOTE - I usually make all 3 recipes first thing in the morning so when dinner time is near all I have to do is cook the burgers. No muss, no fuss. It's great if you are having guests. 
I cook my slider patties in a frying pan until the meat is cooked all the way through. You could also bake them in the oven or on the BBQ. 
Serving the Thai Inspired Sliders - spread a generous amount of the peanut sauce on the top and bottom bun. Top with a cooked slider patty and then a generous amount of the pickled veggies. 
If desired you can sprinkle with drizzle of lime juice and extra cilantro. 


I don't want to sound like a weirdo... wait, that's not necessarily true... being weird is awesome.... but this is a flavor and texture adventure. Combining pork and beef gives these a little somethin' somethin' more than just using beef. Then throwing the crunchy, tangy vegetables on top and the spicy kick of the peanut sauce has your tastes buds wondering just what the heck is happening. 


If you have someone in your house that is a picky eater - mom I'm looking in your direction - then you can leave off the peanut sauce and pickled veggies and just put BBQ sauce or mustard and ketchup (the normal stuff) on top of your bun. *Sigh* It makes me sad, but it can be done.


I cooked half of these for dinner one night and then froze the leftover sliders - uncooked - for a later date. In an airtight container or bag they will last a couple of months in the freezer. Then simply thaw overnight in the fridge and cook. You can make more veggies and peanut sauce when you are ready to cook the burgers. 
If you are looking for something different to try, give these a go. You won't regret it! 

Sunday, June 24, 2018

Homemade Cup A Noodle Soup


I don't know about you but I am a huge fan of Mr. Noodle soup. Or Itchiban. Or pretty much any noodle soup that can be made by adding boiling water. The only thing is they are usually not all that good for you. Soooo much sodium, plus the noodles are usually fried.
I played around with some spices and different noodles and came up with a healthified, make ahead noodle soup that tastes delicious and can be kept in the fridge for up to about 5 days so is great for meal prepping too!
My niece, Sue's daughter, is on a modified diet (FODMAP) and she was able to enjoy this as well. It is also gluten free and vegan - in case you follow those eating plans -- I did add chicken to some of the cups and it was yummy too!
As written below it makes 8 noodle cups. 


Homemade Cup A Noodle Soup

Ingredients
Spices
2 Tbsp veggie bouillon
1 Tbsp salt
1/4 tsp black pepper
1/2 Tbsp onion powder
1 Tbsp garlic powder
2 tsp paprika
1/2 tsp turmeric
1/2 tsp wasabi powder
1/8 tsp ground ginger
1/4 cup dried parsely
2 Tbsp sugar

Soup
200 gr bag of Brown Rice Vermicelli
4 cups fresh baby spinach, coarsely chopped
2 cups shredded carrots
1 can (398 ml) miniature corn, finely chopped
8 tsp gluten free miso paste
8 tsp gluten free soy sauce
~ 3/4 cup green onions, finely chopped

Directions
Place all of your spices in a dish.


Stir well and then set aside.
Soak the vermicelli noodles in warm water for about 5 minutes, then drain.
Assemble soup: place 8 jars on your counter. Layer the ingredients as follows: 
1/2 cup spinach leaves
1/4 cup shredded carrots
2 Tbsp of chopped corn (or chopped chicken, if you are using)
1 tsp miso paste
1 tsp soy sauce
1/8th of the vermicelli noodles
1/4 cup green onions


Repeat until all 8 jars are full


You can now cover and refrigerate up to about 5 days. 
When you are ready to eat them all you have to do is fill (to cover the noodles) with boiling water and let sit, covered, for about 2 minutes.


Then give it a good stir.


You can eat it out of the jar, or pour it into a bowl.


Either way, you have lunch/dinner ready to eat in about 5 minutes. 
FYI - these are great to bring to the office for lunch or even throw in the cooler camping (just boil some water over the campfire and your good to go!). 


Healthy, easy, and tasty - what have you got to lose?


Be sure to visit Carole's Chatter for more fun foody links!