Showing posts with label lemon. Show all posts

Saturday, May 23, 2020

Sunshine Cake (12 Egg Yolk Cake)


I decided to give this cake a try because I had 12 egg yolks left over after making an angel food cake for our nephew's birthday. (Our Angel Food Cake recipe can be found HERE). 
From now on, whenever I make an angel food cake I will be making this cake as well. 


Never again will I have trouble using up 12 egg yolks!
You can use a 10 inch (12 cup) bundt pan or an angel food cake pan, either will work. This cake is kind of like a chiffon cake but not exactly. You have to make it to see what I mean. The texture is different as there is no fat in the cake other than the egg yolks. I'm calling it a sunshine cake because of the color it gets from the yolks! Very bright and cheery (more so if you use farm fresh eggs!) 


Sunshine Cake

Ingredients
3 cups flour
2 1/2 tsp baking powder
1/2 tsp salt
12 egg yolks
2 cups sugar
1 tsp vanilla
1 tsp lemon extract (or coconut)
1 cup cold water

Glaze
1 1/2 cup icing sugar
3 Tbsp milk
1 tsp lemon extract (or coconut)

Decoration (if desired)
black berries
lemon slices

Directions
Preheat oven to 350. Spray a 12 cup bundt pan (or angel food pan) with cooking spray and line the bottom with parchment paper, set aside.


 Sift together flour, baking powder, and salt. 
In a separate bowl, beat egg yolks until thick and fluffy, about 5 minutes. Gradually beat in sugar. beat for 2 minutes on high, stopping to scrape the bowl. Reduce to low speed and add in extracts and cold water. 
Gradually, but quickly, add sifted flour mixture. Beat only long enough to blend, about 1 - 2 minutes. Pour into prepared pan. 


Bake 50 - 60 minutes at 350, until golden brown or when a pick inserted near the center comes out clean. Remove from oven and cool at least 15 minutes on wire rack.


Run a knife around the edge of the pan (and the center) to loosen the cake. Invert onto wire rack and then invert again to another wire rack. Let cool completely. 


Whisk together the icing sugar, milk, and extract to make the glaze. It should be the consistency of glue (pour-able but not thin), add more milk if necessary. 
Pour the glaze evenly over the cake and let it drip down the sides. 


If you are using fruit to decorate the cake then do it before the glaze dries. They will stick when the glaze is wet. 


Of course, you can always go with coconut extracts and sprinkle it with toasted coconut too. 
Your options are pretty varied. 
I love the look of the berries and lemons. 


If you have 12 egg yolks to use up then I recommend you give this cake a try. It's pretty impressive looking. And very springy/summery. 
Decorate it with your favorite berries. 


You can definitely change up the flavors a bit with what extracts you use. Coconut, lemon, lime, strawberry.... you see where I am going here. The base flavor is very vanilla so a little extra flavor is a good idea. This is also a fairly large cake so perfect to bring to a gathering (or freeze the extras for later!) 

Thursday, April 30, 2020

Aunty Pat's Summer Slush (Large Batch)


Our Aunty Pat used to make this for us every summer when we would visit. I can remember eating it with a spoon while we sat beside her pool in our bathing suits. We got the kiddie version while the adults got the adult version. I'm sharing the adult (read: alcoholic) version here but by just leaving out the booze it is totally kid friendly. 
Have extra bananas but don't feel like more banana bread? This is the perfect way to use up those overripe bananas. This makes a large amount, which is great for sharing with family and friends! 


Aunty Pat's Summer Slush (Large Batch)

Ingredients
Base
2 cups sugar
6 cups water
5 bananas
1 can (48 oz) pineapple juice
1 can (12 1/2 oz) frozen orange juice
1 can (12 1/2 oz) frozen lemonade

Mix
coconut rum (I use Malibu Rum)
lemon lime soda (such as 7up or sprite)

Directions
Bring the 2 cups of sugar and 6 cups of water to a boil. Let boil for 3 minutes. Remove from heat and let cool completely. 
Mash bananas in a large bowl. I use beaters to make is easier. 


Add in pineapple juice, frozen orange juice, and frozen lemonade. (NOTE - I couldn't find the 12 1/2 oz containers of frozen orange or lemonade so I used 2 of the smaller sizes. This works just fine.) 


Add in the sugar water. Beat to combine. 


Pour  into ice cream bucket OR several smaller containers if you are going to share. (It makes about 10 - 12 cups) 


Cover and freeze until completely frozen. This takes at least several hours. When ready to serve:
Fill glass half full of slush. Add in a shot glass of rum (or to taste). 


Top up glass with the lemon lime soda. 


Give it a good stir. Top with a cute umbrella and cherry.


Serve immediately. 


Sue had hers in her margarita glass and it looks beautiful. 
You can add any liquor you prefer. I believe my aunt used to add gin. I've added vodka in the past too. Coconut rum is my favorite though - the coconut goes really well with the pineapple and banana flavors. How many serving it makes depends entirely on the size of the glasses you use. It makes a lot though, which makes it perfect for summer BBQs OR for giving as gifts. In a covered container it will last a long time in the freezer. 

Saturday, January 11, 2020

Strawberry Lemon Pie


I don't know about you but I love pie. It used to be pretty low on my dessert favorites list but I am slowing coming over to the pie side. This one is a really different pie that usually confuses people at first. It has the fluffy and creamy lemon filling and then the gooey strawberry layer. People tend to need a few bites before they know what's happening. 
I had one sampler tell me that the first bite she had she thought it was awful and thought maybe I had lost my mind. Then she took a few more bites and was like 'this is the best pie I have ever eaten". 
Need a dessert that will make a statement at your next gathering? Try this one. It's no-bake, easy to whip up, and will definitely start a conversation. PLUS, it's super pretty. So.... there's that. 


Strawberry Lemon Pie

Crust
1 9 inch baked pie crust (Find our recipe HERE) 

Strawberry Layer
1/2 cup water
1/3 cup sugar
1 Tbsp cornstarch
1/2 pkg strawberry Jello powder
3 cups diced, fresh strawberries

Lemon Layer
1 (8oz) pkg cream cheese, room temp
1/2 cup prepared lemon curd
1 1/2 cups whipping cream

Decoration
1/2 cup whipping cream
1 Tbsp strawberry Jello powder
lemon slices, cut into triangles

Directions
Set baked pie crust aside while you prepare the strawberry layer. 
Prepare strawberry layer - In a medium saucepan over medium heat; bring water, sugar, and cornstarch to a boil. Boil for 1 minute, stirring constantly. Stir in the 1/2 pkg of jello powder and let sit for 10 minutes. After ten minutes, stir in the strawberries and spread in the pie crust. 


Chill while preparing lemon layer. 
Prepare lemon layer - beat the cream cheese until smooth, scraping sides as needed. Beat in the lemon curd. In a separate bowl, beat the whipping cream until stiff peaks form. Fold in to the lemon mixture.
Spread the lemon mixture on top of the strawberry layer. 


To decorate - whip the 1/2 cup whipping cream with the 1 Tbsp Jello powder until stiff peaks form. Pipe on top of pie. 


Top with the lemon slices cut in triangles. 


Chill until ready to serve - at least 3 - 4 hours, up to overnight. 


See.... so purdy. 


And it just keeps getting better..... 


As I mentioned above, the flavors and textures are a bit of a shocker at first but everyone comes around! So. Much. Yum.
Rich, creamy, fruity, beautiful. Perfect for Valentine's Day, Easter, Christmas, Thanksgiving... you see where I'm going here, right? ALL the occasions. Every one. 

Tuesday, May 28, 2019

Macarons (Peanut Butter Cup and Lemon)


My foray into the world of macarons was very stressful. Macarons (not to be confused with macaroons, totally different cookie) are notoriously tricky to make. You can go from beautiful to what-even-is-that simply by stirring too many times. 
*sigh*
They are not impossible but they are one of the most difficult and unpredictable things I have ever made. I'm sharing my chocolate macarons and lemon macarons here because I seem to have the most success with them. 
I've also tried cinnamon bun macarons and bailey's and coffee macarons.


Above is the cinnamon bun macarons. Filled with cream cheese, yum! (You can see that the "feet" did not properly form on these ones)


My first attempt was the Bailey's and coffee. Tasted great but did not look very macaron-y. The "feet" did not really form at all and they were very pointy. 


If you've never made macarons but want to try I would definitely recommend searching how-to videos on Pinterest and Youtube. Watching the videos and getting a good visual on what they are supposed to look like is important. 
Also, my directions are going to be just basic directions. If you are looking for more in depth instruction, be sure to do some Googling! 
Are they worth it though? Yes. The texture and flavor are super-de-duper amazing and like nothing else you can make. Be prepared to make more than one batch. 


Peanut Butter Cup Macarons

Ingredients
Cookie
2 cup icing sugar
1 cup almond flour
1/2 cup baking cocoa powder
4 egg whites
1/2 cup sugar (granulated)

Filling
1/2 cup peanut butter
6 Tbsp icing sugar
1 Tbsp coconut oil
1 Tbsp milk (or almond milk)

Directions
Preheat oven to 325. Line a large baking sheet with parchment paper, set aside.
In a food processor (or blender), combine icing sugar, almond flour, and cocoa powder. Process until very fine. Sift into a large bowl. 
In a stand mixer, beat egg whites using the whisk on medium speed until light and frothy. Reduce speed to low and slowly add in sugar. Increase speed to high and beat until stiff peaks form. Be patient, it will take a few minutes. 
Add the dry ingredients to the egg whites and gently fold in using a spatula. Once ingredients are combined, fold for just another few turns of the wrist. **Be careful, this is where things can go wrong. Under mix and you will have pointy shells, over mix and you will have a soupy mess.**
Transfer to a piping bag and carefully pipe mixture onto prepared baking sheet about an inch apart. 
Tap the sheet on the counter several times to remove any air from the cookies. Let sit for 30 minutes, until tops are glossy and smooth to touch. (They should be dry!)
IMPORTANT - do not skip tapping the the sheets on the counter or letting them sit out. 
Bake at 325 until just set, about 10 - 12 minutes. 


Cool completely before filling.
Prepare peanut butter filling - beat together the filling ingredients until smooth. Pipe a small amount onto the flat surface of one of the macarons, lightly press the flat surface of another macaron on top. Note - they are quite fragile so be sure to do this carefully!


The lemon macarons are very similar. 


Lemon Macarons

Ingredients
1 cup almond flour
3/4 cup icing sugar
2 egg whites
1/4 tsp cream of tartar
1/4 cup sugar
1 tsp lemon zest
1 tsp lemon extract
yellow food gel coloring

Filling
1/4 cup butter
1 cup icing sugar
2 tsp cream (or milk)
1 Tbsp lemon juice
1/2 tsp lemon extract

Directions
Line a large cookie sheet with parchment paper (or silpat), set aside.
Preheat oven to 300.
Sift together the almond flour and icing sugar, twice. Set aside.
In a stand mixer, beat egg whites using the whisk on medium speed until light and frothy. Add in the cream of tartar. Reduce speed to low and slowly add in sugar. Increase speed to high and beat until stiff peaks form. Add in the lemon zest, extract, and food coloring. 
Add the dry ingredients to the egg whites and gently fold in using a spatula. Once ingredients are combined, fold for just another few turns of the wrist. **Be careful, this is where things can go wrong. Under mix and you will have pointy shells, over mix and you will have a soupy mess.**
Transfer to a piping bag and carefully pipe mixture onto prepared baking sheet about an inch apart. 
Tap the sheet on the counter several times to remove any air from the cookies. Let sit for 30 minutes, until tops are glossy and smooth to touch. (They should be dry!) (FYI - If it is humid this can take as long as an hour.)
IMPORTANT - do not skip tapping the the sheets on the counter or letting them sit out. 


 Bake at 300 for 18 - 20 minutes. 
Transfer to wire rack and cool at least 15 minutes before removing. 
Prepare filling - beat together the filling ingredients until smooth. Pipe a small amount onto the flat surface of one of the macarons, lightly press the flat surface of another macaron on top. Note - they are quite fragile so be sure to do this carefully! 


Macarons are best eaten the next day. They can be stored in an airtight container in the fridge for about 5 days. They also freeze very well. 
If you read through both the above recipes you can see that they are a bit different. In ingredients and in method. I'm not sure which is my favorite way but they both seem to work pretty good. Sifting can be a pain in the butt and is probably what takes the longest to make these. 


From top to bottom: bailey's and coffee, peanut butter cup, lemon, and cinnamon bun. 


One of the nice things about macarons is that your flavor combos are limitless. 
I'm going to try again with some new flavors. 
Practice, practice, practice. 


I ended up sharing my trials with the local hospital and medical clinic. Sue and I wanted to thank the nurses and doctors and administrators for all the hard work they do. 
Need an idea for something a little different for a bake sale? Macarons sell like crazy. 
Because they taste even better the next day, they are great for gifting to people too!

Thursday, May 16, 2019

Spiked Blueberry Lemonade Slushie


Are you ready to discover your new favorite *adult* summer drink? 
Got a pen and paper? Okay.. okay... you're on your phone, I get it. Get ready to Pin the heck out of this one. 
I created this recipe for a BC Blueberries recipe contest a while ago and...guess what??? It won!! I get why it won. It's sweet, but not too. It's refreshing. It's tangy. It's boozy. It's soooo tasty. It's got those delicious BC Blueberries that make everything tastier. 
I don't usually like to toot my horn but *toot toot*. 
It's a keeper. 


Spiked Blueberry Lemonade Slushie

Ingredients
4 cups frozen blueberries
1 can (295 ml) frozen lemonade concentrate
2 Tbsp sugar
1 cup vodka
3 cups ice

Garnish
lemon slices
blueberries

Directions
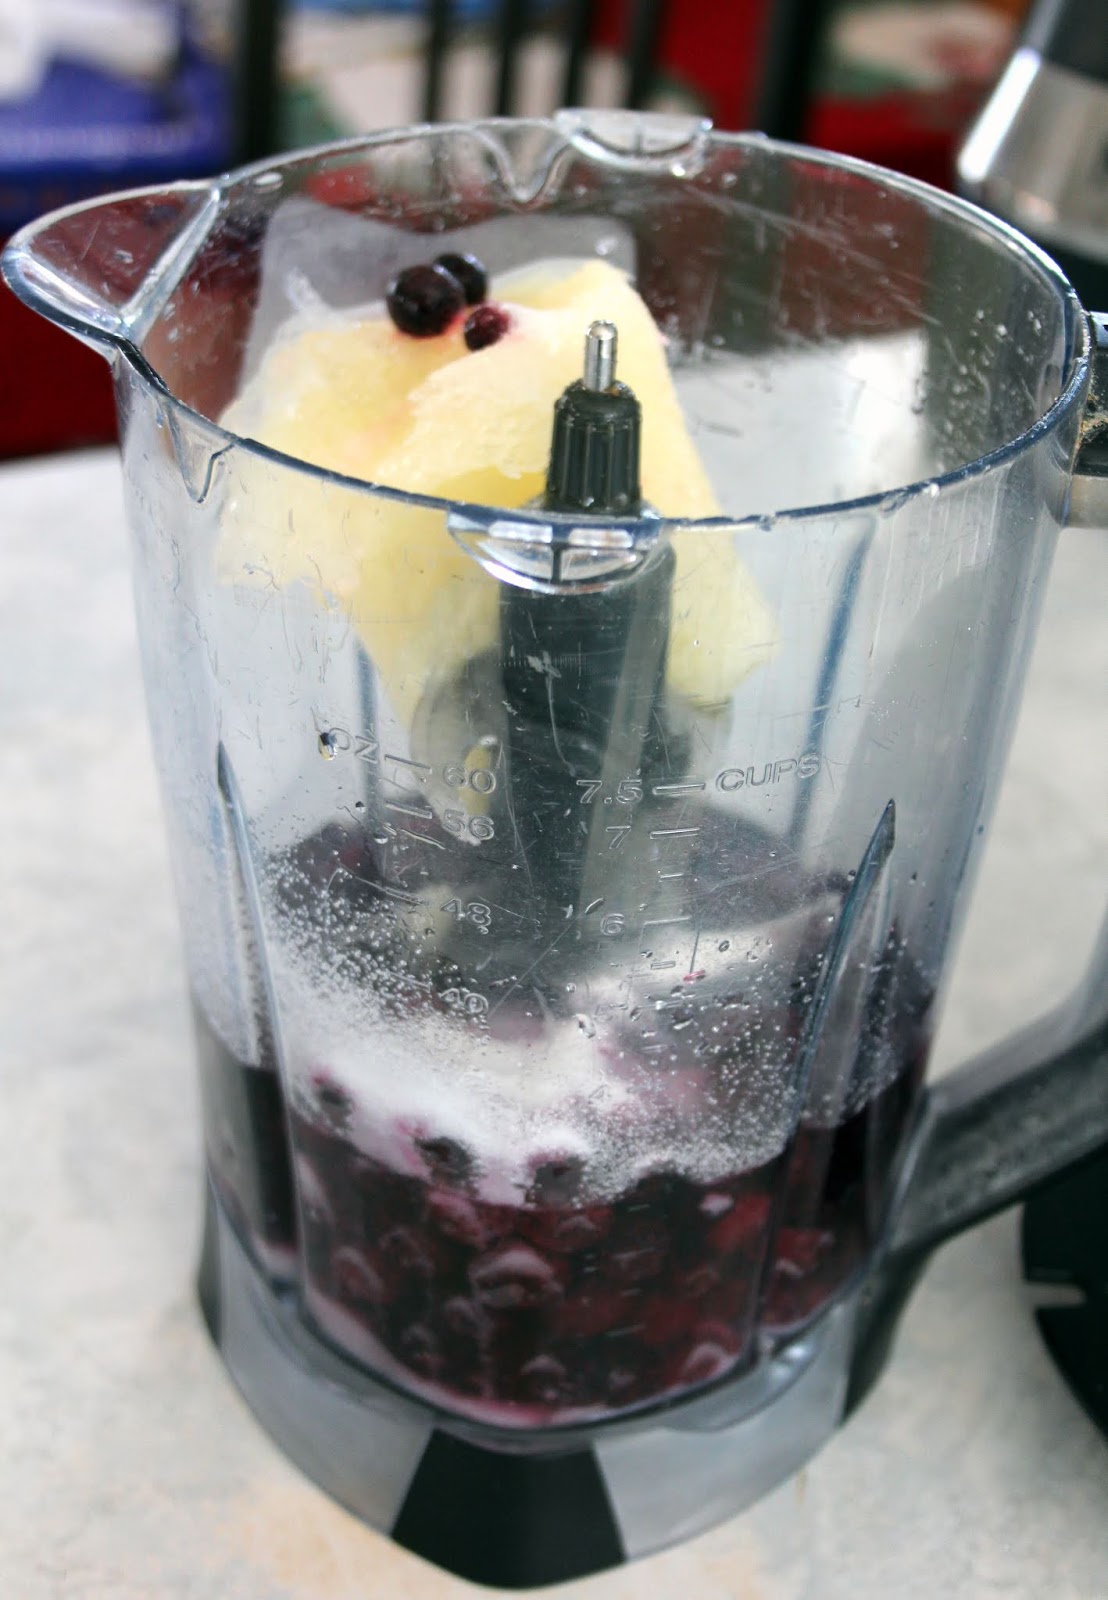
Place frozen blueberries, lemonade, sugar, vodka, and ice in a blender.


Blend the heck out of it. Add more ice if you want it slushier (but it should be pretty slushy!).
Garnish your glass with a slice of lemon and a few blueberries on a little skewer. Totally not required by the way, but it does make things all fancy schmancy. 


Yeah. Not too shabby. Look at that pretty color. 


Recipe makes 4 servings. You can place any leftovers in the freezer (I use a freezer bag) and then just blend again when you are ready to enjoy them! 


This has summer written all over it, am I right? 
Like all good things, please enjoy responsibly! 

Thursday, May 2, 2019

Blueberry Lemon Tart


For Easter dessert I wanted something a little different this year. I usually do carrot cake or cheesecake or trifle. This year I went with an Old Fashioned Strawberry Pie (recipe HERE) and this pretty blueberry lemon tart. I had hoped for a lighter purple color but the color entirely depends on your berries. Mine just happened to be darker so the color was darker. Still pretty. Still delicious. 
This tastes quite similar to a lemon meringue pie but is sweeter due to the blueberries. It makes a lovely addition to any meal and you can leave it plain, topped with whipped cream or meringue, or all fancy schmancy with whipped cream and berries and pie crust cut outs. 
Start with a homemade crust or a store bought crust, or even a graham cracker crust! Completely up to you.


Blueberry Lemon Tart

Ingredients
Crust
dough for a single 8" pie crust

Blueberry Lemon Curd
2 cups fresh blueberries
zest from 3 lemons
1 Tbsp water
1/2 cup butter, room temp
1 1/4 cup sugar
2 eggs
3 egg yolks
juice from 3 lemons (about 1/2 cup)
pinch salt
2 tsp cornstarch

Directions
Preheat oven to 400. 
Roll out pie dough to fit your pan. I used a 4 X 13 tart pan but you can make this in an 8 inch pie pan, or other shaped pan. Bake at 400 for 5 minutes, then reduce heat to 350 and cook until crust is lightly browned, about 15 - 20 minutes. Let cool completely. 


Prepare curd - In a medium saucepan over medium heat, bring blueberries, lemon zest, and water to a boil. Reduce heat and simmer 7 minutes. Let cool about 15 minutes and then press through a sieve into a bowl. Discard pulp leftover.


In a mixing bowl, beat butter and sugar until creamy. Beat in eggs and yolks, one at a time, until smooth. Slowly mix in the lemon juice, salt, and cornstarch. Lastly, mix in the berry puree. 
Place into a saucepan over low heat and stir until thickened. Remove from heat, let cool about 15 minutes, then press through sieve again. 
Pour into the cooled pie shell. Let cool completely before topping. 


You can also enjoy the blueberry lemon curd without a crust, if you prefer!


I put the leftover curd in dishes so our gluten free guests could enjoy it as well. 


It's beautiful served this way as well. 


However you decide to serve it; it's going to impress your guests. 
I love how different the color is and that sweet and tart thing it has going on. 
I'd love to try it with a graham cracker crust just to see how it changes the flavor. That might just be next on my list! 
Now you know what to do with all those blueberries you have this blueberry season!