Sunday, February 25, 2018

Coconut Crisp Cookies


I'm normally not a fan of crisp cookies. Soft and squishy is the way to go, in my opinion.
But then I made these cookies and, well, they are bringing me over to the crisp side. 
These are kind of a shortbread cookie but think shortbread that decided to move to Hawaii during the Christmas holidays. 
They only take a few minutes to whip up and then a few more minutes to cook so they are easy peasy and perfect for unexpected company. Or expected company. Or, you know, even family. 
I enjoyed mine with a glass of milk but I'm thinking tea or a glass of wine might be even better!


Coconut Crisp Cookies

Ingredients
6 Tbsp butter, room temp
1/3 cup icing sugar
1/2 tsp vanilla
1/4 tsp coconut extract
1/8 tsp nutmeg
1/8 tsp cardamom
1 Tbsp ground flax
1/4 tsp baking powder
3/4 cup coconut powder
1/2 cup flour

Topping
1 cup shredded coconut

Directions
Preheat oven to 350. Line a cookie sheet with parchment paper or a Silpat, set aside. 
In a mixing bowl, beat the butter until creamy, scraping sides as needed. Beat in the vanilla and coconut extract until well combined, again scraping sides as needed. 
In a separate small bowl, whisk together spices, ground flax, baking powder, coconut powder, and flour. (NOTE - if you can't find coconut powder in the store simply pulse approx 1 cup shredded coconut in the blender until it is super fine.)
Beat the dry ingredients into the butter mixture until well combined. (NOTE - if you find the dough is too crumbly then add in one or two tablespoons of water to help it stick together.)
Using a small cookie scoop, scoop dough and roll into balls.  (If you don't have a cookie scoop, simply pinch off a golf ball sized amount of dough and roll into a ball.)
Roll each ball in the shredded coconut and place on prepared cookie sheet. Flatten slightly with the palm of your hand. 


Bake at 350 until cookies are golden brown around the edges, about 8 - 10 minutes.  


Let cookies cool on the sheet to firm up, about 5 minutes.
Remove to wire rack to cool completely. 


Store any leftovers in an airtight container on the counter or in the fridge. These also freeze very well.


They may seem a little dull in color but I have to tell you, they are anything but dull in flavor and texture. Seriously, you have to try them to believe it! 

Saturday, February 24, 2018

Vegan Mongolian "Beef" Noodles


I know what you are thinking. It's NOT Mongolian beef if it's vegan. 
Well, you'd be right about that. But, now hear me out, it's pretty darned close when you use jackfruit in the recipe. The more we cook with it the more we are learning how incredibly versatile jack fruit is. You'd never know it wasn't beef in this recipe. The only difference we find is,  it is not as chewy as beef would be. 
This recipe only takes about 20 minutes from start to finish so is great for those busy weeknights. 
Also FYI - this recipe is gluten free if you use gluten free rice noodles and a gluten free soy sauce. 


Vegan Mongolian "Beef" Noodles

Ingredients
2 pkgs (450 gr each) rice noodles 
1 cup low sodium soy sauce
1/3 cup brown sugar
1/2 cup water
1/2 tsp red chili pepper flakes 
1 Tbsp sesame oil
1/2 tsp grated fresh ginger
6 cloves garlic, minced
2 pkg (200 gr each) shredded jackfruit
8 green onions, diced
6 cups coleslaw/rainbow salad mix


Garnish
green onion
toasted sesame seeds

Directions
Pre-soak rice noodles as per package directions.
While noodles are soaking, whisk together soy sauce, brown sugar, water, and pepper flakes. Set aside. 
In a large pot or wok, heat the sesame oil over medium heat. Cook and stir the ginger and garlic for 2 minutes. Add in the jackfruit and stir to combine. Pour in half of the soy sauce mixture and let simmer for 5 minutes. 
Stir in the green onions and coleslaw/rainbow salad mix. (See below for a photo of the two kinds of salad to clarify. I used one bag of each for some variety.)


Cook and stir until veggies are wilted, about 5 minutes.


Add the soaked rice noodles to the pot/wok and stir well. Pour in the remaining soy sauce mixture. 
Cook and stir until heated through - about 3 - 4 more minutes. 
Serve immediately. Garnish with a sprinkle of green onion and sesame seed. 


Note - this makes a LARGE amount. Probably enough to feed about 8 to 10 people. You can easily half the recipe, if desired. 


Leftovers are fabulous heated up the next day. Of course, the noodles will soak up the sauce so they become drier the longer they sit. 
Be sure to use a large pot as until everything cooks down, your ingredients take up a LOT of room. If it is easier, you can toss the noodles with the veggies in a large bowl and then place back in the pot to heat through. 

Sunday, February 18, 2018

Vegetarian (Jackfruit) Greek Gyro


Jackfruit is becoming my favorite new ingredient to experiment with. I think its because it confuses my brain so much. It's fruit but it totally looks and tastes like meat. 
Have you tried it yet? You really need to. If we can get it here in Lillooet then I know you can find it where you are. We use the Upton's Natural pre-cut jackfruit (plain) for this recipe. 


These gyros are vegetarian but could be made vegan with a couple of substitutes. We found the original version of this recipe over at Lazy Cat Kitchen (click HERE) but made a few switches of our own to suit what we had on hand. Click over to Lazy Cat Kitchen for how to completely veganize the recipe. 


Vegetarian (Jackfruit) Greek Gyro

Ingredients
Jackfruit "Meat"
3 Tbsp oil
1 medium purple onion, diced
5 cloves garlic, finely diced
1/2 tsp cumin
2 tsp Greek seasoning
1/2 tsp chili powder
1/4 tsp black pepper
2 Tbsp tomato paste
2 boxes of shredded jackfruit (400 gr/14 oz total)
1/4 cup soy sauce
2 Tbsp maple syrup
2 tsp apple cider vinegar

Remaining Ingredients
6 large Greek pitas
1/2 cup tzatziki 
6 romaine lettuce leaves
1 cucumber, sliced
1 small purple onion, sliced
cherry tomatoes, quartered 
1/3 bag of McCain's Rosemary & Garlic Superfries 

Directions
Prepare the jackfruit "meat": in a large frying pan heat the oil over medium heat. When sizzling, add in the onions. Cook and stir until onions are translucent and then add in garlic. Cook and stir another few minutes, until garlic is fragrant. 
Add in the spices (cumin, Greek seasoning, chili powder, and black pepper). Fry gently for a minute until well combined. Now stir in the tomato paste. 
Next add in the jackfruit, soy sauce, maple syrup, and vinegar. 


Simmer the mixture gently for 10 minutes, using your flipper to break up the jackfruit into smaller pieces. After 10 minutes, remove from heat and let cool. 


Chill, covered, in fridge until ready to prepare gyros. 
**NOTE - to this stage can be done up to 2 days ahead of time. The longer the mixture sits the stronger the flavors are. ** 
When ready to assemble: Preheat oven to 400 degrees F. Spread the jackfruit mixture on a cookie sheet covered with parchment paper. Bake at 400 for 20 minutes, stirring once at the halfway point. 
**NOTE - I spread the jackfruit on half of the cookie sheet and place the McCain's Rosemary & Garlic Superfries on the other half so they are ready at the same time.** 
Place a Greek pita on piece of parchment paper. Spread a little tzatziki on the pita. Layer on lettuce, cucumber, onion, and tomatoes. Top with a generous scoop of the jackfruit mixture, then a few of the fries.


Gently bring up the sides of the pita and wrap with the parchment paper. Top with another dollop of tzatziki.


Serve immediately. 
**NOTE - to prevent the pita from cracking when you fold it, simply microwave it for 20 seconds first.** 


You should get enough for 6 pitas. 
This. Was. Heavenly.
You cannot tell it is not meat. Seriously. You could fool the biggest carnivores out there. 
Those Greek flavors are addicting too. I used the McCain's Rosemary & Garlic fries because they totally compliment the spices in the jackfruit. Apparently fries in a gyro is a thing that happens all over the world. I like it. I'm soooo doing that with all my gyros from now on. 

Saturday, February 17, 2018

Butter Tart Donuts


We all know butter tarts are pretty much the best thing on the planet. Don't even argue. It's Canadian thing. (Check out our classic Butter Tart recipe HERE). 
We tried a Maple Syrup Butter Tart (HERE), and a Butter Tart Ice Cream (HERE), which were both so tasty, but we were still wanting to create another butter tart inspired dessert. 
Anyway, one day Sue was talking about jelly donuts and that we should make something like that so we started talking about what kind of fillings you could use instead of jelly. *voila* The butter tart donut (doughnut?) was invented. (Although, thanks internet for crushing our dreams. Apparently others have also done a butter tart donut already. It's okay. We are still sharing our version because it's ridiculously delicious.) 
I just want to add - yes, they are sweet. I know, shocker, being stuffed with butter tart filling and all. These are not for the faint at heart. 


Butter Tart Donuts

Ingredients
Dough
2 cups buttermilk
2/3 cup sugar
4 1/2 tsp traditional yeast
1/2 cup butter, melted
2 eggs, beaten
1 Tbsp vanilla
2 tsp salt
4 - 5 cups flour

oil for frying 

Butter Tart Filling
1 cup dark brown sugar
1/2 cup golden corn syrup
1/2 cup butter
2 eggs
2 ts vanilla
1 tsp salt

Decoration
1/2 cup icing sugar

Directions
Prepare the dough: Heat milk over medium heat in a saucepan until milk starts to steam. Stir in sugar and pour into a large mixing bowl. Sprinkle yeast over the warm milk mixture and set aside for 10 minutes for yeast to activate (foam). 
After yeast is foamy, beat in butter, eggs, vanilla, and salt until smooth. Add in 2 cups of the flour and beat until smooth. Add in more flour, stirring with a wooden spoon or spatula, until soft dough forms. Sprinkle flour onto a work surface and place dough on top. Knead dough, adding a bit more flour if too sticky, for about 5 minutes. Oil a large bowl, form dough into a ball and place in the bowl. Cover with a towel and set somewhere warm to rise for an hour. (You can run your oven for a minute to start to warm up, then shut it off, then you can place the bowl of dough in the oven to keep warm to rise.)
After dough has risen for an hour, line a cookie tray with parchment paper and set aside. 
Roll out the dough to 3/4 inch thickness and cut with a 2.5 to 3 inch round cookie or biscuit cutter. 


Place the rounds on the prepared cookie sheet. Reroll the dough scraps and cut again. (Depending on your cookie cutter and the thickness of your dough you should get about 3 dozen donuts - that is what I got using a 2.5 inch cutter)
Cover the dough rounds with a towel and let rise in a warm place for another hour. 
After an hour, prepare a cookie sheet with a couple of layers of paper towel, set aside. Place a large pot with your oil over medium heat and bring oil to 350 degrees. 
Working in batches of about 3 donuts at a time, fry the dough until golden - about 1  minute on each side. 


If your donuts go too dark too quickly then your oil is too hot! 
Transfer the donuts from the oil to the paper towel covered cookie sheet and let cool. Continue until all your donuts are cooked. Do your best to maintain the oil temperature at 350 degrees. 


When the donuts are cooled you can fill them with the filling.
Prepare filling: Combine all the ingredients (brown sugar, corn syrup, butter, eggs, vanilla, salt) in a heavy bottom pot. Place over medium heat and, stirring constantly, cook until mixture thickens to coat the back of a spoon - about 8 minutes or so. Transfer to a bowl and place in refrigerator until chilled, about 2 hours. FYI - I usually make the filling right after I prepare the dough for it's first rise so it is ready about the same time as the donuts. 
Assemble: Place filling in a piping bag with a longer tip. Press the tip into the center of a donut and fill with the filling as you pull out the tip. Repeat with remaining donuts. (FYI - If you don't have a piping bag and tips then you can use a large plastic bag with a corner cut off, and simply press the end of a wooden spoon handle into the donut then fill with the filling.)


Dust with icing sugar before serving.


This is optional but makes them look and taste even better. Just sayin'


Little squishy works of art, I say. 


So gooey and delicious. 
New Canada Day tradition? I vote yes. 
Butter tart everything. Who's with me?

Saturday, February 10, 2018

Valentine's Cake In A Can


Sue and I realized we haven't done anything really fun for Valentine's Day for a while and wanted to try and remedy that. I came across a post on Pinterest that showed a woman baking a birthday cake in a can and things kind of snowballed from there. 
I didn't want to bake the cake in the can as I wasn't sure how to tell if it was actually safe to do that. I decided to bake the cake separately and then place it in the can after. It worked like a charm. 
You could use any kind of cake and frosting you like - being this was for Valentine's I went with chocolate and more chocolate. 
This is a super fun way to make treats for someone special and is totally customizable. I used Word to print my labels but you could also just cut paper and have the kids draw their own art on each label for a perfect gift for Gramma and Grampa.  


Valentine's Cake In A Can

Ingredients (non-edible)
7 cans with a "pop top"
7 can labels
7 forks
hot glue gun with glue sticks
ribbon

Ingredients (edible)
2 cups chocolate frosting
2 cups sixlets (or sprinkles)

Directions
Using a can opener, remove the BOTTOMS of the cans. Pour the contents into a bowl to use for something else. (Make sure you use canned fruit cans. You don't want any lingering weird flavors in your cake from soup or something.) Wash and dry the cans. Be sure to hang on to the bottoms that you removed, you will need them after the cake is placed inside. 


Use a cookie cutter the same size as the opening in the can to cut out your cake.


Assemble the cakes: 1. divide the sixlets between the cans evenly.  


2. Pipe in icing to cover the candies.


3. Place one of the cake circles you cut out in the can and lightly press down. Top with a bit more icing.


4. Cut a second round of cake in half and press half down lightly on top of the frosting. Your cake should come as close to the rim of the can as possible. 


5. Place the bottom of the can on top and then carefully run a bead of hot glue around the outside to hold the lid in place. 
Don't worry if the glue looks messy. It is on the bottom and you won't see it. (NOTE - if you don't have a glue gun you can put an "X" with tape across the bottom of the can to hold the tin in place. Any tape on the sides of the can will be covered with the label.) Let glue cool and solidify before turning cans over. 


Place the labels on the can using a small bit of hot glue. You can also use tape if you don't have a glue gun. Tie a fork to each can using a bit of ribbon. 


How cute are they?
*eeeeeeeeeeeeee*
But wait, they get even cuter when you open them. 


Let's go in for a closer look, shall we?


All those tasty candies hiding what lies beneath....


Ooooooh.... so much chocolate. 


I could just crawl right in there. 


These cakes in a can were part of what we donated to a local bake sale fundraiser. They are a fabulous idea for bake sales! Something a little different from the normal cupcakes and muffins. 
Make these for the kids, your significant other, friends, or even for yourself. 
Change the label and they are good for all sorts of celebrations - the possibilities are endless!


We're sharing over at Carole's Chatter. Be sure to pop by and say hi!

Saturday, February 3, 2018

Giant Bacon Cheeseburger


One of my friends at work does not like sweets so whenever her birthday comes around I get to come up with fun savory dishes for her. I've made a cute Sushi Cake (HERE), a tasty Savory Southwest Cheesecake (HERE), and a very cake-looking Smorgastarta (HERE)
This year I went big. 
Like... really big. 


Although, to be fair, she is pretty tiny so in comparison it looks even bigger. 
Anyway, this burger is sooo much fun to make. The bread recipe I use here makes enough for 2 large buns so you can always make one bun and then make regular sized buns from the other half if you like. I made 2 large buns because I wanted to make sure I had a back up in case something went wrong. 


Giant Bacon Cheeseburger

Bun
1/2 cup hot water
1 Tbsp sugar
1 1/2 Tbsp dry active yeast
4 cups warm water
1 Tbsp sugar
2 Tbsp oil
1/2 tsp salt
7 to 9 cups of flour

1 egg white, beaten
2 Tbsp or so of sesame seeds

Burger
4 lbs extra lean ground beef
4 eggs
1 Tbsp HP sauce
2 Tbsp prepared mustard
2 tsp garlic granules (or 4 cloves minced garlic)
1/4 onion, finely diced
1/2 cup fine breadcrumbs 

Toppings
condiments: mustard, mayo, ketchup
5 - 6 leaves of lettuce
1 large tomato, sliced
1 lb bacon, cooked
1 jar sliced sandwich pickles
1/2 onion, sliced
8 to 10 large slices of cheese (I used jalapeno jack)

Directions
Prepare bread: In a small bowl place the 1/2 cup hot water, the first 1 Tbsp sugar, and the yeast. Don't stir, set aside and let stand for 10 minutes to activate the yeast.
In a large bowl, place the 4 cups of warm water. Add in the remaining 1 Tbsp of sugar, 2 Tbsp of oil, and salt. Add in 3 cups of flour, mixing as you are adding, stir until smooth. 
Next, stir the yeast mixture into the flour mixture until smooth. Add flour, 1 cup at a time, until dough is sticky and forms a ball (you may or may not need the entire 9 cups). Place dough onto a floured work surface and knead until dough feels soft and light to the touch - about 5 minutes or so. Add a little more flour if dough seems too sticky. Don't add a lot more flour though or your bread will be tough instead of fluffy. 
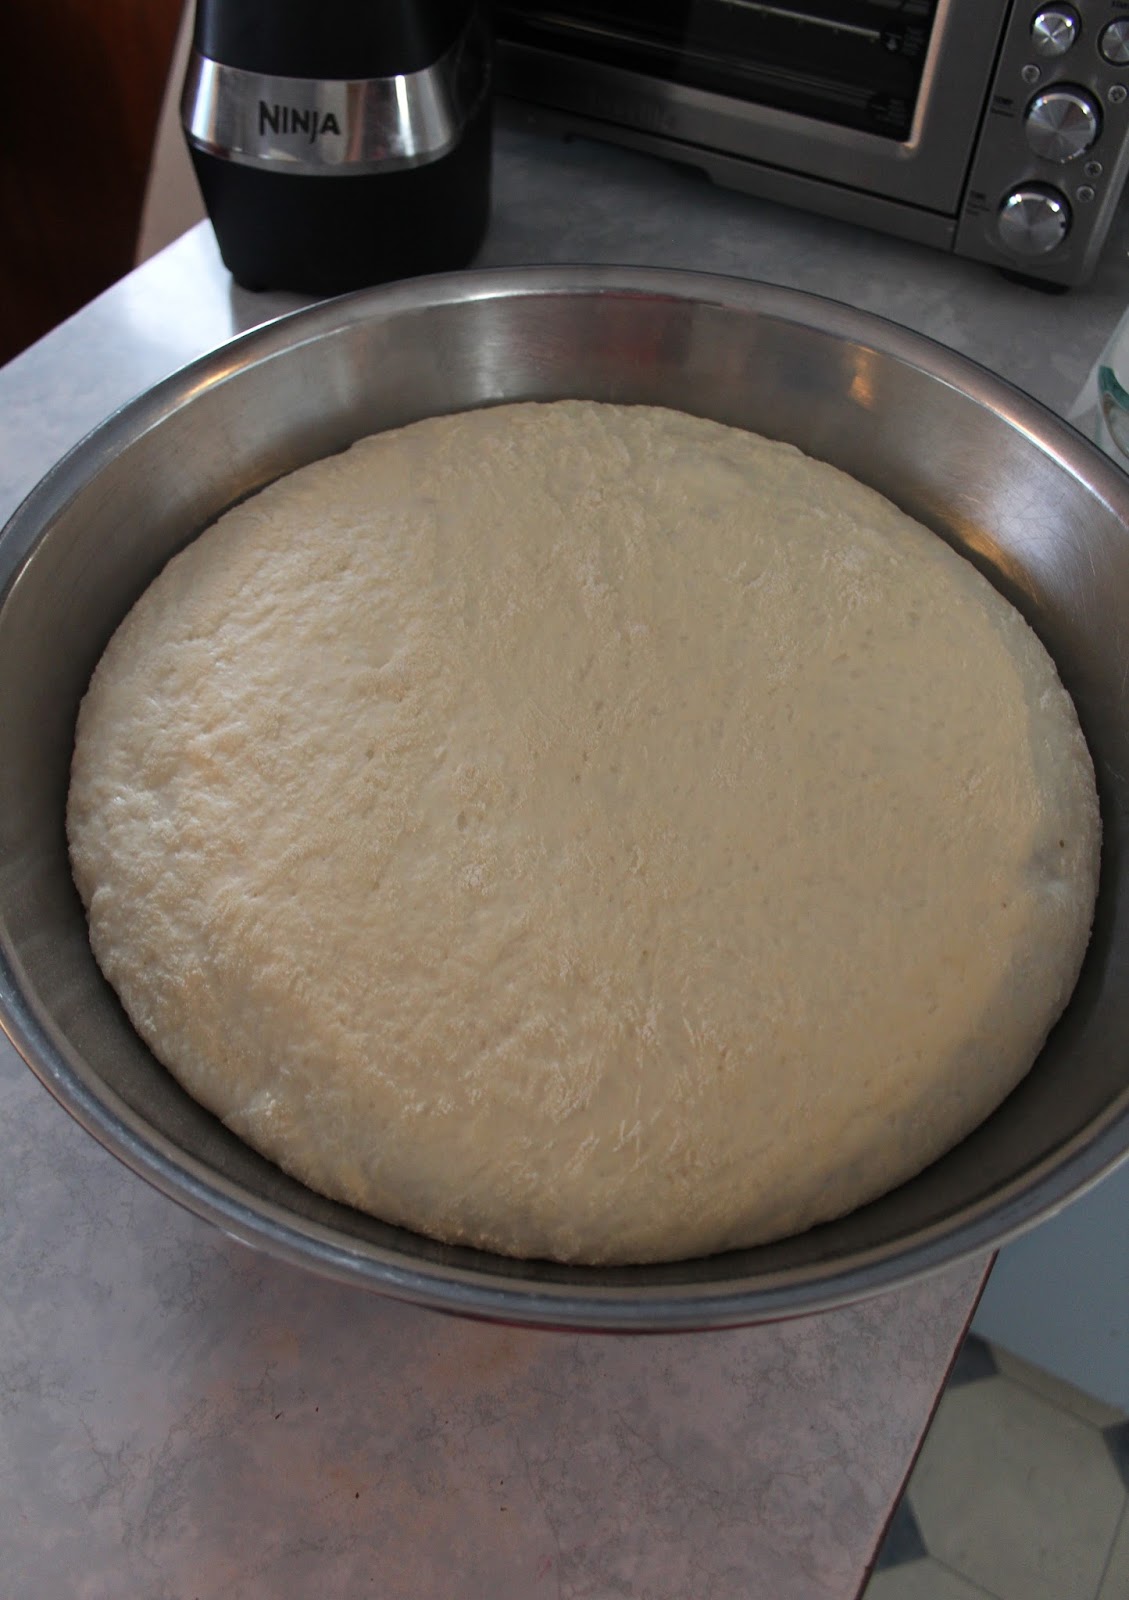
Oil a mixing bowl and place the dough in the bowl.


Cover the bowl with a towel and put in a warm place to rise until doubled, about 1 hour. 


After an hour, punch dough down and cut in half. Roll each half into a large ball and place in a large pan with very short sides, or on an oven safe dish, or a cookie sheet. Be sure to spray the dish you use with cooking spray OR line with parchment paper. 


I used a tart pan and serving platter with curved sides. Cover the dough with a towel and set somewhere warm to rise for another hour until doubled in size. 


When dough is risen, preheat oven to 375. Brush the tops of the bread with beaten egg white and then sprinkle generously with sesame seeds. Bake until bread is well browned and sounds hollow when tapped - about 45 minutes or so. 


Let cool for about 8 minutes and then remove the bread from the pans to a wire rack to cool completely. You may need to run a butter knife around the edge off the pan to loosen it.


Set aside until burger is ready. Bread can be made ahead of time and frozen, then simply thawed when you are ready to make the burger. You need to cut the bun in half, horizontally. I found using a serrated knife works best. 

Prepare burger: In a large mixing bowl combine the beef, eggs, HP sauce, mustard, garlic, onion, and bread crumbs.


Mix until very well combined - it helps to get in there with your hands. 
On a cookie sheet lined with a silpat or parchment paper, Pat out the burger mixture until it is a little bit bigger than the bun you made. As you can see from the photo below, I used the bottom of my tart pan that I baked the bread in as a guide for how big to make the patty. 
You want to make it a little bit bigger than your bun to allow for meat shrinkage from cooking. 


Bake in 350 oven for about an hour - until meat is thoroughly cooked. The best way to tell if it is cooked is to use a meat thermometer. 


Assemble your burger: Place the bottom of your bun on a serving tray. Spread mustard, ketchup, mayo - whatever your favorite condiments are - on the bun. Top with lettuce. Carefully place the burger patty on the lettuce.


Now top with your favorite toppings. I used jalapeno jack cheese, bacon, pickles, tomato and onion. 


Spread more condiments on the top bun and then place on top.


Serve immediately!
Note - you can make the bun ahead of time and you can also make the burger patty ahead of time. The burger patty can be reheated in either the microwave or in the oven. 


You can cut the slices are big as you like but, trust me, a little slice goes a long way.


I managed to snap a few pics with my phone at the office before it was devoured. 
Now, I just wanted to say: for me, the meat was a little thick. I used 4 lbs of ground beef but I think the next time I make it I would cut back to 2.5 to 3 lbs. A few of my coworkers agreed with me and a few said the meat-to-bun ratio was perfect. It comes down to your own preference!


I apologize for the weird lighting in some of these pics. I assembled everything together first thing in the morning to bring to work so it was pitch black outside and there was no natural light at all. 
Also, this would be a smashing idea for Super Bowl party time. Am I right? Imagine how happy your guests would be if you showed up with this for the game!


Looking for more fun foody links? Pop over to Carole's Chatter!