Showing posts with label layers. Show all posts

Monday, July 27, 2020

Pina Colada Cloud


Nothing beats a frosty pina colada when the summer heat gets crazy.
Even better? This Pina Colada Cloud dessert! It'll transport you to the tropics while you are staying at home in your own backyard. Make it in a 9 X 13 pan for a bigger group OR in 2 - 8 inch pans if you want to share it! 
Layers of graham crumbs, rum cheesecake, pineapple, banana, and coconut ensure this dessert will be your go-to for BBQs all summer long! 


Pina Colada Cloud 
(Slightly altered from Ramona Johnson, Valleyview Alta)

Ingredients
Crust Layer
2 cups graham cracker crumbs
1/2 cup melted butter

Rum Cheesecake Layer
1 1/2 cup whipping cream
1 - 8 oz brick cream cheese, softened
1/2 cup icing sugar
2 tsp rum extract

Banana Layer
3 medium bananas

Pineapple Layer
2 cans (398 ml each) crushed pineapple (do not drain)
1/4 cup water
1/2 cup brown sugar
1 tsp lemon juice
3 Tbsp cornstarch

Coconut Whipped Cream Layer
1 1/2 cup whipping cream
2 tsp coconut extract
1/3 cup toasted, shredded coconut

Directions
Prepare Crust Layer - combine graham crumbs and butter until well mixed. Press firmly into bottom of pan. Chill while preparing next layer. 
Prepare Rum Cheesecake Layer - beat 1 1/2 cups whipping cream until stiff peaks form. In a separate bowl, beat cream cheese, icing sugar, and rum extract. (NOTE - if you do not have rum extract you could use 2 Tbsp of rum) until smooth. Beat the cream cheese mixture into the whipped cream until just combined. Spread over the crumb base. 
Prepare Banana Layer - Slice bananas into a single layer on top of the cheesecake layer. Cover and chill while preparing the pineapple layer. 
Prepare Pineapple Layer - in a saucepan, combine pineapple, water, brown sugar, lemon juice, and cornstarch. Cook over medium low heat until thickened. Remove from heat and let cool completely - it speeds things up if you pop it in the freezer for about 15 - 20 minutes, stirring every 5 minutes. 
Spread the cooled pineapple mixture over the bananas.  


Prepare Coconut Whipped Cream Layer - beat 1 1/2 cups whipping cream with the coconut extract until stiff peaks form. Spread over the pineapple layer. Sprinkle evenly with the toasted coconut. 


Chill until ready to serve. At least 3 hours. 


If you like Pina Coladas then you will love this dessert. 


Layers of pineapple, banana, coconut, and rum.... what's not to love?


This is best the day it is made but will last in the fridge for a couple of days. I usually make it the morning I am planning to serve it so it has time to chill for several hours. I've made it the night before and it is fine too - the crust just gets a bit soggy the longer it sits. 

Sunday, May 24, 2020

Keto Sex In A Pan


I'm always on the look out for keto recipes that don't give off keto vibes, if you know what I mean. A lot of time low carb/gluten free recipes just aren't spectacular. For me it's generally a texture thing. 
Anyway, our Keto Nanaimo Bars (Recipe HERE) have pretty much been the peak of gluten free desserts for me to this point and I really wanted to try and convert our "normal" Sex In A Pan (Recipe HERE) dessert to keto because it's the peak of "normal" desserts when I'm not doing keto. 
Long story short.... this recipe is a hit. 
You'd never know it was keto/gluten free. It's a bit fussy to make because there are 4 layers but it's totally worth it. The portions are big (always a plus) and the net carbs are impressive - only 3.7 net carbs per serving, recipe makes 12 servings! (303 calories, 28.3 fat, 6.3 carbs, 2.6 fiber, 5 protein - keep in mind it is always best to enter your own brands/weights into a nutritional calculator to be exact.) 
Do you have a favorite keto/gluten free recipe that you love? Share with us in the comments below!


Keto Sex In A Pan

Ingredients
Crust
1 1/4 cup almond flour
1/3 cup unsweetened baking cocoa powder
1/4 cup powdered Swerve
pinch salt
1/4 cup butter, melted
1 Tbsp water

Cheesecake Layer
8 oz cream cheese, room temp
1/4 cup whipping cream
1/4 cup powdered Swerve
1/2 tsp vanilla

Pudding Layer
1 cup whipping cream
1 cup unsweetened almond milk
1/2 cup powdered Swerve
4 egg yolks
1/2 tsp xanthan gum 
1/3 cup unsweetened baking cocoa powder
3 Tbsp butter, cut up
1/2 tsp vanilla

Whip Cream Layer
1 1/2 cups whipping cream
2 Tbsp powdered Swerve
1/2 tsp vanilla

Chocolate Sprinkles
1 oz (approx 2 Tbsp) sugar free chocolate (I use Lily's chocolate chips)

Directions
Prepare crust - Preheat oven to 325. Lightly spray the bottom of a 10 inch pan with cooking spray (OR, I used 6 X 5 inch individual mini pie pans) 
Mix almond flour, cocoa powder, Swerve, and salt together in a bowl. Stir in the melted butter and water until well combined. Spread evenly into prepared pan(s) and press down firmly. 


Bake at 325 for about 10 - 15 minutes. 10 minutes in the individual pans or 15 in one large pan. 
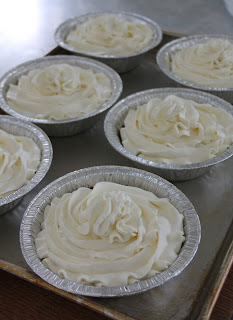
FYI - If you are using smaller pans it helps to place them on a cookie sheet for easier transportation. 
After the crusts have baked, remove them from the oven and place them into the fridge or freezer while you prepare the next layer. 
Prepare cheesecake layer - In a mixing bowl, beat the cream cheese until it is lump free, scraping sides as needed. In another bowl, beat the whipping cream, Swerve, and vanilla until stiff peaks form.
Slowly beat the whipping cream mixture into the cream cheese, until smooth. 
Spread evenly over the crust layer. 


Place in fridge or freezer while you prepare the pudding layer. 
Prepare pudding layer - In a saucepan bring whipping cream, almond milk, and Swerve to a simmer over medium heat. 
Whisk the egg yolks in a bowl and slowly whisk in the cream/milk to temper the eggs. Return everything to the saucepan and place back over medium-low heat. Sprinkle with the xanthan gum and whisk in. Whisk in the cocoa powder. Stir fairly vigorously over the medium-low heat until thickened. 
Once thickened, remove from heat and whisk in butter and vanilla. Stir until smooth. Set aside and let cool. (You can set in the freezer and stir every 15 minutes to speed the process.)
Once it reaches room temperature, spread evenly over the cheesecake layer. 


Chill until cool and set, about 2 hours. 
Prepare whip cream layer - Beat together whip cream, Swerve, and vanilla until stiff peaks form. Divide and spread evenly over the pudding layer.


Prepare chocolate sprinkle - Pulse 1 oz (approx 2 Tbsp) of chocolate in a blender or food processor until fine. Sprinkle evenly over the whipped cream layer. 


Chill until ready to serve. Can be made a day ahead of time. 


FYI - You want to keep it covered. 


The recipe makes 12 servings. Generous servings, if I do say so! 
This keto Sex In A Pan is rich, creamy, low carb, gluten free, and super de duper delicious. 


The crust has a hint of almond flour taste but I find by the third bite I'm tasting more chocolate and it's all good. Texture is pretty much spot on to our original Sex in a Pan, maybe a bit creamier, but I'm not complaining about that!. 
FYI - This will last a few days, covered, in the fridge. 
Feel like you are missing out by following keto or gluten free? You won't with this decadent dessert. It's got all the bells and whistles! 

Monday, February 17, 2020

Keto Nanaimo Bars


You guuuuuuuys! 
These Nanaimo Bars are going to change your life! Okay.... maybe not... but they might. You don't want to not try them and take the chance you're missing out. 
They taste like "normal" Nanaimo bars, they look like "normal" Nanaimo bars, and the texture is totally like "normal" Nanaimo bars. You'd never know they were keto/gluten free/diabetic friendly. 
I even had some taste testers say they preferred these over "normal" Nanaimo bars because they weren't quite as overwhelmingly sweet. 
I wanted to keep some of the Bird's Eye pudding powder in the recipe because that is what makes a Nanaimo bar a Nanaimo bar. It adds the most carbs to the recipe but also adds the authentic flavor and color. Per bar (recipe makes 24) the nutritional counts are: 191 calories, 17.5 fat, 5.9 carbs, 3.2 fiber, 2.7 protein. That's 2.7 net carbs per slice.
Doing keto you often can feel like you are missing out. Not with these bars. These keep well in the freezer so you can just pop one out whenever you need a keto friendly sweet treat!


Keto Nanaimo Bars

Ingredients
Bottom Layer
1/2 cup butter
1/4 cup Swerve brown sugar 
1 egg
5 Tbsp unsweetened baking cocoa
1/4 cup chopped walnuts
1 cup almond flour
1 cup unsweetened coconut, toasted

Middle Layer
3/4 cup butter, room temp
2 Tbsp Bird's Eye custard powder
1 cup Swerve icing sugar
4 Tbsp whipping cream

Top Layer
3 Tbsp butter
6 oz (scant 1 cup) sugar free milk (or dark) chocolate chips
2 Tbsp Swerve icing sugar

Directions
Prepare bottom layer - In a heat safe bowl, stir together butter, brown sugar Swerve, and egg. Place over a pan of simmering water over medium heat (or in a double boiler). Stir until well mixed. Stir in the cocoa powder. Stir until thickened. 
Remove from heat and stir in walnuts, almond flour, and coconut until well mixed. Press into a 10 X 10 pan lined with tinfoil. Set aside. 


Prepare middle layer - beat together butter, custard powder, and Swerve icing sugar. Beat in the whip cream until smooth. Drop by the spoonful over the crust.


Use the back of a spoon to spread the layer evenly. Note - it helps to dip the spoon in water and shake it off, then spread to prevent sticking. You can also use your fingertips dipped in water to help spread it out. 


Chill the two layers for at least half an hour before doing the last step - or pop in the freezer for 20 minutes. It is very important you do not skip chilling it!! Spreading the chocolate layer on top will be almost impossible if the bottom layers are not chilled. 
Prepare the last layer - Melt butter and chocolate chips in a microwave safe bowl in 20 second increments, stirring well in between, until smooth. Stir in the Swerve icing sugar. 
Working fairly quickly, drop the chocolate in spoonfuls over the yellow layer and then spread it with the back of a spoon. This can be a little tricky because the chocolate starts to melt the middle layer, making it difficult to spread. Don't worry if your chocolate isn't completely even - just do the best you can. 


Chill until set. 
Use the tinfoil to remove the bar from the pan - this will make it much easier to cut. 
Cut into 24 pieces. You can keep these in the fridge or on the counter. I tend to leave them in the fridge in a lidded container and take them out about half hour before serving them. 


Only 2.7 carbs per slice!!


Look me in the eye and tell me that doesn't look EXACTLY like a "normal" Nanaimo bar. 


I love one of these with my keto coffee for those days I'm craving sugar. Totally satisfies the need for sweets. 


Texture is a big thing for me when it comes to replicating recipes to a keto friendly format. The texture of these, IMO, is spot on. A healthified, gluten free, keto friendly, diabetic friendly treat that I guarantee everyone will enjoy. 


FYI - you can also make these in mini muffin tins - I got 30. Just spoon about a tablespoon of the base into each muffin tin and press it down, then a Tbsp of the filling, spread it out, and then about 1 tsp of the chocolate topping, and spread it over the filling. 

Saturday, January 11, 2020

Strawberry Lemon Pie


I don't know about you but I love pie. It used to be pretty low on my dessert favorites list but I am slowing coming over to the pie side. This one is a really different pie that usually confuses people at first. It has the fluffy and creamy lemon filling and then the gooey strawberry layer. People tend to need a few bites before they know what's happening. 
I had one sampler tell me that the first bite she had she thought it was awful and thought maybe I had lost my mind. Then she took a few more bites and was like 'this is the best pie I have ever eaten". 
Need a dessert that will make a statement at your next gathering? Try this one. It's no-bake, easy to whip up, and will definitely start a conversation. PLUS, it's super pretty. So.... there's that. 


Strawberry Lemon Pie

Crust
1 9 inch baked pie crust (Find our recipe HERE) 

Strawberry Layer
1/2 cup water
1/3 cup sugar
1 Tbsp cornstarch
1/2 pkg strawberry Jello powder
3 cups diced, fresh strawberries

Lemon Layer
1 (8oz) pkg cream cheese, room temp
1/2 cup prepared lemon curd
1 1/2 cups whipping cream

Decoration
1/2 cup whipping cream
1 Tbsp strawberry Jello powder
lemon slices, cut into triangles

Directions
Set baked pie crust aside while you prepare the strawberry layer. 
Prepare strawberry layer - In a medium saucepan over medium heat; bring water, sugar, and cornstarch to a boil. Boil for 1 minute, stirring constantly. Stir in the 1/2 pkg of jello powder and let sit for 10 minutes. After ten minutes, stir in the strawberries and spread in the pie crust. 


Chill while preparing lemon layer. 
Prepare lemon layer - beat the cream cheese until smooth, scraping sides as needed. Beat in the lemon curd. In a separate bowl, beat the whipping cream until stiff peaks form. Fold in to the lemon mixture.
Spread the lemon mixture on top of the strawberry layer. 


To decorate - whip the 1/2 cup whipping cream with the 1 Tbsp Jello powder until stiff peaks form. Pipe on top of pie. 


Top with the lemon slices cut in triangles. 


Chill until ready to serve - at least 3 - 4 hours, up to overnight. 


See.... so purdy. 


And it just keeps getting better..... 


As I mentioned above, the flavors and textures are a bit of a shocker at first but everyone comes around! So. Much. Yum.
Rich, creamy, fruity, beautiful. Perfect for Valentine's Day, Easter, Christmas, Thanksgiving... you see where I'm going here, right? ALL the occasions. Every one. 

Sunday, December 29, 2019

Raspberry Dreamsicle Dessert


For the holidays we always try to have fancy schmancy desserts. Okay, if we're being honest, we like to have fancy schmancy desserts ALL THE TIME. I mean.... desserts are the best, am I right?
This dreamsicle dessert looks so pretty and tastes delicious and is so rich that a small piece goes a long way. That makes this 9 x 13 dessert perfect for family gatherings and potlucks! I went with raspberry juice and raspberry Jello so it would be Christmas-y but you can use orange juice and orange Jello for another delicious flavor. 
You dirty a few dishes with this one but it's all worth it in the end!


Raspberry Dreamsicle Dessert

Ingredients
Bottom Layer
2 cups graham cracker crumbs
6 Tbsp melted butter

Raspberry Layer
1 cup raspberry juice
2 pkgs raspberry Jello
1 pkg cream cheese, room temp
2 cups Cool Whip

Pudding Layer
1 pkg cream cheese, room temp
1 cup milk
2 lkg vanilla instant pudding
2 cups Cool Whip

Top Layer
remaining Cool Whip
Raspberries

Directions
Prepare bottom layer - mix together crumbs and butter and press into a 9 X 13 pan. Chill the pan while you prepare the next layer. 


Prepare raspberry layer - microwave the raspberry juice for 2 minutes (almost boiling). Whisk in the 2 pkgs of raspberry Jello. Set aside. In a separate bowl, beat cream cheese until smooth, scraping sides as needed. Very slowly pour the jello into the cream cheese, beating well between additions. Beat until smooth. Whisk in 2 cups of Cool Whip until smooth. Pour over the bottom layer. Let chill while you prepare the next layer. 


Prepare pudding layer - beat cream cheese until smooth, scraping sides of bowl as needed.Very slowly beat in the milk, scraping bowl between additions. Beat until smooth. Beat in 2 pkg of vanilla pudding. Lastly, beat in the 2 cups of Cool Whip. Spoon onto the raspberry layer and then smooth out evenly. 


Top with the remaining Cool Whip (usually about 1 - 2 cups), spreading evenly. Then top with fresh raspberries. 


Let chill until ready to serve - at least a couple of hours. 


If you want to make the orange version - instead of placing raspberries on top, I like to grate some orange rind over the whipped topping. Not as bold as the berries, but still beautiful!


I loved the texture of this dessert - so smooth and creamy. Sue, not so much. She found the Jello layer too spongy for her liking. To each their own! I know the orange version is just as delicious but I have yet to try any other flavor.... maybe lemon or lime or even grape?? Something I will be keeping in mind for the spring! A fun colorful dessert that works for holidays or every day! 

Saturday, December 29, 2018

Ukrainian Festive Walnut Torte


This year for Christmas Sue came up with the idea of doing a traditional Ukrainian Christmas (Click HERE to see our dinner post). I'm all about pierogies and cabbage rolls so I said, heck ya! Let's do it. 
I searched Pinterest for research on Ukrainian desserts and came across this torte from Suburban Grandma (Click HERE to see the original recipe). I was sooooo excited to try it. I love chocolate and coffee flavors. Unfortunately, I had an elbow injury on Christmas Eve and was not able to make it. Our sister, Orra, was my savior and volunteered to do it for me! It is a bit of fuss - there are 3 recipes you have to make - but, trust me, it is totally worth it! I cannot stress enough how much I LOVED this dessert. It is very rich and decadent so a little goes a long way. It also makes a large torte so is perfect for serving a larger crowd. This is normally a holiday recipe BUT I know I'm going to be making this more often than that. 


Ukrainian Festive Walnut Torte
(Ever so slightly adapted from Suburban Grandma) 

Ingredients 
Torte
10 oz walnuts, finely ground (approx 2 1/2 cups)
1/3 cup flour
2 tsp cornstarch
1 tsp baking powder
12 large eggs, separated
pinch salt
1 1/4 cup sugar
1 Tbsp vanilla

Mocha Frosting
3/4 cup butter, room temp
2 tsp vanilla
6 oz unsweetened chocolate, melted
6 cups icing sugar
3/4 cup strongly brewed coffee

Coffee Cream Filling
2 cups heavy cream
2 tsp instant coffee granules
1/4 cup icing sugar

Topping 
3 Tbsp walnuts, chopped

Directions
Prepare torte - Preheat oven to 350. Line 2 - 10 inch pans with parchment paper and lightly spray with cooking spray. Set aside.
Combine the ground walnuts, flour, cornstarch, and baking powder. Set aside.
In another bowl, combine egg whites and salt. Beat to stiff peaks, then set aside. 
In another bowl, beat the egg yolks on medium speed for 2 minutes. Add in the 1 1/4 cup sugar and vanilla and beat until mixture becomes thick and fluffy - about 5 minutes. Set aside.
Sprinkle the walnut mixture over the egg yolk mixture and stir briefly. Fold in half the egg whites until still streaky. Fold in the remaining egg whites until combined. 
Divide the batter evenly between the 2 prepared 10 inch pans. Bake for about 30 minutes - or until toothpick inserted near center comes out clean. 
Remove from oven and let cool for 5 minutes. Run a knife around the edges of the pan and then invert cakes onto wire racks to cool completely. 
Prepare Mocha Frosting - In a mixing bowl, beat together butter, vanilla, melted chocolate, and 1 1/2 cups of the icing sugar until creamy. Alternately add in the coffee and remaining 4 1/2 cups icing sugar. Set aside.
Prepare Coffee Cream Filling - In a mixing bowl, beat together cream, coffee granules, and 1/4 cup icing sugar until stiff peaks form. 
Assemble the torte - Split each torte in half diagonally making 4 equal discs. Place one disc on a serving platter, cut side up. Spread about 3/4 cup mocha frosting on top. Then spread 1/3 of the coffee cream filling. Repeat with the second and third disc. Place the final disc on top (cut side down) and decorate with the last of the mocha frosting. Sprinkle with the 3 Tbsp of chopped walnuts. 


Chill until ready to serve. 


Guuuuuys! It's ridiculous. 


So. Many. Yummy. Layers. 


Someone ate a lot of this. Not saying who. It may or may not have been me. I'm not admitting to anything. Just saying.... it was really good. 
The torte layers are quite fragile - Orra said she was going to try and frost the sides of the cake but decided against it because she was afraid it would tear apart. I love the rustic look she created by leaving the sides bare. It makes it easier to see all those gorgeous layers. 
FYI - I mentioned it above but I will say it again. This is very rich and a little goes a long way. Unless you are me.... and can eat mocha frosting and coffee cream by the bucket full.... you will only need a small piece.