Showing posts with label sandwich. Show all posts

Saturday, August 16, 2025

Shrimp Po Boy Sandwich


I'm going to start right out of the gate by saying I had never tried a shrimp po boy before today. Sure, I'd seen tons of recipes and social media posts about them and they looked uh-mazing. But, I'd never tried one until now. 
To be fair this version is kind of a cheater version BUT it is still super duper delicious. All I did was pick up some crispy battered shrimp at the store instead of deep frying my own. Am I going to try a "real" po boy if I get the opportunity? YES. Absolutely. I need to see how close this one comes. 
What do you think? 
Regardless of how close it comes to an authentic po boy - it's pretty darned good and so easy peasy to make. 


Shrimp Po Boy 

Ingredients
Sauce
1/4 cup mustard
1 1/4 cup mayonnaise
1 tsp pickle juice (or vinegar)
2 cloves garlic, minced
1 tsp paprika

Sandwich
sausage buns (or other soft bun) 
crispy breaded shrimp
shredded iceberg lettuce
tomato slices
chives, diced fine

Instructions
Prepare po boy sauce - whisk together mustard, mayo, horseradish, pickle juice, garlic, paprika, and Cajun seasoning. You can add a tsp of hot sauce as well if you want it spicier!  Set aside. **This is best prepared at least 20 minutes before use so flavors can build. 


Prepare po boys - Cook shrimp as per package directions. Remove from heat and let sit while preparing buns. spread sauce generously on both sides of buns. Top with shredded lettuce, then shrimp, then a little more sauce, then tomato slices, then sprinkle with chives. 


These are delicious served warm but you can wrap them well and refrigerate until later. 


You do want to eat them the day they are prepared . They get a bit soggy if you leave them until the next day. 


They really are that simple. 
Of course, for the authentic experience you should fry your own shrimp but I'm pretty sure the secret to the shrimp po boy is the Cajun mayo. As written, this recipe makes a good amount so unless you are making a lot of sandwiches, you will have left overs. It's great on roast beef sandwiches, burgers, and as a veggie dip too. 

Thursday, February 11, 2021

Ham Salad Sliders


Everyone needs a good ham salad recipe in their life. A way to turn leftover ham or even canned ham into the best sandwich filling EVER. 
Our recipe has been a family favorite forever and is super simple to whip up. Got ten minutes? Then you have time to make this ridiculously easy and delicious yet soon to be favorite recipe. 
We love these on our homemade Focaccia Slider Buns (Recipe HERE) but this filling is delicious on pretty much any bread or buns or even with veggies. 


Ham Salad Spread

Ingredients
2 cups ham, diced small (or 2 small cans)
1/4 cup onion, diced small
2 green onions, diced small
1 Tbsp prepared mustard
4 Tbsp mayo
salt & pepper
1 pickle, diced small

To make sliders
mayo
mustard
pickle slices

Directions
Place ham, onion, green onion, mustard, mayo, salt & pepper, and pickle in a bowl and stir to combine.
Divide mixture in half and place half in a blender or food processor. 


Process until smooth and creamy, scraping sides of blender as necessary. 
Add back to the bowl with the reserved ingredients. 


Stir together. Add in a little more mayo, if needed, to make sure it is nice and creamy. 


Spread a little more mustard and mayo onto the bread or buns you are using. Then top with ham spread. 


Place pickle slice in the sandwich OR on top of the bun for serving. 


Don't assemble the sandwiches until ready to serve. The pickle slice will make your bread soggy if it sits too long. The ham spread can be made up ahead of time and stored in the fridge until ready to use.


Ham salad is a great way to use up leftover ham after the holidays. Planning snacks for game day or kids after school snacks? Tired of egg salad or tuna salad? 
*Tah-Dah*
Problem solved. 

Sunday, August 2, 2020

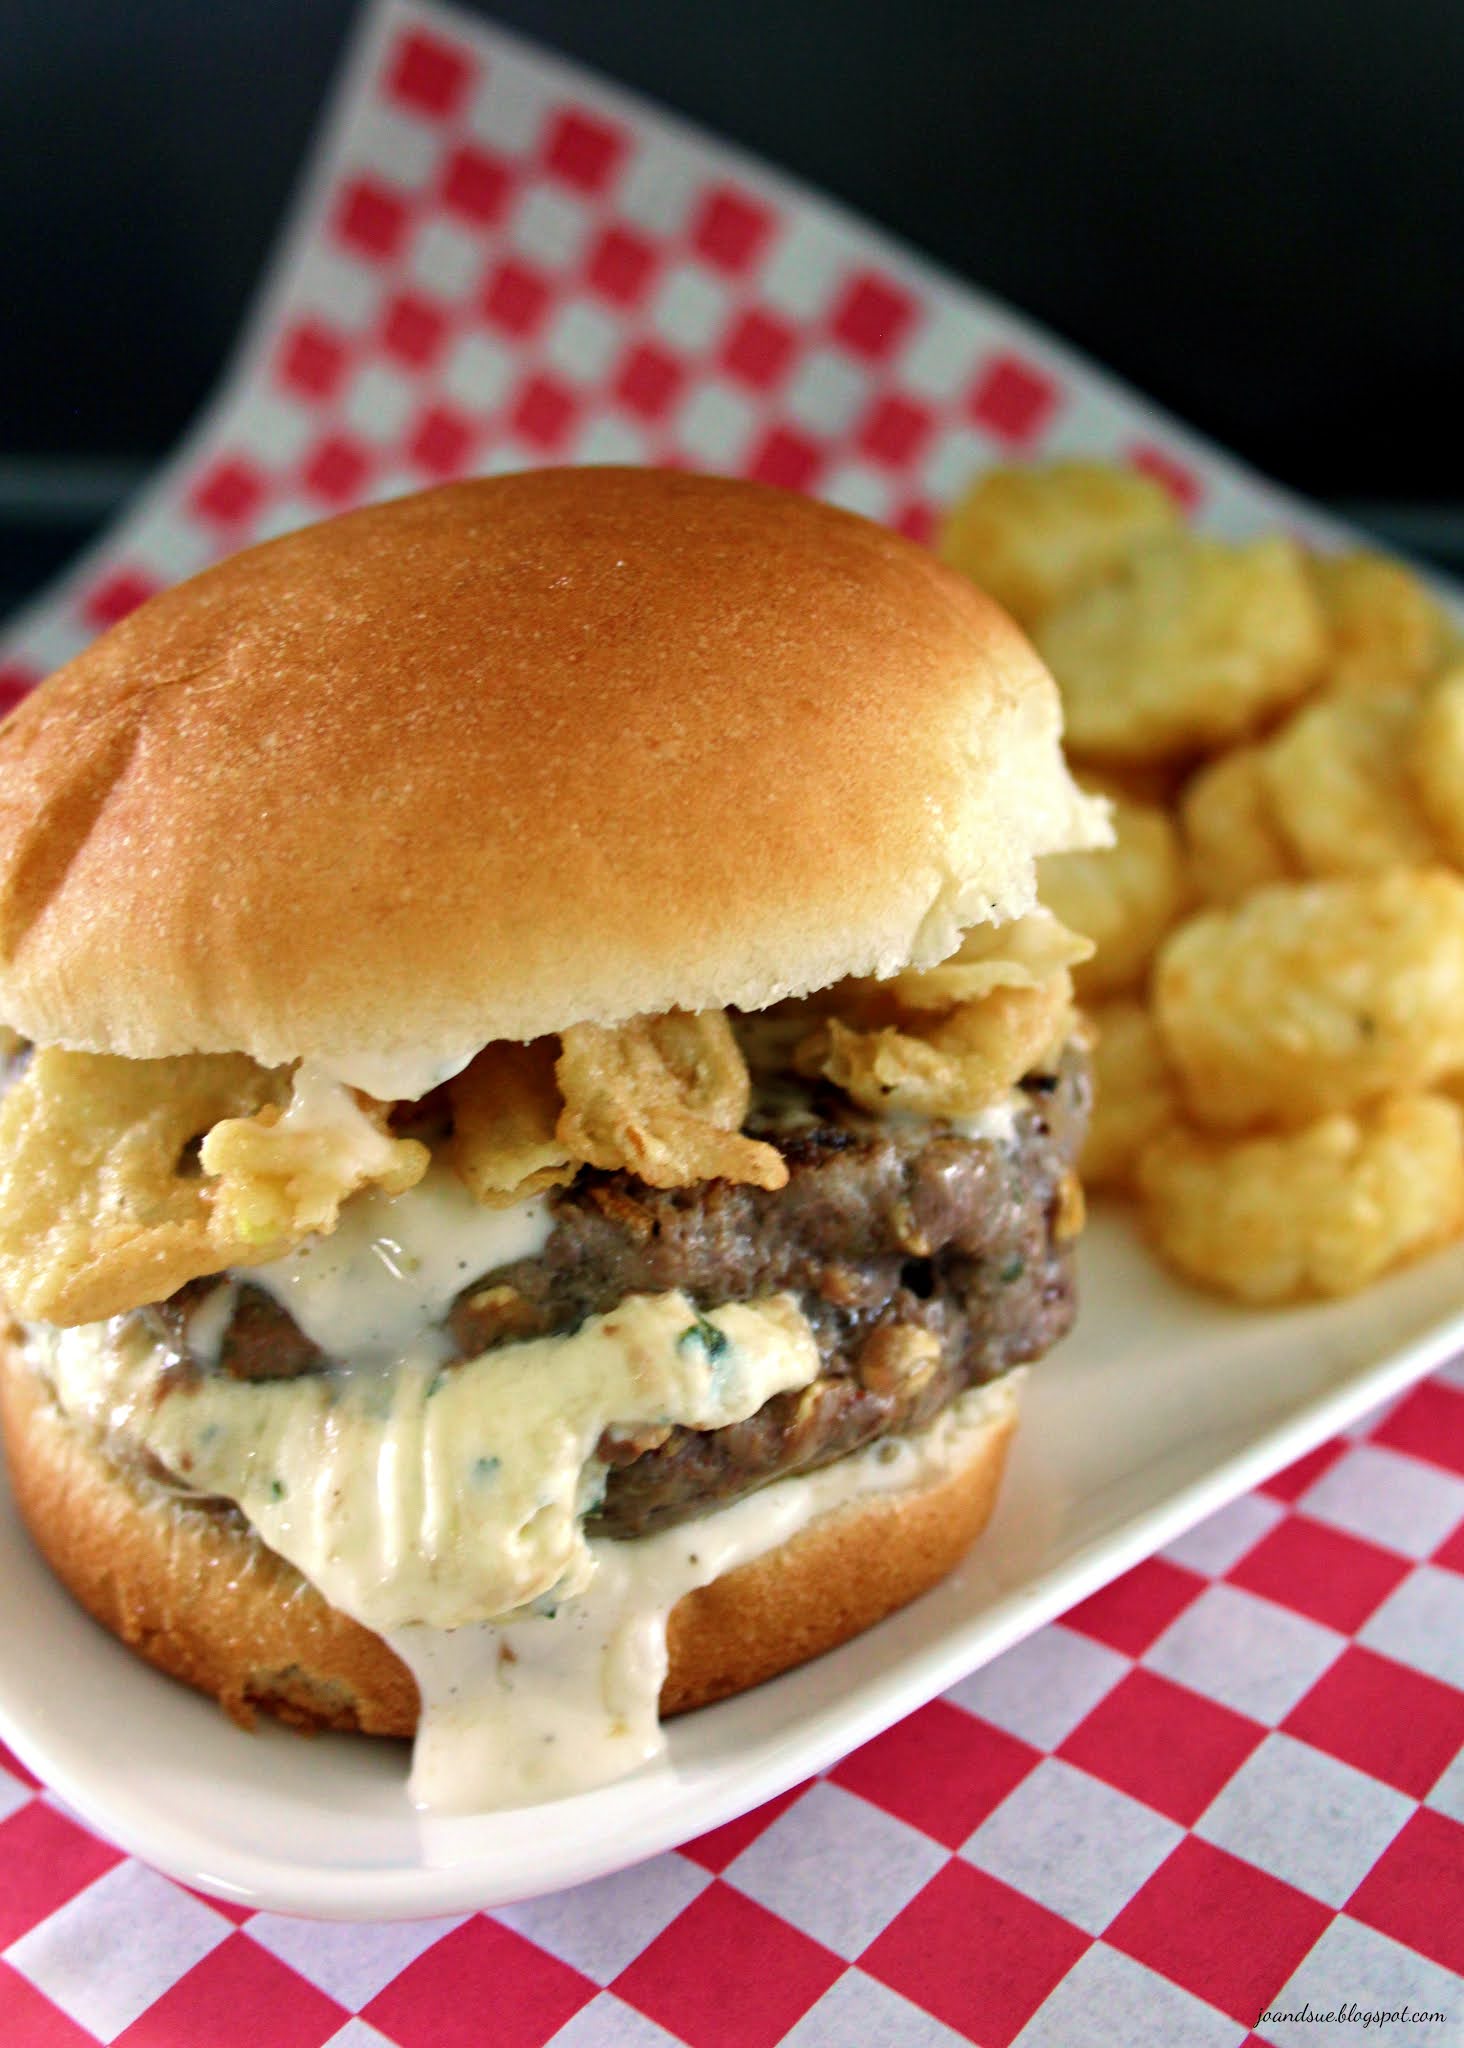
Garlic Overload Burger


Hold on to your hats garlic lovers. This burger is going to blow your mind!
I used garlic grown in our nephew's garden so it was SUPER garlic-y. If you are using mild garlic then I would recommend using more than the recipe calls for. 
After you eat one of these bad boys you should be able to clear the room... so... yeah... super de duper garlic-y. 
The basil and garlic cream cheese stuffed into the middle of the burger patties will have you hooked. So different and so delicious. 
Probably not the burger you want to make for date night but it is the burger you will want to make pretty much every other night... just sayin' #garlicrules


Garlic Overload Burger

Ingredients
Basil Garlic Cream Cheese
8 oz cream cheese, room temp
2 cloves strong garlic, minced
2 - 3 Tbsp fresh basil, finely chopped
1 Tbsp fresh parsley, finely chopped

Garlic Aioli
1/2 cup mayo
6 cloves strong garlic, minced
4 Tbsp lemon juice
salt & pepper

Burger Patties
2 lbs lean ground beef
3 cloves strong garlic, minced
1 Tbsp fresh parsley, finely chopped
1/2 cup oats
2 eggs
salt & pepper

Buns
8 brioche style buns (or your fav soft hamburger buns)

Burger Toppings
French's fried onions

Directions 
Prepare the cream cheese mixture - Beat cream cheese until smooth, scraping sides of bowl as needed. Add in the minced garlic and fresh basil and parsley. Mix until well combined. Divide into 8 equal portions. Chill until ready to use.
Prepare the garlic aioli - whisk together the mayo, garlic, lemon juice, and salt and pepper. Set aside. 
Prepare burger patties - mix together the beef, garlic, parsley, oats, eggs, and salt & pepper until well combined. I find it works best if you use your hands. Divide into 16 equal portions. 
Stuff the patties - Take one portion of beef and flatten it in your hand. Press one portion of the cream cheese mixture into the center of the beef. 


Top with a second portion of the beef and seal the cream cheese in the center of the two patties. Make sure you seal the edges well. 


Chill the patties until ready to use, at least an hour. 
When ready to eat - cook burgers on the grill or pan fry them until done. Don't worry if a little of the cream cheese filling leaks out, you can just scoop it on top of the patty before you put it on the bun!


To serve the burger - put a generous spoonful of garlic aioli on the bottom half of the bun. Top with a burger patty and then more garlic aioli!


Add on a generous amount of the French's fried onions then top with a little garlic aioli on the top half of the bun. 


It's a beautiful thing...


Like garlic? Looooove garlic?
You need to make this burger. 
The hints of fresh basil in the cream cheese take this burger to the next level. If you can find locally grown garlic then I highly recommend it. It's so much stronger and more garlic-y than garlic from overseas. 


Oh yeah baby. 

Saturday, July 4, 2020

Cuban Sandwich


Sue and I eat a lot of sandwiches. Sandwiches are awesome. 
What is weird is that we haven't shared a lot of sandwiches on our blog. 
We definitely need to fix that. I'm going to start right now by sharing one of our favorites. A Cuban sandwich. You can make this on normal bread but if you want it to taste like a super de duper delicious Cuban sandwich then you need to make it on Cuban bread (pan cubano). Homemade bread is a little consuming but always worthwhile in the end! FYI - This is a great way to use up leftover pork roast. 


Cuban Sandwich

Pan Cubano
1 1/4 cup hot water
2 1/4 tsp active dry yeast
4 tsp sugar
3 cups flour
2 tsp salt
4 Tbsp lard (can use butter), melted

Sandwich
butter
yellow mustard
Swiss cheese
deli ham
pork roast 
pickle

Directions
Prepare bread - In a small bowl, whisk together water, yeast, and sugar. Let bloom for 5 minutes. 
In another bowl, put in flour, salt, and melted lard (or butter). Stir in the active yeast. 
Knead dough for 5 minutes, until smooth. Add in a little more flour if dough is too sticky. 
Place in an oiled bowl, cover, and place somewhere warm to rise for an hour. 
After dough has risen: punch down and divide into 6 logs. Let rest for 15 minutes. Then shape the pieces of dough into 8 inch logs with tapered ends. Place on cookie sheet lined with parchment paper, cover with a clean tea towel, and let rise somewhere warm for another hour. 
After buns have risen: preheat oven to 375. Lightly spray the buns with water (or very gently brush water on with a basting brush) With a very sharp blade, place a slash down the center of each bun, leaving about an inch on each end not cut. 
Bake at 375 for about 15 minutes, until buns are golden brown on top. Remove from oven and let cool completely.


Prepare sandwiches - Cut Cuban buns in half and place on work surface. 
Spread one half of each bun with butter. Then spread both halves generously with yellow mustard. 
Top both sides with a slice or two of Swiss cheese. Then layer on the ham, pork roast, and pickle.


Close sandwich and admire how beautiful it is. 


Now slather the top with a generous amount of butter. 


Place sandwich in tinfoil. I like to put a smear of butter under the sandwich as well. 


Wrap the sandwich in the tinfoil (see photo for clarification).


To cook the Cuban sandwich - heat BBQ grill to medium/low heat. Place wrapped sandwich on the grill and top with something heavy, like a cast iron skillet. Grill for 5 minutes. Flip sandwich over and repeat on other side for 5 minutes.
Unwrap the sandwich and grill for 2 - 3 more minutes on each side. 
If you do not have a grill - You can cook the sandwiches in a frying pan on the stove top. You do not need to wrap them in foil to do this. Simply get the stage where you cover the top and and bottom with butter, then place in a frying pan over medium/low heat. Place something heavy, like a cast iron skillet, on top and cook for about 5 minutes on each side. You want the cheese to be melted and the sandwich to be heated through. 


You can add more cheese if you want things gooier, of course. 


I didn't have a lot of pork roast leftover so I diced mine so it would go further. If you want to leave it in thin slices then that works great too. Even shredded pork roast is fabulous on a Cuban sandwich. 
Like a grilled cheese but a magic, otherworldly grilled cheese. 
I recommend making the bread up before you need it and freezing it. 
You can easily double the recipe for 12 buns instead of 6. 

Monday, April 27, 2020

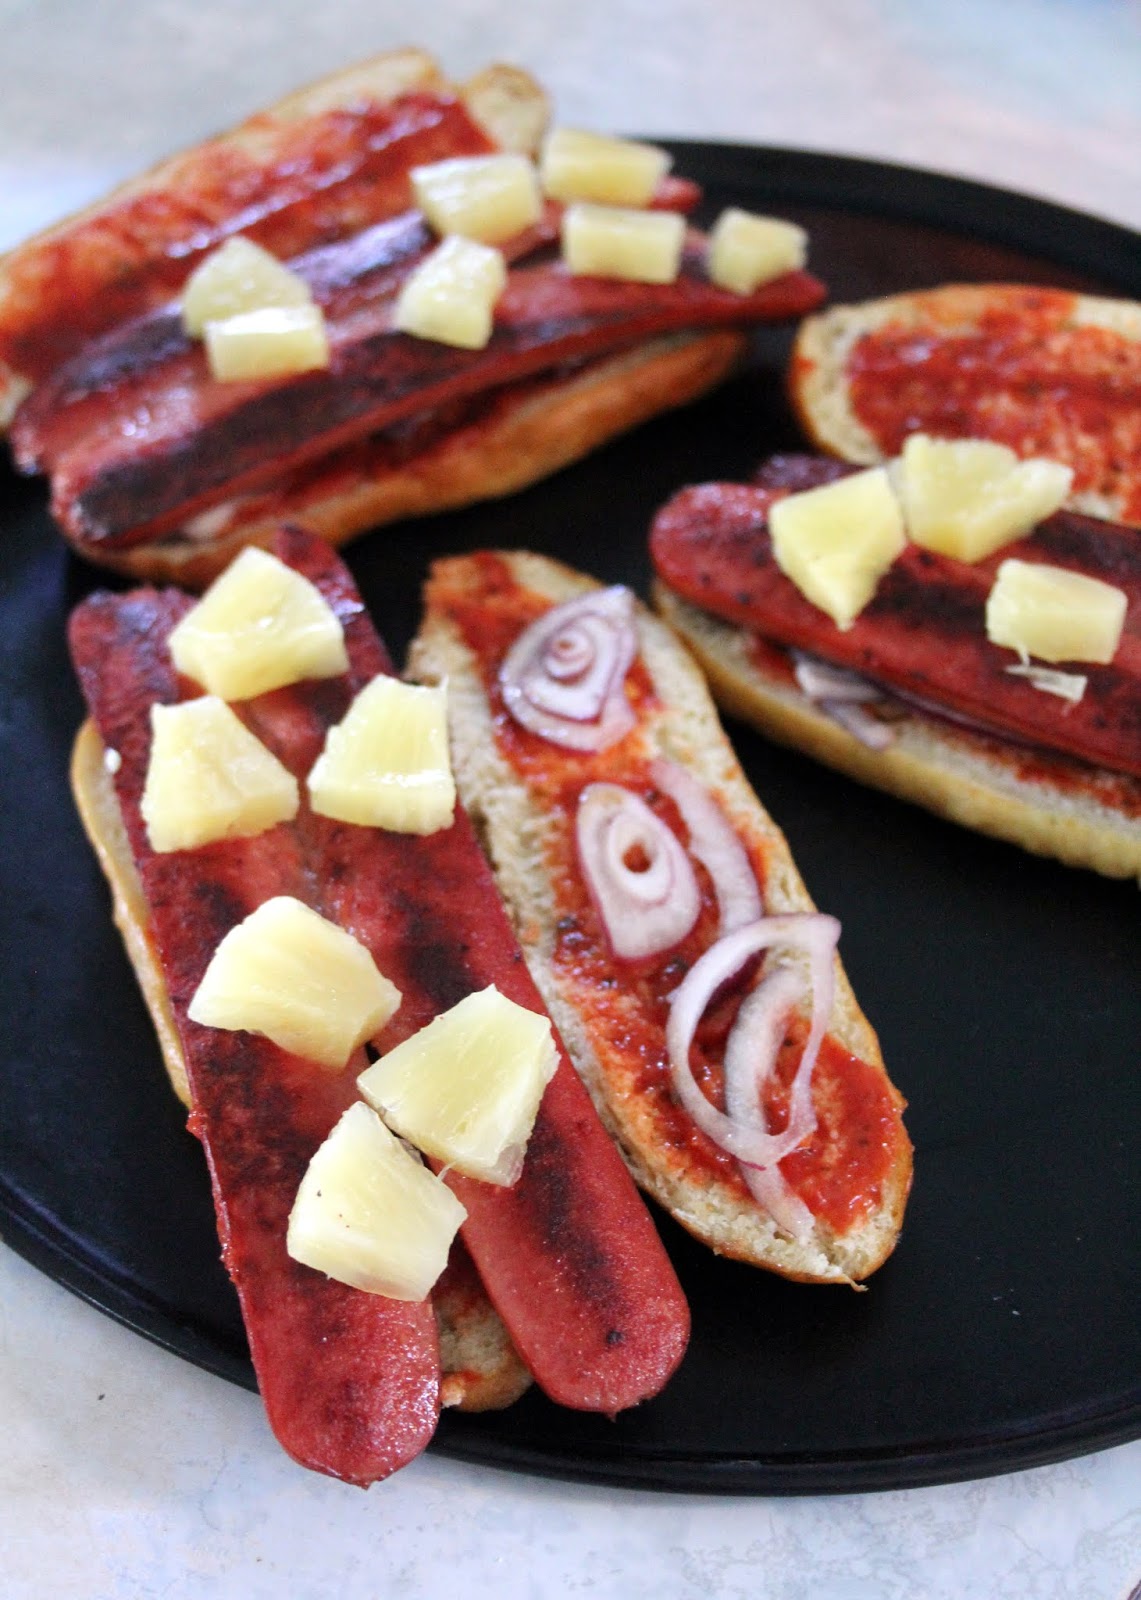
Hawaiian Pizza Dog on Homemade Garlic Pretzel Bun


The last post we did was about Sue's 1st prize winning entry in our weekly Chopped: Quarantine Edition (Pineapple and flour) competition. Check it out HERE. (Korean Inspired Spicy Tacos with Pineapple Salsa and Homemade Tortillas) 
This week I'm sharing my entry, which came in third. I was pretty excited to come in third, we had a lot of fabulous entries for our pineapple and flour competition. Did it deserve a first place finish? Well.... I'm a bit biased so I'm going to say yeeeessssss. But, make it yourself and let me know what you think! Pretzel garlic hot dog buns make hot dogs even better - if that's possible! 
It's like pizza and pretzels and hot dogs had a baby. A delicious, delicious baby.


Hawaiian Pizza Dog on Homemade Garlic Pretzel Bun

Ingredients
Buns
2 cups very warm milk
1/4 cup brown sugar
3 Tbsp honey
4 1/2 tsp active dry yeast
1/4 cup butter
4 cloves garlic, minced
2 tsp dried parsley
2 tsp salt
2 - 5 cups bread flour (or AP)

1 egg, beaten
2 Tbsp coarse sea salt

8 cups water
1/3 cup baking soda

Pizza Dogs
12 large wieners
pizza sauce
onions, sliced
pineapple chunks
mozza cheese

Directions
Prepare buns - In a small bowl, stir together the milk brown sugar, honey, and yeast. Let sit to bloom about 5 - 8 minutes. 
While yeast is blooming, cook the butter, garlic and parsley over medium heat until garlic is softened, about 3 - 5 minutes. Set aside.
Combine the flour, and salt, egg, and cooked butter and garlic. Stir in the bloomed yeast and salt. Add in enough flour to form a stiff dough that is a little sticky but still able to be kneaded. Knead for about 5 minutes, you may have to add a bit more flour to keep it from sticking. 
Place in an oiled bowl, cover with a tea towel, and let rise somewhere warm for 40 minutes. 


After 40 minutes your dough should be doubled in size. 


Punch dough down and cut into 10 to 12 equal pieces. You can weight them to get them exact but I never do. I just guesstimate. :) 


Roll each piece into a 7 inch log. Try to get it smooth, if there are wrinkles then they will show up more prominently when the dough rises. 


Set aside and cover with a tea towel for 30 minutes. 
Preheat oven to 425. Line a cookie sheet with parchment paper. 
Bring the 8 cups of water with the 1/3 cup baking soda to a low boil over medium heat in a large pot. 


Carefully place 2 - 3 rolls into the boiling water for 30 seconds. Carefully flip them over and cook another 30 seconds. Remove from the water with a slotted spoon and place on cookie sheet lined with parchment paper. 


Brush each one with the beaten egg and then sprinkle generously with the coarse sea salt. Cut 3 shallow slices across the top of each bun (not totally necessary but it looks cool). 
Place in 425 oven and cook until deep golden brown, about 10 - 15 minutes. 


Let cool for 10 minutes before removing to wire rack to cool completely. 
FYI - recipe can be doubled easily. 


You can eat as is. May I recommend warm with butter?
Or cut them horizontally for hot dog buns! 


Prepare Hawaiian dogs - Place buns on a cookie tray. Spread the inside of the cut pretzel buns with pizza sauce and top with onions. 
Cook the wieners to your desired level of doneness! Place a wiener on each bun. Top with pineapple chunks. 


Lay the mozza cheese slices on top and pop them in the oven under the broiler to melt the cheese. 


Serve hot!


You can add more toppings if you prefer. I like to keep it simple. Lots of pineapple and mozza! 


Want to jazz up your next hot dog meal? This is how to do it! You can make the buns ahead of time and freeze them. The salt on top will look a little funky when you thaw them but it won't affect the taste! Use the buns for subs, sandwiches, hot dogs, even grilled cheese. You can leave the garlic out if you like but it definitely makes the buns more flavorable. 

Tuesday, July 31, 2018

Thai Inspired Sliders


Before this month I had never tried Thai food. 
Is that weird? I feel like that might be weird. I mean.... I'm all about food so why wouldn't I have tried all the food from everywhere? Okay. So I haven't tried ALL the food yet but I'm slowly getting there. I'm a trooper like that. No need to thank me. 
Although you might want to thank me after trying this burger. I love that is has subtle hints of Thai flavors and is so different than the usual summer burgers. 
It was inspired by the flavors in our Thai Dinner we had earlier this month. (Click HERE to see those recipes!) I fell in love with the Peanut Sauce (Recipe HERE) I made to go with our chicken satay. I wanted to come up with another recipe that I could use the sauce with. It totally elevates these sliders from "average" to "whaaaaaaaaaaaaat the heck is this I want to marry it". 
Not even lying. 


Thai Inspired Sliders

Ingredients
Peanut Sauce
1/2 cup chicken broth
2 1/2 Tbsp peanut butter
1/2 Tbsp honey
1/2 Tbsp soy sauce
1 tsp fish sauce
1 tsp sriracha
1/2 tsp ginger paste (or minced)
1 clove garlic, minced
1/2 Tbsp lime juice

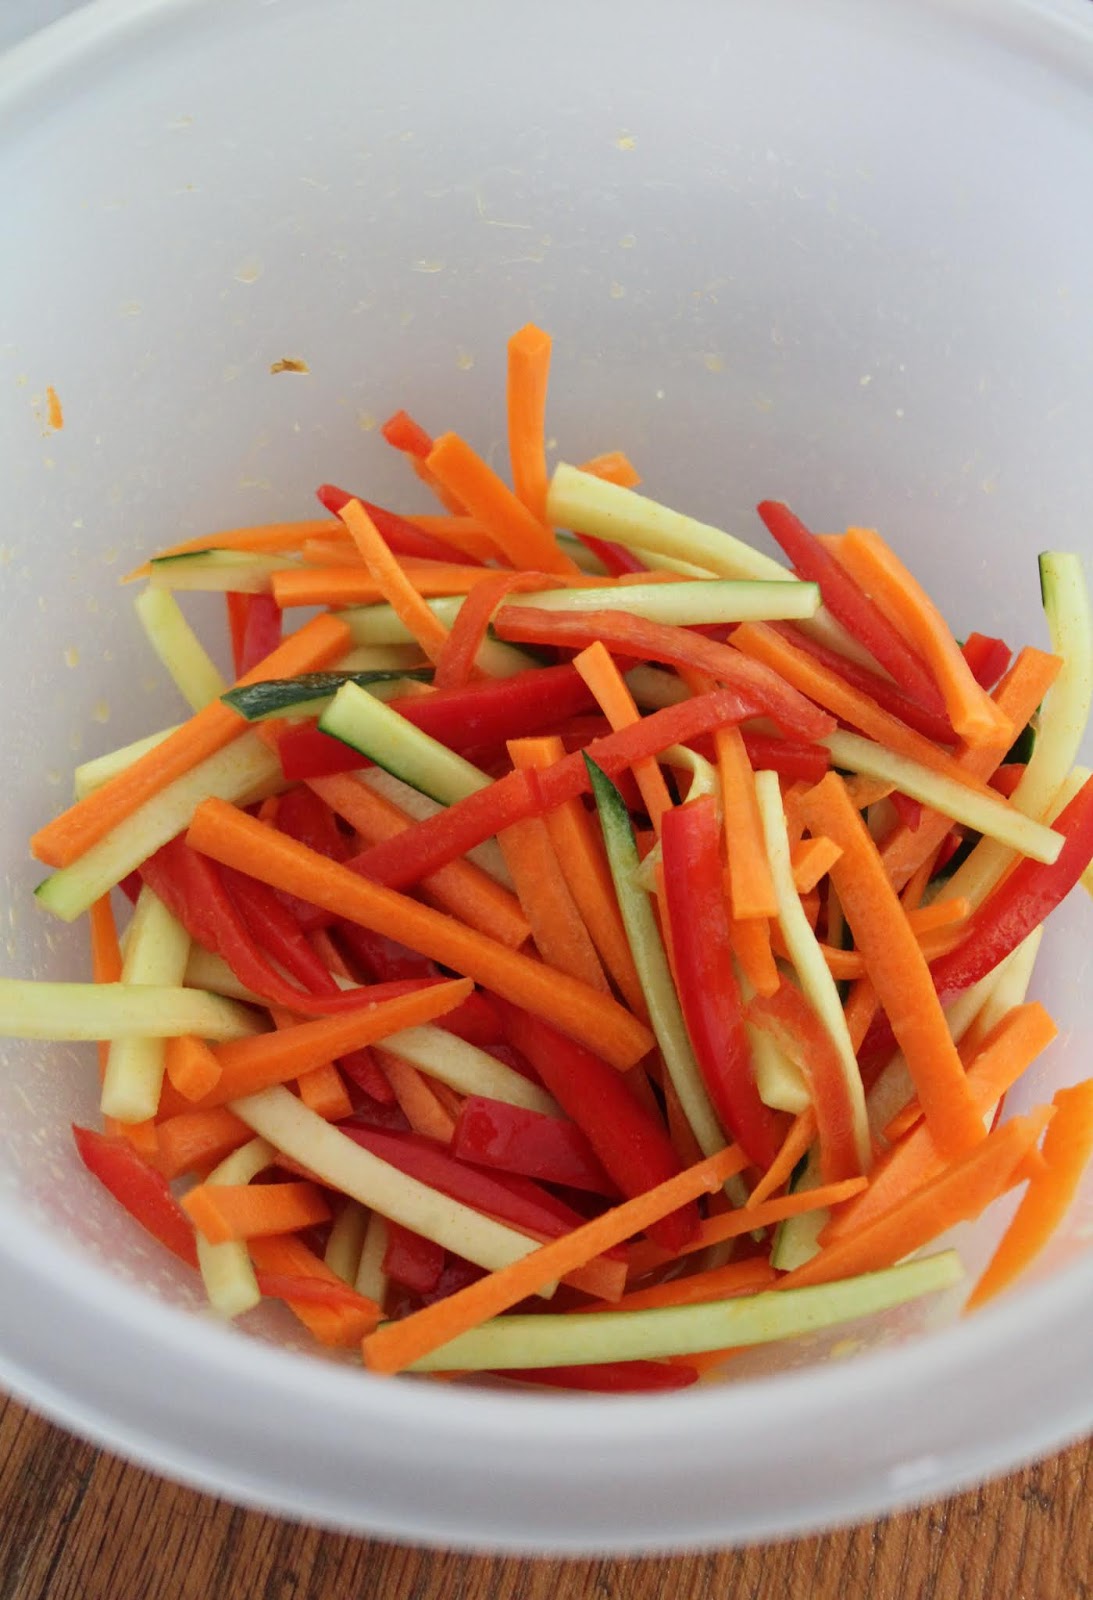
Pickled Vegetables
1 red pepper, julienned
1/2 cucumber, julienned
1 carrot, julienned
1 Tbsp sugar
1 tsp salt
3 Tbsp cider vinegar
1 Tbsp water
1/4 tsp ginger paste (or minced)
1/2 tsp ground turmeric

Slider Patties
1 lb lean ground pork
1 lb lean ground beef
1 Tbsp fish sauce
1 Tbsp chili paste
1 Tbsp soy sauce
3 tbsp bread crumbs
1/4 cup red onion, finely diced
1/4 cup cilantro, finely chopped
1/2 tsp ginger paste (or minced)
salt & pepper

Also Need
16 mini dinner roll buns
lime wedges
cilantro

Directions
Prepare Peanut Sauce - Mix all ingredients EXCEPT lime juice in a saucepan. Bring to a boil over medium heat, reduce heat to low, and simmer for 6 minutes, stirring constantly. 
Remove from heat and stir in lime juice. Let cool completely. (Can be made ahead of time and kept in fridge, covered, for several days.)


Prepare Pickled Vegetables - julienne your veggies.


In a bowl, whisk together sugar, salt, cider vinegar, water, ginger, and turmeric. Add vegetables and toss gently. 


Refrigerate at least 4 hours, stirring every so often to evenly marinate. Can be made a day ahead. 
Prepare Slider Patties - In a mixing bowl, combine the slider ingredients.


I like to start mixing with a wooden spoon and then use my hands to really make sure everything is combined. Form into 16 patties - I use a round cookie cutter to help shape my patties. I place the cookie cutter on a work surface and then press 1/16th of the meat into it with my fingers.
You can weigh them on a kitchen scale to make sure they are all equal but I never do - I just go by look and feel to make sure they are close to being the same.  


You can cover and chill the patties for up to a day ahead of time.... or go ahead and cook now. 
NOTE - I usually make all 3 recipes first thing in the morning so when dinner time is near all I have to do is cook the burgers. No muss, no fuss. It's great if you are having guests. 
I cook my slider patties in a frying pan until the meat is cooked all the way through. You could also bake them in the oven or on the BBQ. 
Serving the Thai Inspired Sliders - spread a generous amount of the peanut sauce on the top and bottom bun. Top with a cooked slider patty and then a generous amount of the pickled veggies. 
If desired you can sprinkle with drizzle of lime juice and extra cilantro. 


I don't want to sound like a weirdo... wait, that's not necessarily true... being weird is awesome.... but this is a flavor and texture adventure. Combining pork and beef gives these a little somethin' somethin' more than just using beef. Then throwing the crunchy, tangy vegetables on top and the spicy kick of the peanut sauce has your tastes buds wondering just what the heck is happening. 


If you have someone in your house that is a picky eater - mom I'm looking in your direction - then you can leave off the peanut sauce and pickled veggies and just put BBQ sauce or mustard and ketchup (the normal stuff) on top of your bun. *Sigh* It makes me sad, but it can be done.


I cooked half of these for dinner one night and then froze the leftover sliders - uncooked - for a later date. In an airtight container or bag they will last a couple of months in the freezer. Then simply thaw overnight in the fridge and cook. You can make more veggies and peanut sauce when you are ready to cook the burgers. 
If you are looking for something different to try, give these a go. You won't regret it!