Showing posts with label single serving. Show all posts

Wednesday, July 5, 2023

Coconut Banana Cream Pie For Two


I tell you, sometimes you just need some banana coconut cream pie. Like *NEED*. 
I came up with this recipe after a craving hit me one afternoon. I didn’t want to make a whole pie (because I would eat a whole pie). I just wanted enough for mom and I to share for dessert. You could probably get 3 or 4 smaller servings out of this but…. We did 2. #ILovePie 
I think it was about 15-20 minutes to whip this up….plus about 2 hours of cooling time. You probably have all the ingredients in your kitchen right now, nothing fancy schmancy required! 

Coconut Banana Cream Pie For Two 

Ingredients
Crust
2/3 cup graham cracker crumbs
2 Tbsp brown sugar
2 Tbsp butter, melted

Filling
3 Tbsp sugar
1  1/2 Tbsp  cornstarch
Pinch salt
1 cup heavy cream (or half and half will work)
1 egg yolk
1 tsp vanilla
1/2 tsp coconut extract
1/2 Tbsp butter
1/2 cup toasted coconut
1/2 banana, sliced

Topping
1/2 cup whipping cream
1/2 tsp vanilla
1-2 Tbsp sugar

Directions
Preheat oven (or toaster oven) to 350. 
Prepare crust - mix graham crumbs, brown sugar, and butter. Press into bottom and up the sides of 2 - 5 inch containers. Bake at 350 for about 8-10 minutes, until lightly browned. Remove from oven and set on counter while you prepare filling.
Prepare filling - Stir together sugar, cornstarch, and salt in a small pan. Slowly whisk in heavy cream until we’ll mixed. Set over medium heat and cook, stirring constantly, until steaming. 
In a small bowl, whisk egg yolk. Slowly, about 1 Tbsp at a time, whisk in the steaming cream mixture to temper the eggs. Don’t mix it in too quickly or you will scramble the egg!
When all mixed, place back in pan, over medium heat and cook, stirring constantly, about 1-2 minutes, until thickened. Remove from heat and stir in vanilla, coconut extract, and butter. Stir until combined. Stir in the toasted coconut. 
Place sliced banana pieces into the two graham cracker crusts. Pour the cream filling evenly into the two pans. Set in fridge and cool completely. 


Prepare topping - whip cream with vanilla and sugar to stiff peaks. Spread half of cream on each cooled pie. 


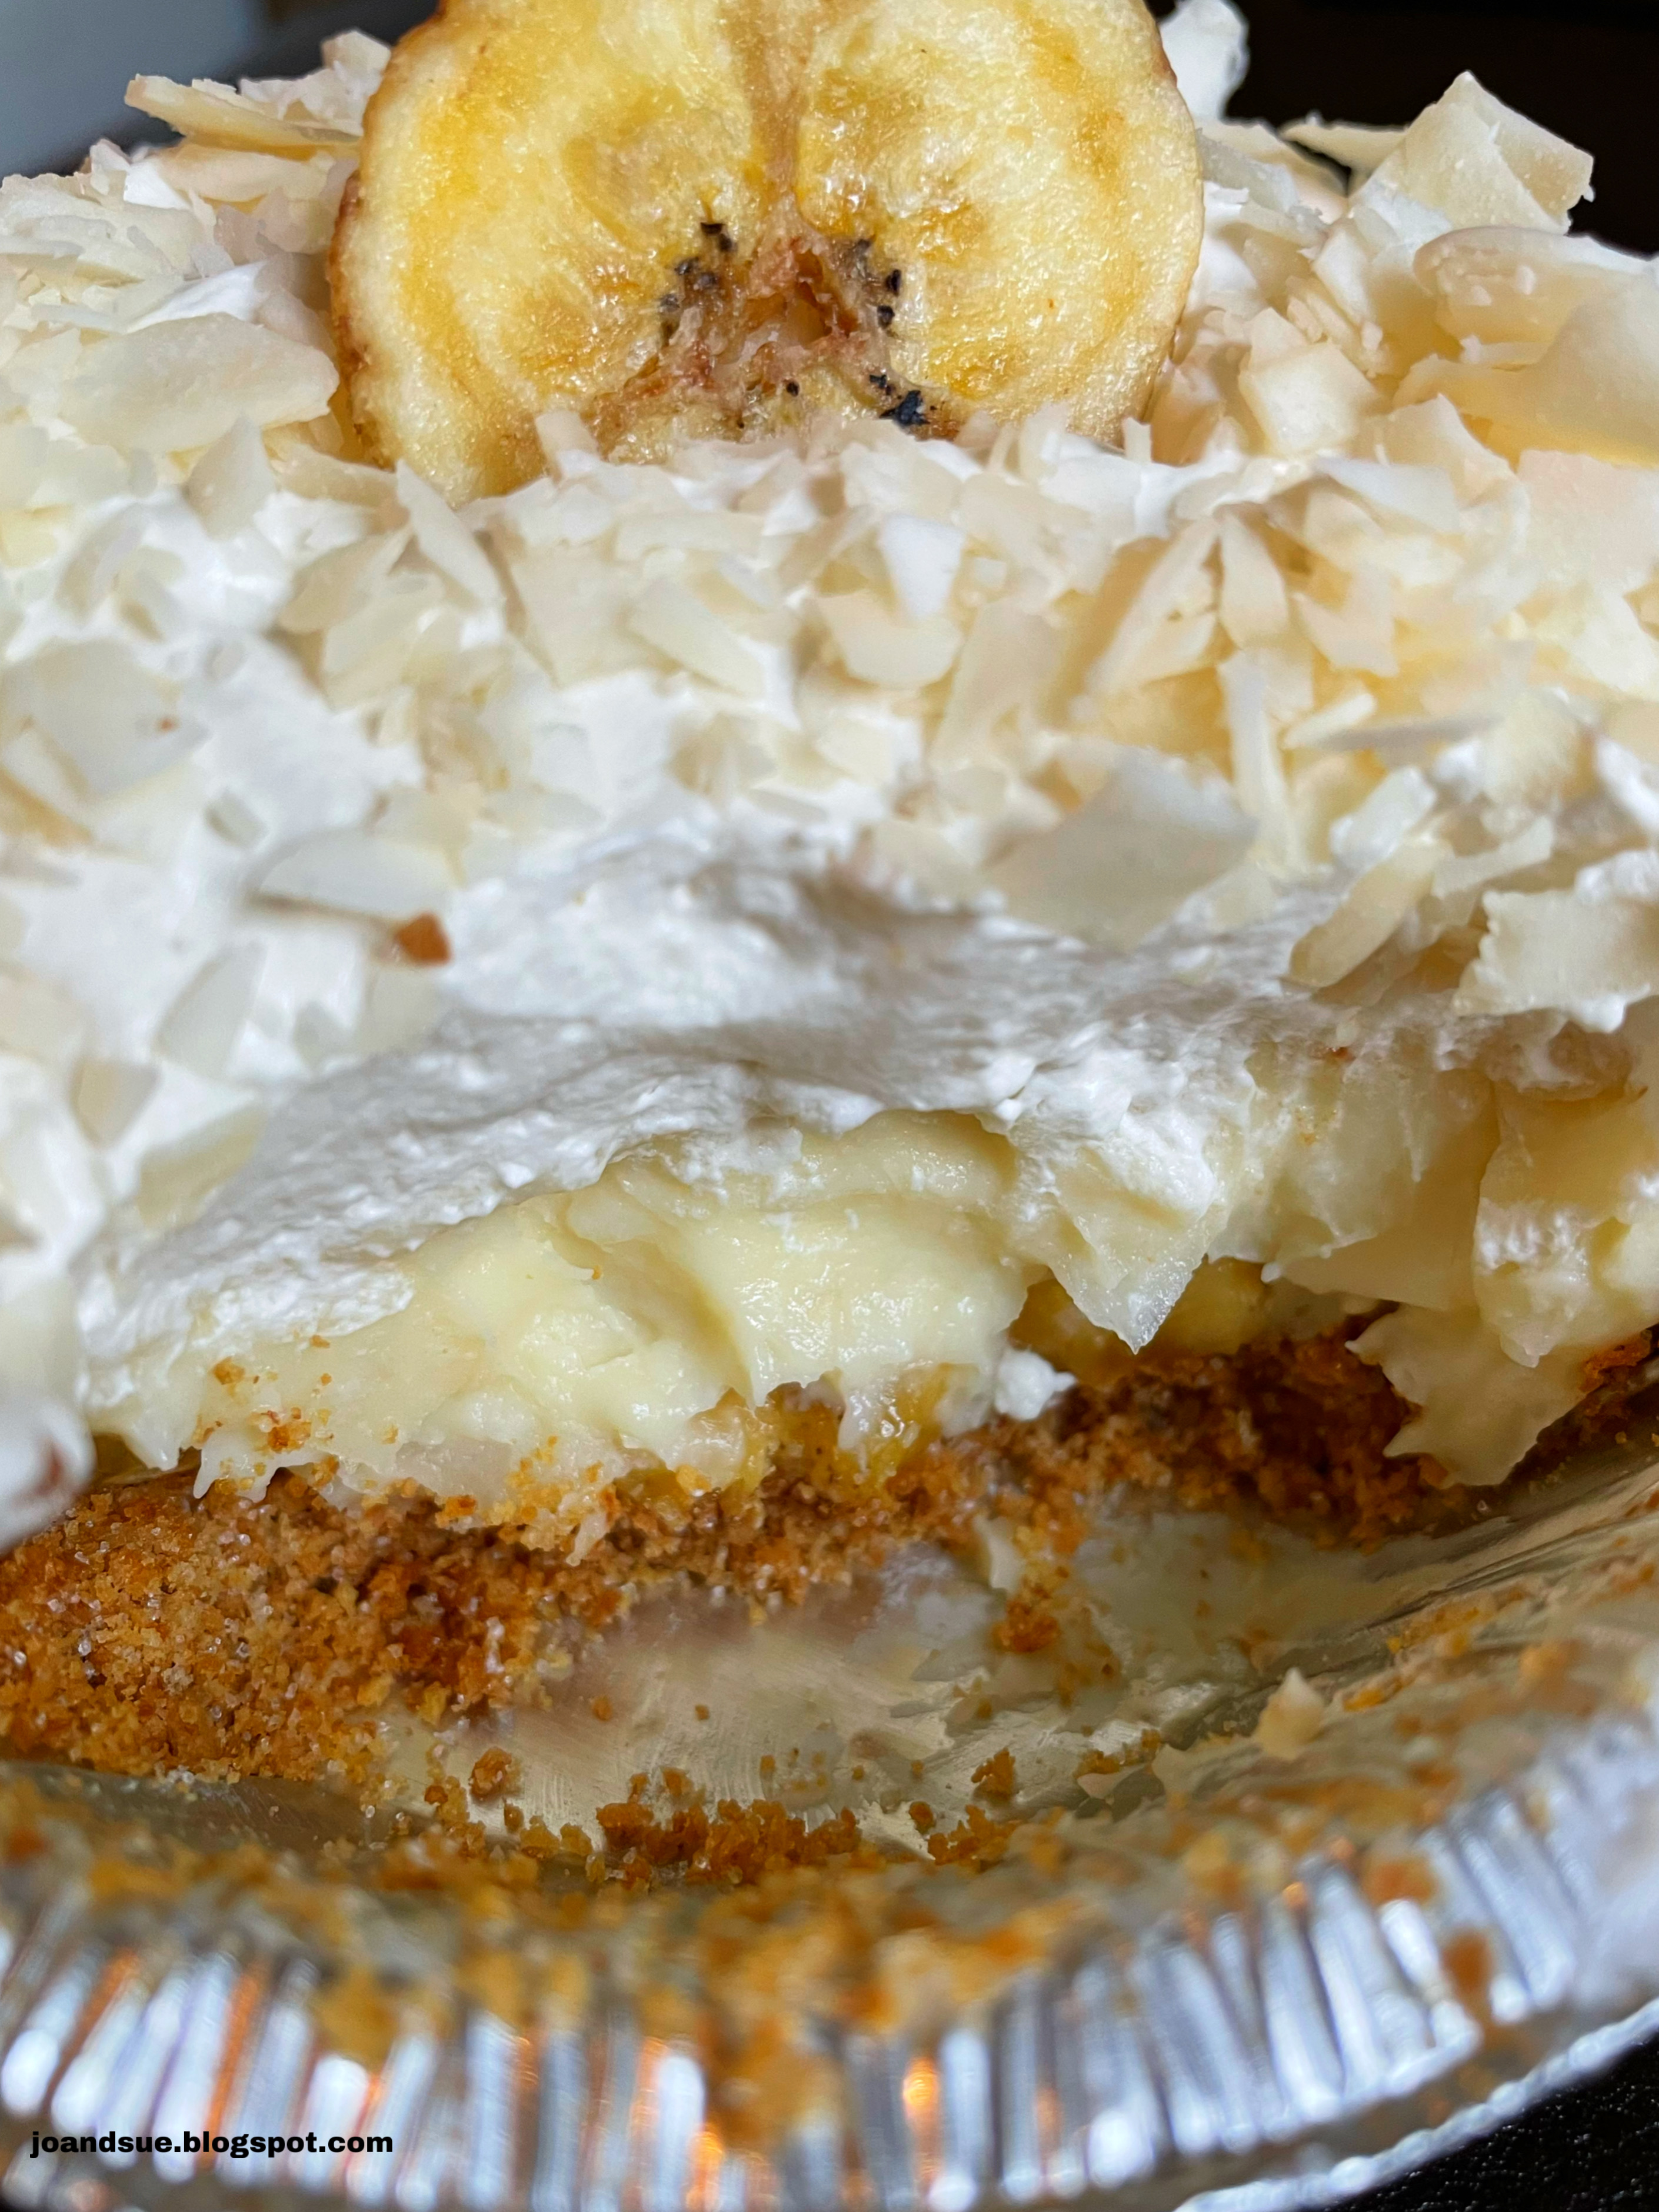
Chill until ready to eat. Optional but you can sprinkle with a little more coconut and a slice of banana to fancy it up a bit. 


When I say that this hit the spot…. I mean…*jazz hands*…it hit the spot! 


Leave out the banana if you want a classic coconut cream pie. Add more bananas and leave the coconut out if you want a banana cream pie. Personally I like both in there. 
I count this as “for two” but the servings are very generous. You could make it in mini cupcake tins and probably get around 6? maybe… let us know if you give it a try. 
I’m cool with eating a big ol’ piece of pie so I’m still counting it as 2. 


Wednesday, February 15, 2023

Keto Chocolate Mug Cake


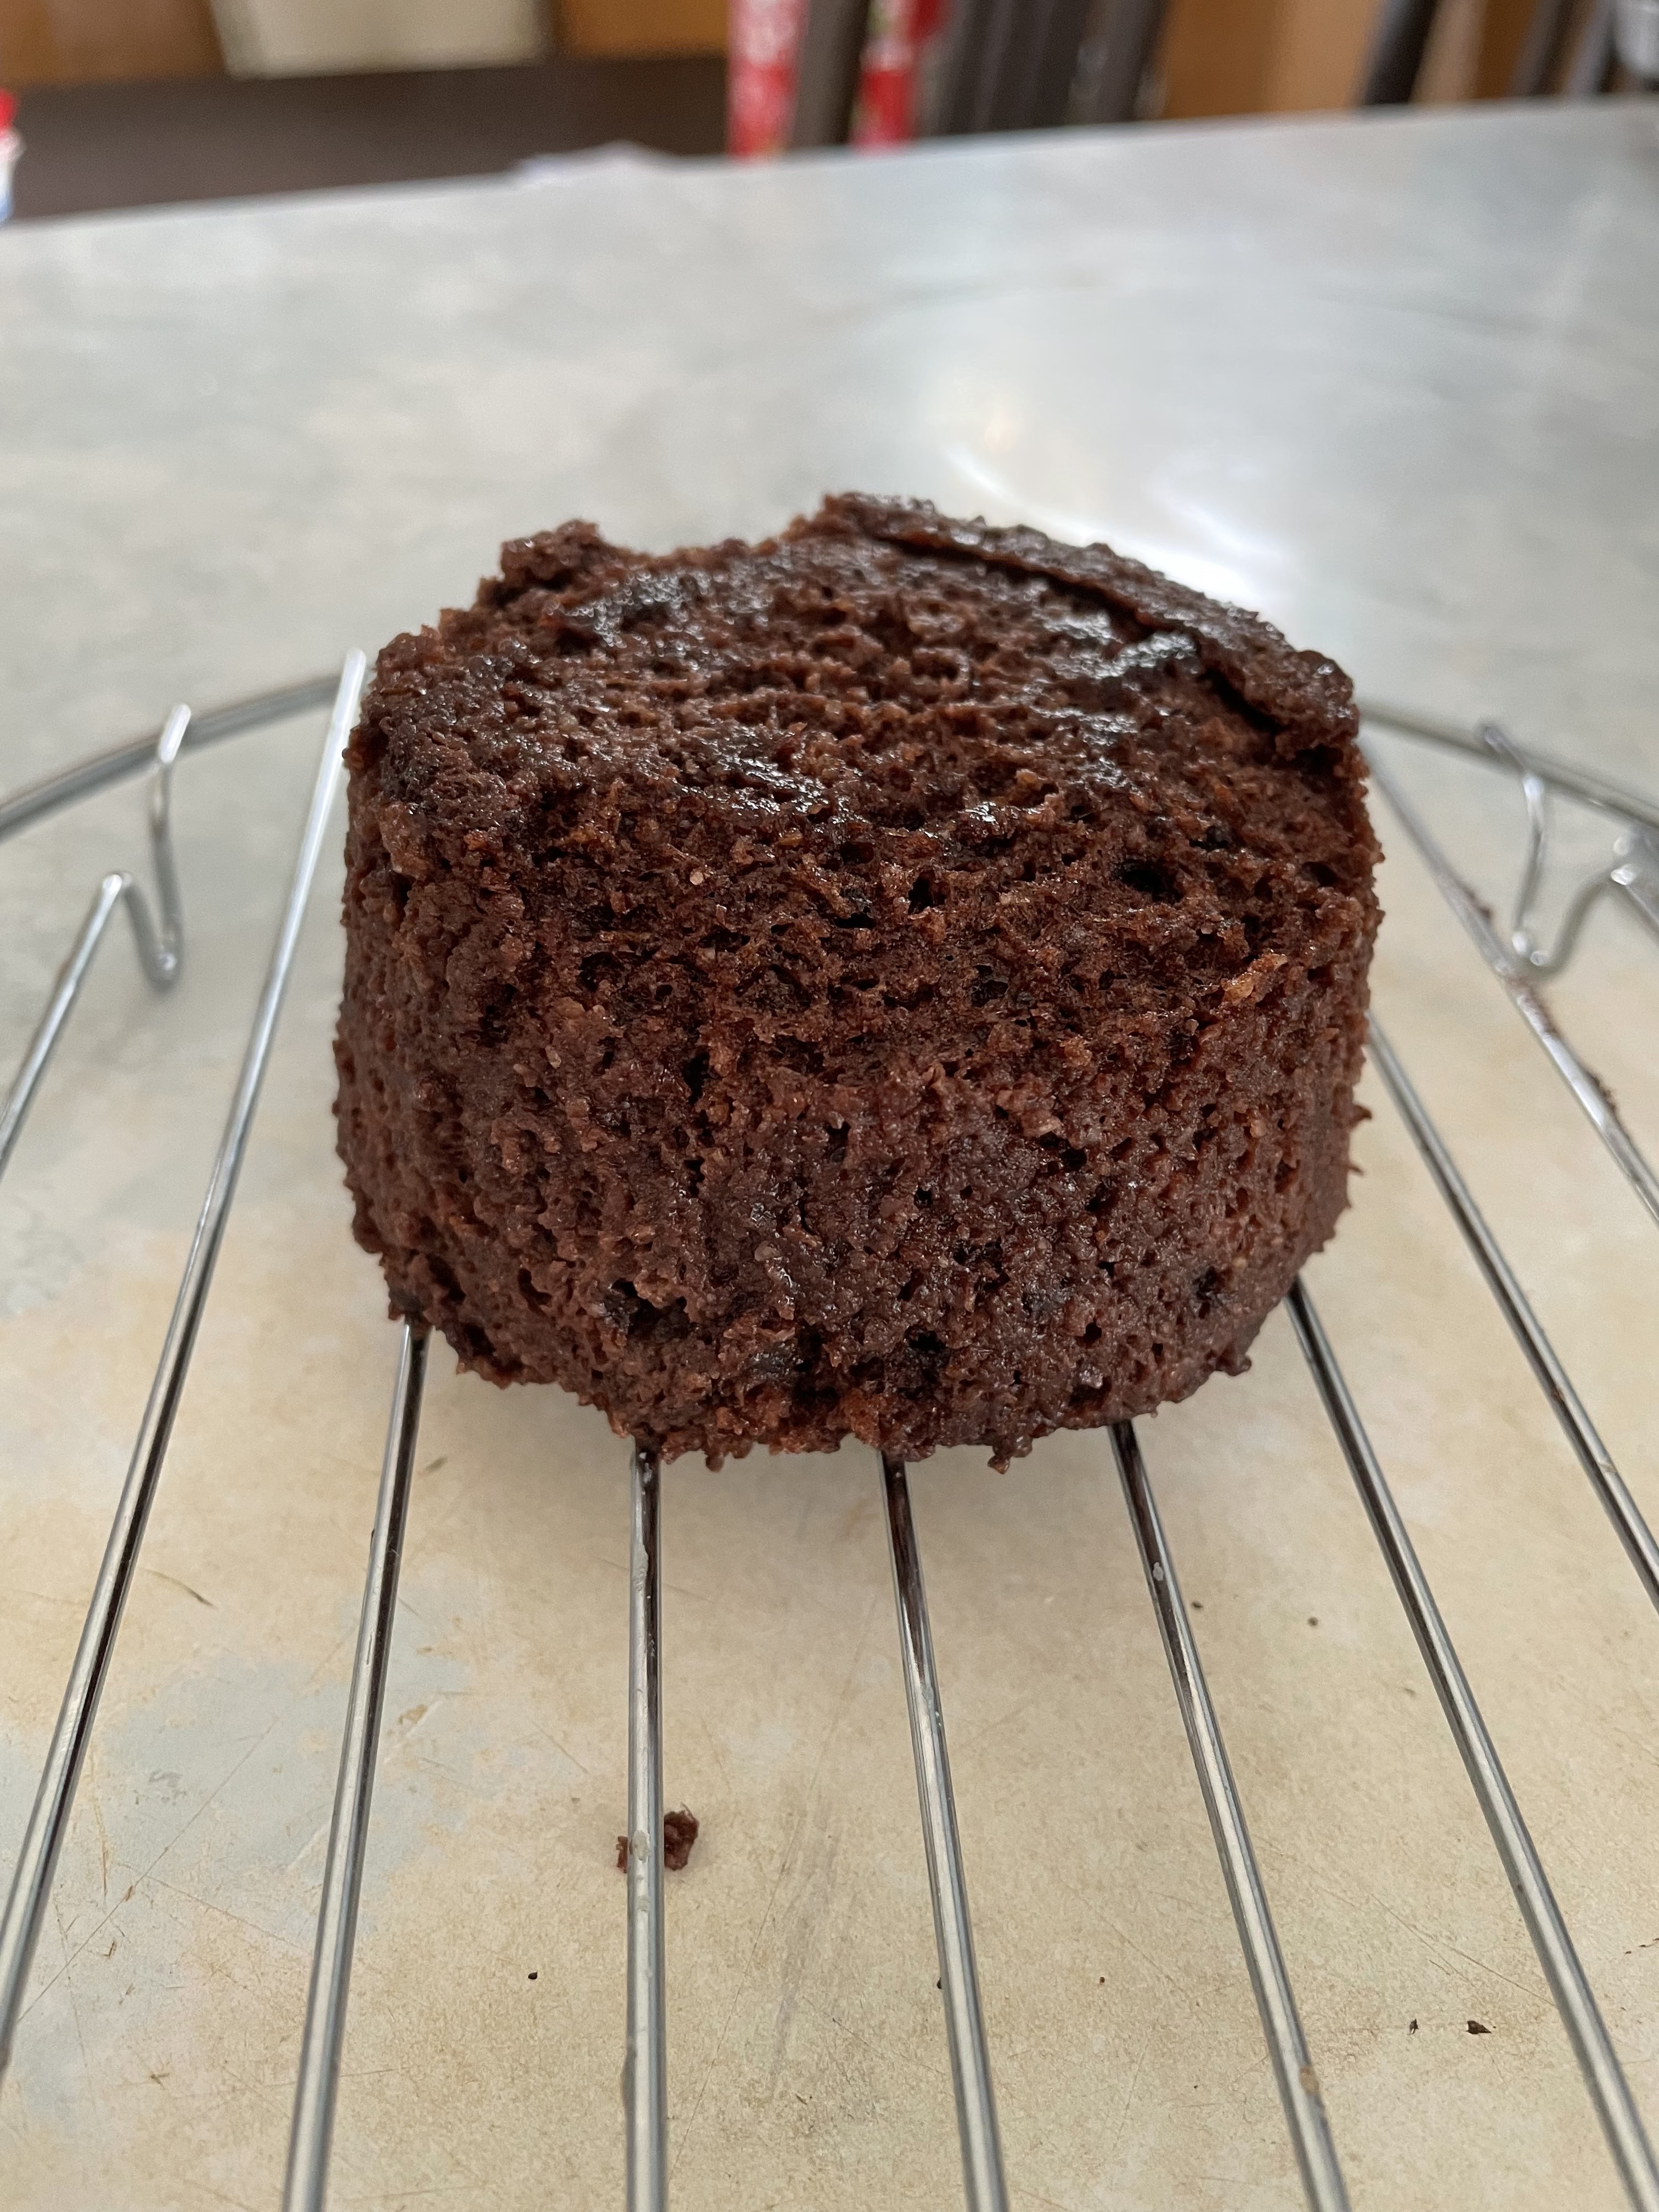
This keto mug cake can be whipped up in about 15 minutes. Seriously. From start to completely finished in a ridiculously short amount of time.
I’ve been following keto eating for a long time and when the need for a sweet indulgence hits, trust me, this comes in super handy! According to MyFitnessPal, the nutritional counts are: 
Without frosting - 306 calories, 27 fat, 8.7 carbs, 4.3 fiber, 12 protein
And
With frosting and chocolate candy - 520 calories, 45 fat, 10.2 carbs, 4.3 fiber, 13.6 protein.
Mug cakes can be tricky to cook so I always start with a lower time, check it, then add more time if needed. If you start off with too much time you might overcook your cake! 


Keto Chocolate Mug Cake

Ingredients
1 Tbsp butter
2 Tbsp Swerve granulated
3 Tbsp almond flour
1 Tbsp unsweetened baking cocoa 
1/2 tsp baking powder
1/8 tsp instant coffee granules
Splash of vanilla
1 egg, beaten

Frosting
1/3 cup whipping cream
1 Tbsp no sugar chocolate pudding mix 
1 no sugar Russell Stover chocolate, chopped

Directions
Melt butter in ramekin or coffee mug in microwave (about 15 seconds should do it). 


Stir in Swerve, almond flour, cocoa powder, baking powder, instant coffee, vanilla, and egg. Stir very well.


Microwave 60 seconds and check if done. Toothpick should come out clean. If not done, microwave in 20 second increments until cooked through. I found for my microwave I do 1 minute, check, then 30 more seconds and it’s perfect. 


Let cool 5 minutes before running a knife around the edge and inverting onto wire rack. 


Pop cake into freezer while you prepare the frosting (or enjoy warm without frosting!) 
Prepare frosting - beat whipping cream with sugar free pudding mix until stiff. This only takes a minute or two. 
Frost cooled cake.


Sprinkle crushed sugar free chocolate on top. 


Enjoy now or refrigerate until ready to serve.


There are 2 cakes in these photos because this recipe is also super easy to double. 
I make 2 batters up at the same time but cook them individually as cooking both at the same time changes the microwave cooking time. If you do both at once, start at 1:00 minute and check every 20-30 seconds until done. FYI - the icing amount listed here will cover both cakes albeit thinner. If you want to cut a few calories then don’t double the icing. 😊 


A prefect keto friendly Valentine’s treat for you and your partner! 
Also note - make sure your batter doesn’t go more then halfway up the side of your baking container. In the microwave it bubbles up and if your container is overfilled it will make a mess! 
You can also bake these at 350 if you don’t want to microwave them. I would start checking at about 12 minutes for done-ness. 


Wednesday, April 15, 2020

Masala French Toast (Savory French Toast)


I don't know why I have never thought to attempt a savory french toast until now. I know "regular" French toast is delicious and doesn't really need any improving BUT making it savory is just brilliant. 
This version is a popular Indian toast that I discovered while searching Pinterest for some ideas. Sue and I have been running a "Chopped" style contest for everyone on Facebook while we are all self isolating and the ingredients for one particular challenge were eggs and carrots. 
I took inspiration from several recipes and came up with this version here. It only takes about 2 minutes to whip up and would be great for breakfast, lunch, or dinner. 
While I didn't win our Chopped: Quarantine Edition with this recipe, I have added it to my weekly rotation as it is totally addicting. Serve it with some raita for an extra special treat! (Our Raita recipe can be found HERE but there are tons of simpler ones out there if you Google them!)


Masala French Toast

Ingredients
2 eggs
2 Tbsp finely diced onion
3 Tbsp shredded carrot
1 clove garlic, minced
pinch curry powder
pinch coriander
1/4 tsp cumin
2 Tbsp flour
pinch salt & pepper
2 - 3 slices of bread
1 - 2 Tbsp butter for frying

Directions
In a small bowl, whisk together the egg, onion, carrot, spices, and flour. 


Heat a frying pan over medium (to medium low) heat and melt the butter in it. Place your slices of bread in the pan and top evenly with half of the mixture, spreading it over the entire surface. Carefully flip the bread over and top the other side with the remaining mixture. Spread it evenly over the bread. 


Cook for about 3 - 5 minutes, until golden, and then flip the bread over and continue to cook the other side for another 3 - 4 minutes. 


Serve immediately. You can sprinkle a little cilantro on top, if desired. 
Or serve with a dollop of raita. 


I can't decide if I like sweet French toast better or savory. They are both equally delicious. I find that French toast works best with a grainy or seedy bread... but that is a personal preference. This will cover 2 larger pieces of bread or 3 smaller. It is super easy to double or tripe if you are making it for more than one person. I count this as one serving! 

Wednesday, January 29, 2020

Hearty Brunch Bowls


We decided to call these hearty brunch bowls but they work equally as well for breakfast, lunch, or dinner. Potatoes, bacon, and eggs are pretty much the trifecta of deliciousness. 
The Little Potato Company ran a recipe contest where they were looking for 30 minute meals using their little potatoes. I entered this recipe (didn't win but it's still fabulous). This recipe only takes about 15 - 20 minutes from start to finish. I'm all about quick, easy, inexpensive, and delicious meals. 
This recipe is for 1 serving but can easily be sized up for more people. 


Hearty Brunch Bowls

Ingredients
Sauce
1 Tbsp BBQ sauce
1 Tbsp honey
1 Tbsp prepared mustard
1 tsp lemon juice
2 Tbsp mayo

Bowl
(note - if you can't find Little Potato Company potatoes just use new potatoes)
2 pieces of bacon
1/4 cup green onions
1/4 cup smoked cheddar
1 egg
salt & pepper

Directions
Prepare sauce - whisk together BBQ sauce, honey, mustard, lemon juice, and mayo. Set aside. This can be made up to a few days ahead of time, if desired. 
Quarter enough potatoes to fill a serving bowl (you can also use a plate but a bowl is more fun, just sayin'). Place in a microwave safe container and microwave the potatoes for 5 minutes. 
While the potatoes are in the microwave, chop 2 pieces of bacon and cook in frying pan until crispy. Chop the green onions and shred the cheese. 
When potatoes come out of the microwave, place on a cookie sheet lined with parchment paper. 


Top with the cooked bacon, green onions, and cheese. 


Broil in the oven just long enough to melt the cheese. 


While the potatoes are broiling, in the pan you cooked the bacon in, fry up an egg. I like to leave it sunny side up so the yolk can break and add a bit more sauciness. 
Assemble your bowl - Place your cheesy potatoes in a serving bowl. Drizzle as much sauce as you would like over the potatoes. 


Top with the fried egg. Add salt & pepper to taste. 


Dig in!


So fast and easy and tasty! 
I like to make up a good sized batch of the sauce as it goes really well with so many other things! (Burgers, chicken, fries, etc...) 
I might not have won the recipe contest but I did find a great go-to meal for when I am super busy and just don't have time to do any prep. Little Potato Company potatoes work great for quick meals like this one, but if you can't find them near you I would suggest using new potatoes or fingerling potatoes - they should work just as well! 

Sunday, January 19, 2020

Keto Chaffles


If you've been following a keto eating plan for any length of time you have most likely heard of chaffles. The magic 2 ingredient dish that can sub for bread, waffles, tacos, pizza base, and the list goes on. Of course, there are a million variations of a chaffle but I prefer the simple, 2 ingredient version that takes about 2 seconds to make. 
If you are new to keto then you will want to invest in a mini waffle maker (I use a Dash Mini Waffle Maker) - just Google them, they are everywhere and go from about $10.00 to $30.00 depending on what you are looking for. You will use it, I promise. 
You can add 1 Tbsp of almond flour and 1/4 tsp baking powder for a fluffier chaffle but this will affect the carb count. You can also add sweetener and cocoa powder for a kind-of chocolate cake dessert. 
Chaffles have become a staple in my keto journey and once you give them a try you will see why! 


Keto Chaffles

Ingredients
1 egg
1/2 cup shredded mozzarella cheese

Directions
Whisk together the egg and cheese.


Scoop half onto your heated mini waffle maker. 


Close lid and cook for 4 minutes - or until cooked to your preferred level of darkness. Repeat with remaining half of mixture. 


Recipe above is 1 serving (2 waffles) and, according to MyFitnessPal, is 252 calories, 16.8 fat, 2.4 carbs, 0 fiber, and 20.3 protein (2.4 net carbs). This will vary according to size of egg and brand of cheese so be sure to enter into your own nutritional counter to be exact.) 


If you are eating them as waffles then top with sugar free syrup, berries and whipped cream, peanut butter, or whatever your favorite keto topping is. 


The waffles made with this recipe can be used as a bun for a burger, a taco, a base for pizza, anywhere you want to use bread. You can use any kind of cheese you like: cheddar, marbled, jalapeno jack, etc... I find the mozza is the mildest flavor and best to use if you want a "plain" flavor. 
Double, triple, quadruple the recipe if desired. Make the waffles up and freeze them - they freeze and thaw very well. (I pop them in the microwave for about 20 seconds and then the toaster on low and they are perfect.) 
I will update with more photos of dishes I have made with them as I go! 

EDIT: By folding the chaffles gently in half and letting them cool you can make keto soft tacos!


Hint: use jalapeno jack cheese for a little bit of spice in the chaffle tacos. Chacos? 


Second EDIT - Breakfast sammie anyone?


Sausage and egger on chaffles will cure any breakfast sandwich cravings you are having without all the carbs!! 

Monday, April 1, 2019

Appletini


Sue and I do not have a lot of posts about beverages on our blog. I'm not sure why. We love creating fancy cocktails for ladies nights and game nights and hot summer days sitting out under the stars. 
We decided we had better start taking more photos and documenting our drink recipes before we forget which ones we have tried. 
The Appletini is now number one on my favorite cocktails list. It's perfect for just about any occasion, it's sweet and refreshing and pairs well a charcuterie board or BBQ or popcorn and snacks. 
It's also ridiculously simple to make. 
We still have to share Sue's famous Lemon Drop Martini so stay tuned for that one. I can't believe we haven't shared it yet. In the meantime... enjoy a thirst-quenching Appletini!


Appletini

Ingredients
Sour Mix
3/4 cup sugar
1 cup water
1 cup fresh lemon juice
1 cup fresh lime juice

Martini
1/2 cup apple juice
1/2 cup Apple Vodka 
1/4 cup of the sour mix 

Extras
ice
sliced green apple

Directions
Prepare the Sour Mix - Place sugar and water in a medium saucepan over medium heat. Stir to dissolve. Bring to a boil, reduce heat, and simmer for 5 minutes. Stir in the lemon and lime juice. Set aside to cool down. Place in fridge to chill. Note - This can be made a few days ahead of time and kept, covered, in fridge. 
Prepare the Appletini - In a shaker half filled with ice, pour 1/2 cup of apple juice, 1/2 cup of apple vodka, and 1/4 cup of the chilled sour mix. Shake well. Pour into a martini glass and serve with a thin wedge of apple.


The recipe, as written here, makes 2 Appletinis with lots of sour mix leftover. You can very easily double, triple, or quadruple the recipe as needed. 


I am not usually a big drinker but I do enjoy a fancy cocktail every once in a while. This one.... this one is soooooo good. I can see myself enjoying a few of them over the summer. 
If you find them too sweet it helps to serve them over ice. It cuts the sweetness down a bit. 
*Always drink responsibly*

Monday, June 19, 2017

Cauliflower Broccoli Pancakes with Fried Egg


For the last 8 days I have been on the Wild Rose Detox/Cleanse. I have been struggling with breakfast ideas that are "cleanse approved" until I decided to use up some veggies I had in the fridge. I decided to try a very simplified version of our cauliflower crust pizza (that recipe HERE). 
Turns out this was a brilliant idea (if I do say so myself). 
The recipe for the "pancakes" is only 3 ingredients then there is only 3 more ingredients for the toppings. How easy is that? 
According to MyFitnessPal, one serving (recipe makes 1) is: 214 calories, 14 carbs, 10 fat, 17 protein, and 4 fiber. Even if you aren't following the Wild Rose Detox/Cleanse (website here for more info), this is a great recipe for a healthy, hearty, delicious breakfast. Nutritional info includes pancakes and toppings.
If you are interested in hearing about my experience with the cleanse then be sure to check back. I will do a more extensive post with what I thought after I have finished the cleanse. 


Cauliflower Broccoli Pancakes (with Fried Egg)

Ingredients
Pancakes
1 cup grated cauliflower, raw
1/2 cup cooked, finely chopped broccoli
1 egg

Toppings
1/4 cup sliced onions
fried egg
1/2 tsp garlic powder
salt & pepper

Directions
In a medium mixing bowl, stir together the cauliflower, broccoli, and egg until well combined. 
Heat a frying pan over medium/low heat. Scoop half of the cauliflower broccoli mixture into the pan and press into a circle about 1/4 to 1/2 inch thick. 


Let cook until firm - don't rush it!! I believe it took about 8 minutes on the first side. (I just kept gently trying to lift the edges with a flipper until it felt solid enough to turn over). Gently turn over and cook the other side for about the same amount of time. You want the heat fairly low so the outside doesn't burn and leave the inside mushy. 


When done, move to a plate and keep warm while you prepare the second pancake.

While second pancake is cooking, in a second frying pan, fry the onions and the egg over medium heat until they reach desired level of done-ness. I started the onions frying, when they were turning translucent I pushed them to one side and cracked the egg in. 
To serve: Place second pancake on serving plate with the first. Sprinkle with a little garlic powder and salt & pepper. 
Place fried egg on top and then the onions. Season with a little more salt and pepper, if desired. 


Serve immediately. 


I added a little bell pepper to my plate as the calorie count on these was so low. 


You can leave out the broccoli if you like and these will still work just fine. I just happened to have leftover broccoli to use up and wanted to add a little color. These are definitely best served as soon as they are made. They do not reheat well as they they don't maintain their crispness (read: they get soggy). 
I really liked this and will be adding it to my breakfast rotation. The only thing I will note that makes these tricky is trying to flip them. DO NOT rush it. Let them cook for as long as it takes!! You can cover the pan with a lid for a few minutes to help hold in the heat and cook better if you find the bottom is getting too dark and the pancake isn't cooking through. 

Pop over to Carole's Chatter for more food links.