Showing posts with label pie. Show all posts

Wednesday, July 5, 2023

Coconut Banana Cream Pie For Two


I tell you, sometimes you just need some banana coconut cream pie. Like *NEED*. 
I came up with this recipe after a craving hit me one afternoon. I didn’t want to make a whole pie (because I would eat a whole pie). I just wanted enough for mom and I to share for dessert. You could probably get 3 or 4 smaller servings out of this but…. We did 2. #ILovePie 
I think it was about 15-20 minutes to whip this up….plus about 2 hours of cooling time. You probably have all the ingredients in your kitchen right now, nothing fancy schmancy required! 
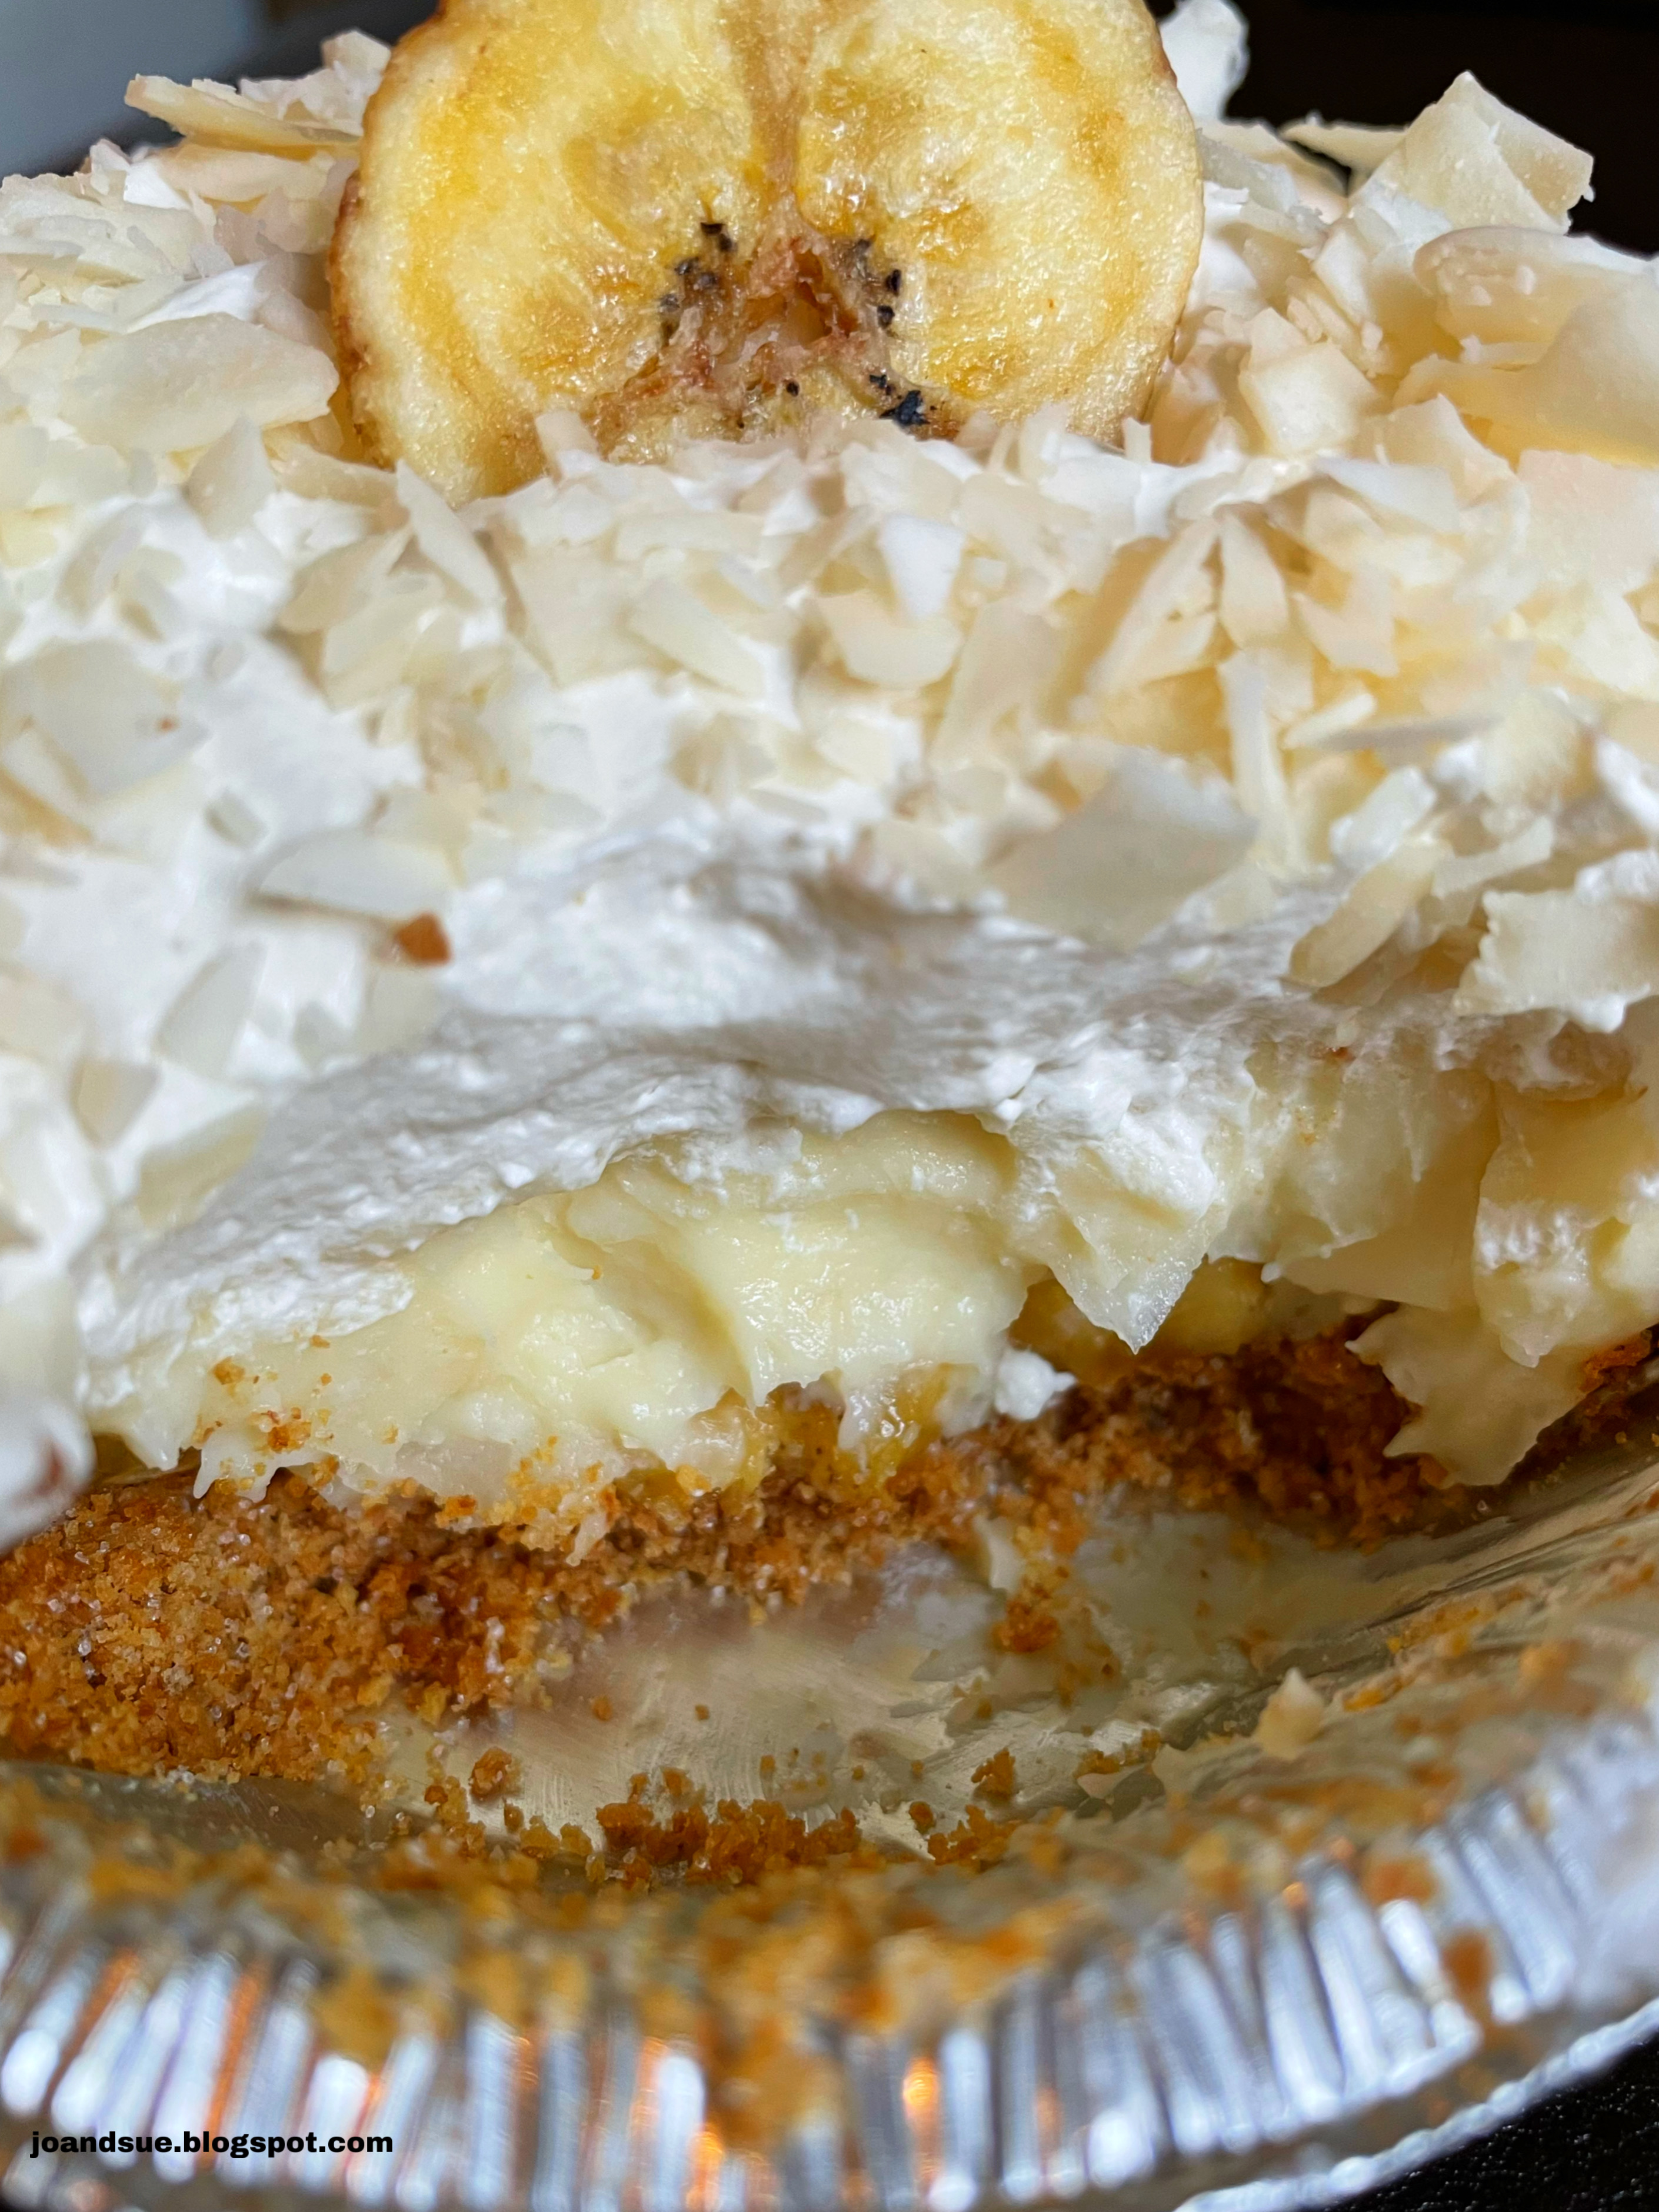

Coconut Banana Cream Pie For Two 

Ingredients
Crust
2/3 cup graham cracker crumbs
2 Tbsp brown sugar
2 Tbsp butter, melted

Filling
3 Tbsp sugar
1  1/2 Tbsp  cornstarch
Pinch salt
1 cup heavy cream (or half and half will work)
1 egg yolk
1 tsp vanilla
1/2 tsp coconut extract
1/2 Tbsp butter
1/2 cup toasted coconut
1/2 banana, sliced

Topping
1/2 cup whipping cream
1/2 tsp vanilla
1-2 Tbsp sugar

Directions
Preheat oven (or toaster oven) to 350. 
Prepare crust - mix graham crumbs, brown sugar, and butter. Press into bottom and up the sides of 2 - 5 inch containers. Bake at 350 for about 8-10 minutes, until lightly browned. Remove from oven and set on counter while you prepare filling.
Prepare filling - Stir together sugar, cornstarch, and salt in a small pan. Slowly whisk in heavy cream until we’ll mixed. Set over medium heat and cook, stirring constantly, until steaming. 
In a small bowl, whisk egg yolk. Slowly, about 1 Tbsp at a time, whisk in the steaming cream mixture to temper the eggs. Don’t mix it in too quickly or you will scramble the egg!
When all mixed, place back in pan, over medium heat and cook, stirring constantly, about 1-2 minutes, until thickened. Remove from heat and stir in vanilla, coconut extract, and butter. Stir until combined. Stir in the toasted coconut. 
Place sliced banana pieces into the two graham cracker crusts. Pour the cream filling evenly into the two pans. Set in fridge and cool completely. 


Prepare topping - whip cream with vanilla and sugar to stiff peaks. Spread half of cream on each cooled pie. 


Chill until ready to eat. Optional but you can sprinkle with a little more coconut and a slice of banana to fancy it up a bit. 


When I say that this hit the spot…. I mean…*jazz hands*…it hit the spot! 


Leave out the banana if you want a classic coconut cream pie. Add more bananas and leave the coconut out if you want a banana cream pie. Personally I like both in there. 
I count this as “for two” but the servings are very generous. You could make it in mini cupcake tins and probably get around 6? maybe… let us know if you give it a try. 
I’m cool with eating a big ol’ piece of pie so I’m still counting it as 2. 


Saturday, October 9, 2021

Keto Crustless Pumpkin Cheesecake


Pumpkin pie is one of those desserts that I enjoy but don't usually make BUT if it's Thanksgiving or Christmas I HAVE TO have it. 
I have been eating low carb/keto for a while now and "regular" pumpkin pie definitely doesn't qualify as either of those things. I came up with this keto friendly pumpkin cheesecake and it is soooo tasty! You'd never know it was low carb, except for it not having a crust. 
I always tell people that eating low carb doesn't mean you have to feel like you are missing out on your favorite meals/treats. This pumpkin cheesecake is a perfect example. All the deliciousness and only a fraction of the carbs and sugar. I count it as a big win!


Keto Crustless Pumpkin Cheesecake

Ingredients
Cheesecake
16 oz (2 pkgs) cream cheese, room temp
3/4 cup pumpkin puree (not pie filling)
1/2 cup brown sugar Swerve
1 Tbsp vanilla
2 tsp cinnamon
2 eggs

Topping
1 1/4 cup whipping cream
pinch cinnamon
1 Tbsp Swerve icing sugar

Directions
Prepare cheesecake - Preheat oven to 350. 
Place cream cheese in a food processor and process until smooth, scraping sides as needed. Add in pumpkin, Swerve, vanilla, cinnamon, coconut flour, and eggs. Process until just combined. (You can also do this with a hand mixer if you prefer) 
Pour into an 8 or 9 inch pie plate and bake approximately 30 minutes: until set. (An 8 inch pie pan will take a bit longer than a 9 inch pan, just keep checking)
NOTE - you can also use an 8 or 9 inch springform pan. Line the pan with parchment paper before you fill it. 


Remove from heat and let cool completely. 


Prepare topping - beat whipping cream with cinnamon and Swerve until stiff peaks form. Spread on top of cheesecake. 


A beautiful dessert for the holidays or for everyday. I used canned pumpkin puree but you could also make your own. Just remember not to use canned pumpkin pie filling - it has sugar and spices already in it and won't be keto friendly. 


If you are counting carbs: this cheesecake is 8 servings and each serving is 6 carbs, 1 fiber for a total of 5 net carbs. 
Not too shabby at all! 
Whether you are counting carbs, cutting down on sugar, or eating gluten free, this dessert fits the bill. Plus it only takes a few minutes to whip up! Not mad about that :)

Friday, June 12, 2020

Shredded Apple Tarts


This is a little twist on a classic apple pie. 
I want to start off by saying if you make something in a muffin tin which has a pie crust THEY ARE NOT CALLED MINI PIES. Okay? They are called tarts. I will fight you on this. I'd like to also mention that these tarts are a delicious alternative to regular apple pie. Same apple cinnamon-y taste but the texture is completely different - in a wonderful way. 
If you'd prefer a pie, this makes one 8 inch pie. Otherwise you should get 12 tarts. Delicious, apple-y tarts. (Not mini pies... just to make sure we're on the same page...) 


Shredded Apple Tarts

Crust
Or enough dough for an 8 inch pie

Filling
1 1/4 cup sugar
1/2 cup butter, softened
3 Tbsp flour
2 tsp vanilla
1 tsp cinnamon
pinch salt
2 eggs
3 medium apples, grated

Directions
Preheat oven to 350. Roll out pie crust and, using a cookie cutter or large glass, cut out 12 circles of dough a little larger than the size of the muffin tins (you may need to re roll scraps to get enough). Press the circles into the muffin tins. 
In a large bowl, beat together the sugar, butter, flour, vanilla, cinnamon, salt, and eggs until well combined, scraping sides of bowl as needed. Add in shredded apples and stir in. (Note - apples don't have to be peeled)


Scoop the apple filling into the pie dough in the muffin tins. Fill to the top. 


Bake at 350 until golden brown and set, about 30 - 40 minutes. (If you make a pie it will be about one hour)


Let cool in pans for about 10 minutes. Then run a knife around the edge of each tart and remove to wire rack to cool. 


You can serve them warm, if you prefer, or chilled. Up to you!


My favorite? Warm with a big ol' scoop of ice cream on top. 


Yum! 
If you want to change up the texture even more.... add in a 1/4 to 1/2 cup of chopped pecans/walnuts for a bit of crunch. Homemade pie crust is definitely the way to go with these BUT we totally get it if you want to save yourself that step and just buy it. 
Tip: Our Never Fail Pie Crust (HERE) can be made up ahead of time and frozen so there is always a few pie crusts in the freezer. 


Thursday, February 27, 2020

Mock Apple Pie


I have wanted to make this pie FOREVER. I don't know why I waited so long to try it. It's magic you guys. Complete and utter magic. I love it when you make a food that tastes like another food and you can trick people. This pie, for example, looks and tastes like an apple pie. For real. You'd never know it wasn't apple pie except for a slight texture difference. The thing is... there are NO apples in it. At all. None. Nada. Zero. Crazy right? (Check out our What Do You Mean It's Not Apple Apple Crisp HERE for another magic recipe!) 
Obviously we didn't create this recipe but we are excited to share it with you. Have you tried it yet? A few friends grew up with it and love this version. I was worried about the pie not being deep enough because I used a larger pie plate so I layered some extra crackers in the filling. If you don't do this then you will not get those layers you see in there and it will completely look like apple pie. If you layer in extra crackers then it kind-of ruins the effect *lesson learned* but does not affect the taste!


Mock Apple Pie

Ingredients
Pie crust for a double pie (Our recipe HERE)
2 cups water
1 cup sugar
2 tsp cream of tartar
30 Ritz crackers 
1 Tbsp lemon juice
1 tsp cinnamon

For Decorating
1 egg, beaten
1 - 2 tsp sugar

Directions
Preheat oven to 400. 
Place one pie crust into an 8 inch pie plate sprinkle with a pinch of cinnamon. Set aside. 


If you want to add a layer of crackers then you can do it now... totally optional though and this will affect the look of the pie!!!


In a medium saucepan over medium heat, bring water, sugar, and cream of tartar to a boil. Add in the Ritz crackers and simmer, stirring every so often, for 5 minutes. 


Remove from heat, stir in the lemon juice. Pour into the crust. Sprinkle with the 1 tsp of cinnamon. (If you want to add extra crackers then you can pour in half the filling, layer crackers, pour in the rest of the filling. Again, totally optional.)


Place the remaining pie crust on top of the pie and seal the edges together with a fork or by pinching together with your fingers. Brush the top of the crust with the beaten egg and sprinkle lightly with the sugar. 


Bake at 400 for 15 minutes. Turn down the heat to 350 and continue to cook another 20 minutes or so - until the crust is golden brown. 


Remove from heat and let cool. 


Slice that baby up and enjoy.


Just to reiterate - I put in extra cracker layers that is why you can see them in there. If you do not add extra crackers then it will look more like apple pie. 


Throw on some ice cream and see if anyone notices it's a magic pie. 


Heck... throw on some caramel sauce on top of the ice cream and *boom* impress EVERYONE in the room. Okay... die hard apple pie fans might figure out something is up... but it'll be a conversation starter for sure. Next time I make it I won't add the extra cracker layers and I'll post a pic of how much more apple pie-y it looks! 
Have you got a magic recipe that tastes like one thing but is actually another? We'd love to hear about it! 

Sunday, February 9, 2020

Orange Cranberry Pie


I initially made this pie for Christmas because the color and flavors seemed Christmas-y to me. Thing is, once we tried it, we fell in love with the flavor! It's tangy and refreshing and rich-yet-light, making it perfect for so many things. The color also works for Valentine's Day or Canada Day - if you're thinking about holiday desserts. Orange and cranberry may seem to be Christmas flavors but I'm thinking they also scream Springtime. 
You can make this pie the night before you plan to serve it, or the day of, you just want to let it sit for at least 4 hours or so to let it set completely. It will last for a couple of days in the fridge before your crust will start to be a little soggy. I topped it with fresh cranberries and orange slices but you may want to warn your guests NOT to eat the cranberries. Raw, fresh cranberries, while totally safe, are very bitter/sour. You could sugar them, if you wanted to, but I always just tell people not to eat them unless they want to give their taste buds a shock! 


Orange Cranberry Pie

Ingredients
1 baked, 9 inch pie shell

Filling
2 3/4 cup fresh cranberries
1 cup sugar
1/4 cup water

3 eggs
2 egg yolks
2 tsp grated orange rind
1/2 cup fresh orange juice
pinch salt
1/2 cup sugar
1/2 cup butter

Whipped cream
1 cup whipping cream (heavy cream)
2 Tbsp instant vanilla pudding powder

Optional Decorations
orange slices
fresh cranberries

Directions 
Prepare filling - In a medium saucepan over medium heat, cook, stirring often, the cranberries, sugar and water. Boil about 10 - 15 minutes, until moisture is gone and cranberries have broken down. 


Remove from heat and let cool 10 minutes. Puree until smooth, about 3 - 4 minutes. 


Add the puree to a double boiler. Add in the eggs, egg yolks, orange rind and juice, salt, and sugar. Cook in a double boiler (or in a bowl over gently simmering water - see pic below), stirring often, until thickened, about 10 minutes.


Strain the thickened curd through a strainer into a bowl. Beat the warm curd, adding a little of the butter at a time. Beat until lighter in color, about 5 minutes.
Pour into the baked pie shell. 


Let cool completely. 
Prepare the whipped cream - whip the cream with the vanilla pudding powder until stiff peaks form. Pipe onto the top of the pie as desired. (Can also just be spread on top.)


Top with oranges slices and cranberries to decorate, if desired. 


Chill until ready to serve - at least 4 hours. 


The lighting is Sue's house is a little odd so the color does not appear as bright in these photos as it really is! 


The texture is a little like a lemon meringue..... but thicker and not quite as smooth. 


A refreshing option after a heavy meal. 
If you don't have a double boiler then you can use a bowl over a pot - as I did in the photo up above. It works just as well - just make sure you use precautions when lifting the bowl out; it will get fairly warm over the simmering water. 
Also, the vanilla pudding powder in the whipping cream helps to stabilize it. If you want to leave it out and just use plain, sweetened whipping cream, that will work too. 

Saturday, January 11, 2020

Strawberry Lemon Pie


I don't know about you but I love pie. It used to be pretty low on my dessert favorites list but I am slowing coming over to the pie side. This one is a really different pie that usually confuses people at first. It has the fluffy and creamy lemon filling and then the gooey strawberry layer. People tend to need a few bites before they know what's happening. 
I had one sampler tell me that the first bite she had she thought it was awful and thought maybe I had lost my mind. Then she took a few more bites and was like 'this is the best pie I have ever eaten". 
Need a dessert that will make a statement at your next gathering? Try this one. It's no-bake, easy to whip up, and will definitely start a conversation. PLUS, it's super pretty. So.... there's that. 


Strawberry Lemon Pie

Crust
1 9 inch baked pie crust (Find our recipe HERE) 

Strawberry Layer
1/2 cup water
1/3 cup sugar
1 Tbsp cornstarch
1/2 pkg strawberry Jello powder
3 cups diced, fresh strawberries

Lemon Layer
1 (8oz) pkg cream cheese, room temp
1/2 cup prepared lemon curd
1 1/2 cups whipping cream

Decoration
1/2 cup whipping cream
1 Tbsp strawberry Jello powder
lemon slices, cut into triangles

Directions
Set baked pie crust aside while you prepare the strawberry layer. 
Prepare strawberry layer - In a medium saucepan over medium heat; bring water, sugar, and cornstarch to a boil. Boil for 1 minute, stirring constantly. Stir in the 1/2 pkg of jello powder and let sit for 10 minutes. After ten minutes, stir in the strawberries and spread in the pie crust. 


Chill while preparing lemon layer. 
Prepare lemon layer - beat the cream cheese until smooth, scraping sides as needed. Beat in the lemon curd. In a separate bowl, beat the whipping cream until stiff peaks form. Fold in to the lemon mixture.
Spread the lemon mixture on top of the strawberry layer. 


To decorate - whip the 1/2 cup whipping cream with the 1 Tbsp Jello powder until stiff peaks form. Pipe on top of pie. 


Top with the lemon slices cut in triangles. 


Chill until ready to serve - at least 3 - 4 hours, up to overnight. 


See.... so purdy. 


And it just keeps getting better..... 


As I mentioned above, the flavors and textures are a bit of a shocker at first but everyone comes around! So. Much. Yum.
Rich, creamy, fruity, beautiful. Perfect for Valentine's Day, Easter, Christmas, Thanksgiving... you see where I'm going here, right? ALL the occasions. Every one.