Saturday, January 23, 2021

Keto Fried Chicken Burger


Needing a delicious burger but low carbing it so a bun is out of the question? 
Not anymore! 
We used a simple fathead dough to make the buns, an even more simple coleslaw and garlic aioli as toppings, and crushed pork rinds to coat the chicken and came up with THE BEST keto friendly chicken burger ever. 
You can make everything ahead of time, if you prefer, so when dinner is being served it comes together in 2 seconds. There are 4 recipes to make for this so it can be a little fussy and you'll want to plan your time out. So worth the effort though! 


Keto Fried Chicken Burger

Buns
2 1/2 cups shredded mozzarella cheese
2 oz cream cheese, softened
1 1/2 cups almond flour
2 tsp baking powder
2 eggs
sesame seeds

Coleslaw
3 cups shredded cabbage (purple or green)
1 thick slice onion, shredded (or finely diced)
3/4 cup mayo
1 Tbsp prepared mustard
salt & pepper

Garlic Aioli
1/2 cup mayo
2 cloves garlic, minced

Chicken
8 boneless, skinless chicken thighs
1 egg, beaten
1/2 cup crushed pork rinds
1/4 cup grated parmesan
1 tsp garlic powder
oil, for frying

Directions
Prepare buns - Preheat oven to 400. Line a cookie sheet with parchment paper and 6 large canning rings. Melt mozzarella and cream cheese in the microwave for about 40 seconds. Stir and microwave again, if needed. Stir until smooth. 
Add in almond flour, baking powder, and eggs. Stir until dough comes together. It will be quite sticky and you may need a little extra almond flour for sprinkling on it to be able to handle it. (Keep in mind every time you add more almond flour you will change the carb count though!)
Divide into 6 pieces. Flatten each piece slightly into a canning ring. Bake at 400 for approx 12 - 15 minutes - until light golden brown. remove from oven and let cool before removing from the rings. NOTE - if you don't have rings that's fine, they are used to help the bun keep its shape and not spread out. Without them your buns will just be flatter. Set buns aside until ready to make burger. (These also freeze very well if you make them in advance.)
Carefully slice the buns in half horizontally. 


Prepare coleslaw - place shredded cabbage and onion in bowl. Add in the mayo and mustard and salt & pepper. Stir well to combine. Chill until ready to use. (This can be made a day in advance but will release liquid. Simply drain it off and serve when ready.)


Prepare garlic aioli - stir together mayo and minced garlic until well combined. Set aside. The longer this sits the more the flavors will blend so make it up at least a couple of hours before you make the burgers, up to a few days in advance. Store, covered, in the fridge.  
Prepare chicken - Blend together the pork rinds, parmesan, garlic powder until it resembles fine crumbs. 
Dip each chicken thigh in the beaten egg to coat. Then toss in the pork rind crumb mixture and coat well. Set aside. Heat oil in a deep pot to 360 degrees. 
Carefully place one or two of the chicken thighs into the hot oil and fry until cooked - about 2 to 3 minutes on each side. Use a thermometer to watch your oil temperature! This will help your chicken cook evenly. Do not crowd the pot or the temperature will drop too much. 
Using a slotted spoon or tongs, remove the chicken from the oil and place on paper towel to drain any excess oil. Continue until all chicken is cooked. 


Assemble the burger: 
Spread the garlic aioli on each half of the bun.


Top with a generous spoonful of coleslaw. 


Top with a chicken thigh. 
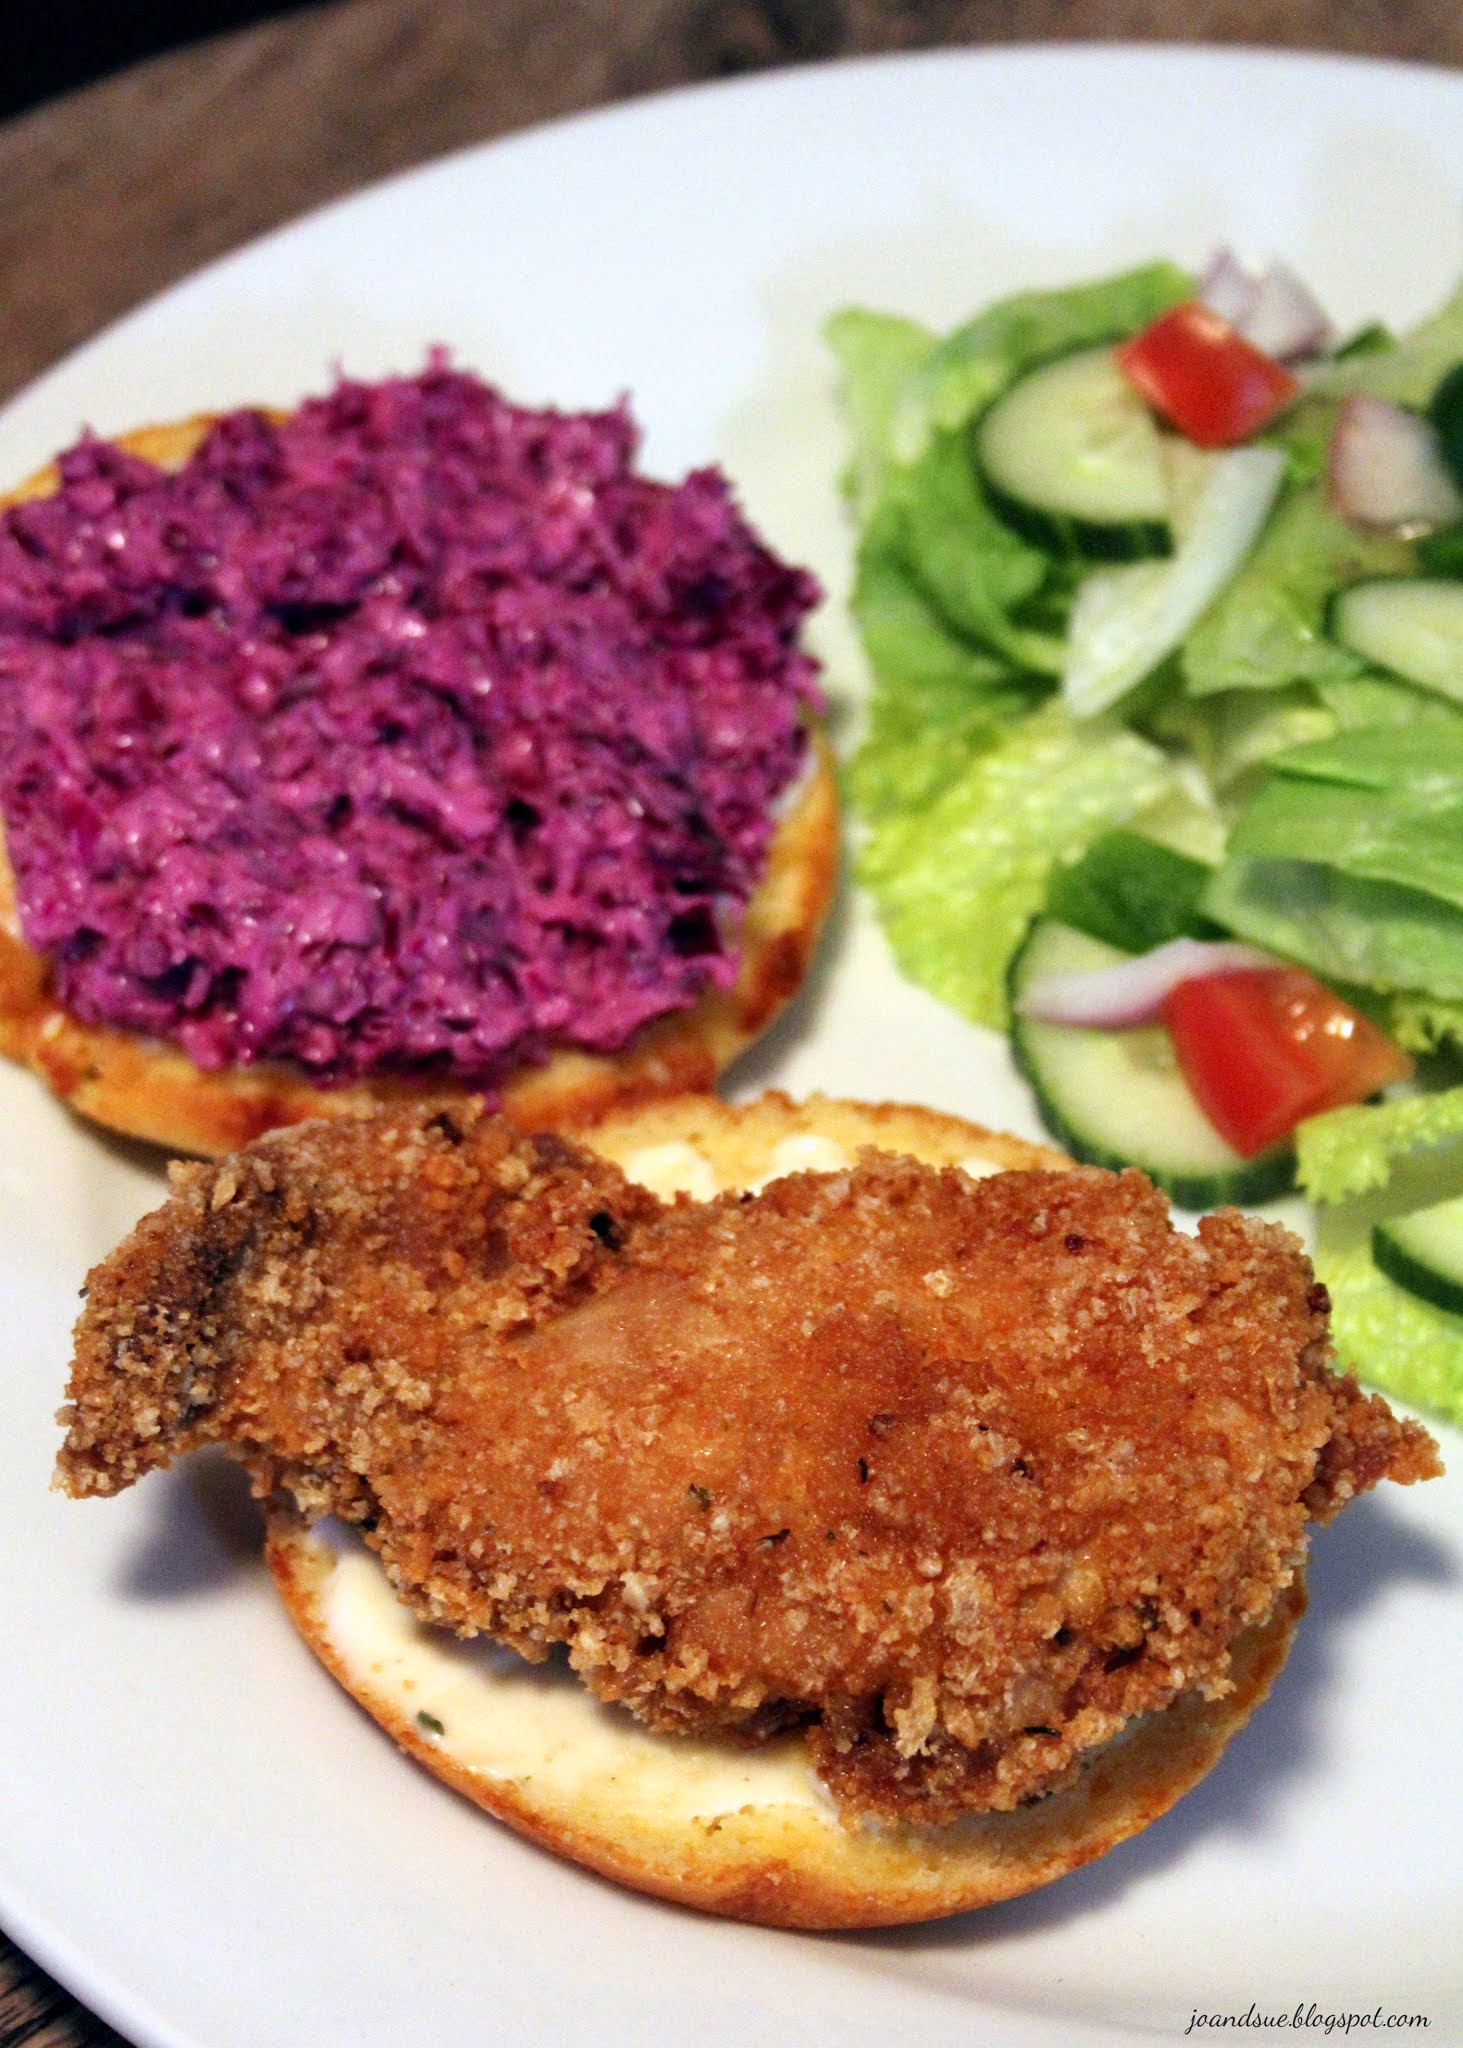

Enjoy! 


The nutritional counts for 1 burger (1 bun, 1 chicken thigh, 1 tablespoon garlic aioli, 2 - 3 tablespoons coleslaw) are: 520 calories, 11 carbs, 41 fat, 34 protein, 5 fiber. That's 6 net carbs. Of course this amount can vary so if you are tracking macros you should enter the ingredients into your own nutritional calculator! 
You will get 6 burgers out of this recipe with 2 extra chicken thighs and a little extra coleslaw and aioli.
I like to serve it with a green salad as it is quite filling and doesn't need a heavy side. 
You can eat low carb and still have a delicious burger. The buns will work equally as well for a hamburger too, as well as for sandwiches or anything else you would usually use a bun for! They are quite sturdy. 


Monday, January 18, 2021

Keto Oven Fried Mushrooms


One of the things I find tricky about eating keto is finding interesting veggie side dishes to accompany whatever meat dish I'm having. Green beans and asparagus are great but a girl needs more options!
I came up with this recipe after seeing some deep fried mushrooms on Pinterest. I initially was going to deep fry them but figured it would be too messy and, honestly, seemed like too much effort at the time.
Anyway, I went with the oven and they worked out amazingly well! 
Recipe as written below will make 2 servings. Nutritional counts per serving are: 185 calories, 10.4 fat, 5.5 carbs, 1.4 fiber, 13.2 protein. So 4.1 net carbs total. 


Keto Oven Fried Mushrooms

Ingredients
1/3 cup ground pork rinds
1 tsp garlic powder
salt & pepper
1/4 tsp paprika
1/4 tsp parsley
1 Tbsp powdered Parmesan
1 egg
12 medium button mushrooms

Directions
Preheat oven to 400. Line an oven safe dish with parchment paper. Set aside. 
Combine ground pork rinds, garlic powder, salt & pepper, paprika, parsley, and parmesan in a large ziplock bag. 
Beat egg in a small bowl. 


Dip mushroom in egg to coat. Then toss into the pork rind mixture to coat. 


Place on prepared pizza pan and repeat with remaining mushrooms. 
Cook at 400 for approx 15 minutes, flipping halfway through cook time. 


If you want to crisp up the top more then place them under the broiler for 1 minute. 


Serve hot. 
Mushrooms are a great keto vegetable and putting a tasty pork rind coating on them makes them a great side dish. You could serve them with a keto ranch dip or garlic aioli if you wanted to but I didn't find it necessary! 
For a potluck you could make up a whole tray of them by easily double or tripling the recipe. 

Monday, January 11, 2021

Veggie Pakoras with Raita


I had a friend gift me a bag of chana/gram flour a little while ago. I wasn't sure what I was going to do with it until Sue reminded me that pakoras are made with chana flour! 
Pakoras are pretty much the most delicious things on the planet. I decided to go with veggie pakoras as I have made them a few times before so kind of had an idea of what I was doing. 
A friend passed down this recipe to me and gave me permission to share it with everyone. Keep in mind that there are a bazillion different recipes for pakoras out there. Everyone has a special tweak to their recipe! What is your favorite ingredient to add to pakoras?


Veggie Pakoras With Raita

Ingredients

Raita
1 cup plain Greek yogurt
1/4 cup onion, finely diced
2 Tbsp lemon juice
1 Tbsp sugar
1 Tbsp cilantro, chopped
1/4 tsp salt
1/4 tsp cumin

Pakoras
1 cup gram/chana flour
1 Tbsp cornstarch
1/2 cup spinach, chopped
1/2 cup potatoes, juliened
1 onion, thinly sliced
2 Tbsp fresh coriander, chopped
1/2 can diced green chilis
1 small head cauliflower, chopped fine
1 tsp crushed coriander
1 tsp garam masala
1 tsp crushed cumin
pinch salt
1/8 tsp baking soda
1/4 cup water

Oil for deep frying


Directions
Prepare raita - combine the yogurt, onion, lemon, sugar, cilantro, salt, and cumin. Let sit so flavors can blend. Raita can be made a day or so ahead of time. 


Prepare pakoras - mix all pakora ingredients together in a large bowl. If you need to a bit more water then do so a little at a time. It should not be soupy! It will be quite thick. I usually end up adding a few more tablespoons. 


Heat oil in a large pot to 350 degrees. Line a cookie sheet with paper towel and set aside. 
Scoop up about a golf ball sized amount of the mixture in your hand and carefully drop it in the hot oil. Don't crowd the pot - only add about 4 or 5 balls of mixture at a time. 
Cook about 1 minute and then turn over and cook another minute - until golden brown and cooked through.


Use a slotted spoon to remove the pakoras and place them on the paper towel. 
Repeat until all the mixture is used up. Be sure to keep your oil at about 350 - if it lowers too much the pakoras will get oily, if it is too high they will burn. 


Serve warm with the raita for dipping.


This makes a fairly large batch of pakoras so you can share them, eat them aaaaallllll, or freeze some for later! Simply line a container with paper towel, place the pakoras in a single layer, cover and freeze. 


When it comes time to reheat them all you have to do is preheat your oven to 350 and place the frozen pakoras on a cookie sheet. Cook until heated through - about 20 - 30 minutes. 


This is a great dish to bring to a potluck because they reheat so well and they are still delicious at room temperature. A bit of a pain in the butt because of all the deep frying but so worth it IMO. 
Looking for a game night treat? Give these a try. 
And don't forget the raita! Everything is better with dip. :)

Tuesday, December 22, 2020

Keto Bread (Keto Stuffing and Keto French Toast)


A few months ago I set out to make an entire Thanksgiving meal that was keto friendly (Be sure to check back for that post). 
One of my favorite dishes to come out of that was this keto stuffing. It is delicious and you'd never know it wasn't "regular" stuffing. You only use half the loaf of bread you make which means you can make a delicious, keto friendly French toast with the other half! You can't lose!
I'm going to post 3 recipes in this post: the first is for the bread, the second will be for the stuffing, and the third will be for the French toast. Be sure to pin or save this recipe for your next holiday dinner! It's a keeper. :) 
FYI - I find the bread eaten on it's own does taste a little eggy BUT in the stuffing and as French toast it is not eggy at all. 


Keto Bread

Ingredients
6 eggs, separated
1/2 tsp cream of tartar
5 Tbsp butter, melted
1 1/2 cup almond flour
3 tsp baking powder
pinch salt

Directions
Preheat oven to 375. Line an 8 X 4 loaf pan with parchment paper. 
Beat egg whites and cream of tartar until soft peaks form. Set aside.
Beat yolks, butter, almond flour, baking powder, and salt. Beat in 1/3 of the egg whites. Dough will be lumpy and thick. Fold in remaining egg whites - do not overmix!
Spread into the prepared loaf pan. 


Bake at 375 for approximately 30 minutes. Toothpick inserted near center should come out clean. 


Let cool about 10 minutes and then remove to wire rack.


Let cool completely before slicing into 20 slices. If you look closely at the above photo you can see I marked off where to cut the slices to make them even. Not necessary but I find it makes cutting the bread easier. 


According to MyFitnessPal the nutritional counts per slice are: 98 calories, 8.5 fat, 1.9 carb, 0.9 fiber, and 3.7 protein. That means 1 net carb per slice. (Loaf should be cut into 20 slices.) 
Freezes well. 


Keto Stuffing

Ingredients
10 slices "Keto Bread Recipe" above
2 Tbsp parsley
1 Tbsp rosemary
1 Tbsp thyme
1/4 cup onion, diced
5 green onions, diced
3 stalks celery, diced
2 Tbsp garlic, minced
8 oz sausage, cooked and crumbled
1 cup broth
1 cup whipping cream
2 eggs

Ingredients
Preheat oven to 200. Line a cookie sheet with parchment paper and set aside. 
Cut the keto bread into cubes.


Place on cookie sheet and sprinkle with the parsley, rosemary, and thyme. 


 Bake at 200 for an hour. Give it a stir at the half way mark to ensure even cooking. Bread should be browned and toasty. 


Remove from oven and set aside. 
Turn heat in oven up to 350. 
In a large bowl place the onion, green onions, celery, garlic, and sausage. Stir in the toasted bread.


In a separate bowl, whisk together the broth, whipped cream, and eggs. 
Pour this over the bread mixture and stir very gently. (I use my hands)
Spread in a 10 inch oven safe dish sprayed with cooking spray. 


Bake at 350 for about an hour, stirring at the half way mark. 
Serve hot. 


According to MyFitnessPal the nutritional counts per serving are (recipe makes 9 servings): 200 calories, 18 fat, 2.8 carbs, 0.8 fiber, 4 protein. That's 2 net carbs per serving. 
Leftovers reheat well in the microwave. 


Keto French Toast

Ingredients
2 Tbsp whipping cream
1 egg
1/8 tsp cinnamon
1/4 tsp butter
3 slices "Keto Bread Recipe" above

For Serving
whipped cream
keto friendly syrup
dash cinnamon

Directions
In a small container whisk together the cream, egg, and cinnamon. 


Heat a non stick frying pan over medium heat and melt the butter in the pan. 
Gently dip a slice of bread into the egg mixture and flip to coat well. 
Place in the pan and repeat with remaining bread. Cook over medium heat for about 2 minutes then gently flip over and cook another minute or two. Toast should be golden brown. 
Serve hot with a little keto syrup, whipped cream, and a sprinkle of cinnamon. 


So good and so filling!


According to MyFitnessPal the nutritional counts are (recipe makes 1 serving):
400 calories, 37 fat, 7 carbs, 3 fiber, 12 protein. That's 4 net carbs!

As I mentioned above - eating the bread on it's own I find it a little eggy tasting. But turn it into stuffing or French toast and it is just like "regular" bread. I'm going to be experimenting to see what else I can make with it! It's a pretty versatile recipe. :) 


Wednesday, December 2, 2020

Keto Fried Fish Batter with Easy Tartar Sauce


You might have come to this recipe because of the word "keto" in the title but I have to tell you, whether keto or not, this is one of the best fried fish recipes EVER. 
So crispy and flavorful!
The homemade tartar sauce goes very well with it too so I recommend spending the extra few minutes and whipping it up! 
I have found a lot of gluten free batters are soft and never really get that crispiness I am looking for. Not so with this one though! You get a crunch that makes the fish inside seem even more tender! I used basa fillets but you could substitute your favorite fish no problem. 
Whether you are following a keto/gluten free eating plan or are just looking for an amazing fish batter - give this one a try! I Promise you won't regret it. 


Keto Fried Fish Batter

Ingredients
Tartar Sauce
1 cup mayo
1 Tbsp lemon juice + zest of half a lemon
1 pickle, chopped fine
1 Tbsp dried parsley
2 tsp dried dill
salt & pepper

Fish 
1 Tbsp powdered parmesan
2/3 cup almond flour
1/2 tsp garlic powder
1/2 tsp dried parsley
2 tsp baking powder
2 Tbsp cornstarch
2 eggs
1/3 cup sparkling water
6 - 8 pieces fish (boneless/skinless)
Oil for deep frying

Directions
Prepare tartar sauce - mix together the tartar sauce ingredients and chill until ready to use. Make up at least an hour ahead of time, up to a day ahead, so flavors have a chance to develop.


Prepare fish - Stir together the powdered parmesan, almond flour, garlic powder, parsley, baking powder, and cornstarch. In a separate bowl, whisk together the eggs and sparkling water. 
Stir the dry ingredients into the wet ingredients until just mixed. 
Pat the fish fillets dry.


Heat oil in a large pot to 350 degrees. 
Dip a piece of the fish into the batter, gently shake off any extra, and then carefully place in the heated oil. Cook 3 - 4 pieces at a time - do not crowd the pot or the oil temperature will drop too much. 


Cook about 2 minutes on each side, until golden brown and fish is cooked through.
Using a slotted spoon, remove the fish from the oil and set on paper towel to absorb any excess oil. 


Serve with homemade tartar sauce.


Look at all that crispiness!


You can easily double or triple the recipe if you are feeding more people!


FYI - leftovers can be stored in the fridge but are best eaten within a day. The crispiness disappears the longer it sits. Reheat in a 350 oven for best results. Of course, you can microwave leftovers, but they will be a bit soggier.