Saturday, June 10, 2017

Strawberry Cheesecake Snowballs


This recipe has been floating around in my thoughts for quite a while. It's one that our Aunty Pat used to make for us when we were children and would spend our summers with her and her family. 
For the life of me I couldn't remember what was in it. I thought it may have been Jello but my experiments just were not coming anywhere close to the real thing. Our aunt passed away before I had the chance to ask her for the recipe so I feared it would be one of those childhood memories that would never be recreated. 
As it happened, our sister, Orra, was down for lunch and I was reminiscing about these treats and she said that had the recipe and, even better, it was in Aunty Pat's handwriting. I cannot tell you how excited I was. I asked her to text me the recipe that day so I could make it!
You guys!!! It tastes just like I remember. 


Strawberry Cheesecake Snowballs

Ingredients
1 8oz brick cream cheese, room temp
1/4 cup honey
1/2 cup frozen strawberries in light syrup, thawed and not drained
3 cups mini marshmallows
1 cup whipping cream

Directions
In a large mixing bowl, beat cream cheese until smooth, scraping down sides of bowl as necessary. Beat in the honey until well combined. Stir in the strawberries.


And stir in the marshmallows.


In a separate bowl, whip the cup of whipping cream until stiff peaks form. Fold the whipped cream into the marshmallow mixture.


When well combined, scoop the mixture into 12 mini cups (like Dixie cups) - each cup should hold about 1/4 to 1/3 of a cup. You will also need 12 Popsicle type sticks. I couldn't find any in town so I snapped the blades of off plastic knives and used the handles for my sticks. 


When each cup is filled, press a stick into the center of each one as far as it will go. 


Place all the cups on a cookie sheet or in a pan to make it easier to carry them all.


Freeze until solid - at least 5 or 6 hours. To enjoy - simply make a cut down the side of the paper cup and peel off.


They are light and airy and so cheesecake-y and, in case you were wondering, they are 192 calories each. 


So easy to whip up. 
You could, of course, use popsicle molds instead of the paper cups. Part of my childhood memory is having to peel the cup off before we could dig in so I am partial to the cups. :)

Be sure to pop by Carole's Chatter for tons of fun food links!

Sunday, June 4, 2017

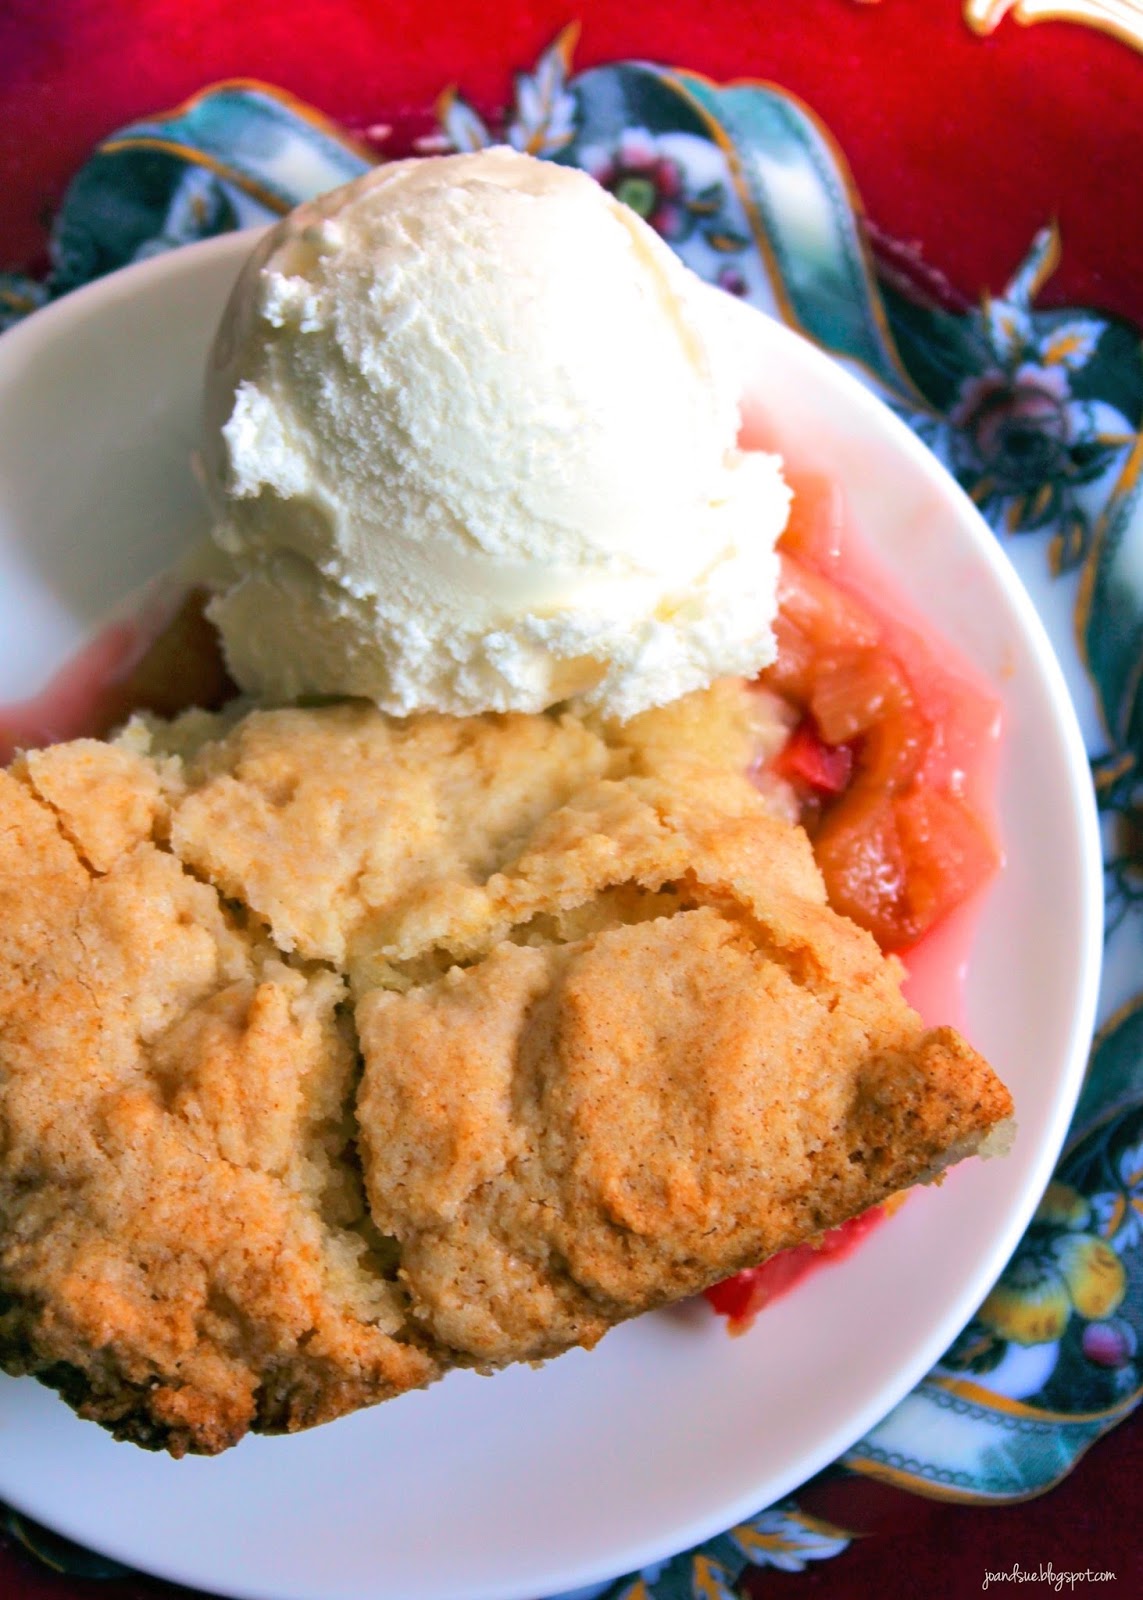
Rhubarb Marshmallow Cobbler


We love rhubarb around our place. Which is a good thing because, as you are probably aware, once it starts showing up there is a LOT of it. Like.... sooooo much...
That's okay though. It just means we get to experiment with tons of rhubarb recipes. 
The one we are sharing here, for example, is adapted from a recipe our mom found in a Taste Of Home magazine. It has marshmallows in it, which just seemed weird. Of course, we had to give it a try! We drastically cut the sugar in this recipe. The original called for a cup and a half to be mixed in with the rhubarb. We only added 1 Tbsp. Seriously. That's all it needs. 


Rhubarb Marshmallow Cobbler
(Adapted from Taste Of Home, Simple & Delicious)

Ingredients
Bottom Layer
4 cups rhubarb, diced
1 Tbsp brown sugar
1 cup mini marshmallows

Cobbler
1/2 cup butter, room temp
1 tsp vanilla
1 cup sugar
1 3/4 cup flour
3 tsp baking powder
pinch salt
1/2 cup milk

Directions
Preheat oven to 350. Lightly spray a 9 X 9 pan with cooking spray, set aside.
Place diced rhubarb in the prepared pan. Sprinkle with the brown sugar and marshmallows.


Prepare cobbler - In a mixing bowl, cream together the butter, vanilla, and sugar until smooth. In a separate bowl, whisk together flour, baking powder, and salt. 
Beat the dry ingredients into the wet ingredients, alternating additions with the milk. 


Spoon the batter over the rhubarb.


Bake at 350 for approx 50 - 55 minutes, until top is golden brown and it is bubbling. 
Remove from heat and let sit on a wire rack for at least 15 - 20 minutes. 


Serve hot or warm.


The outside pieces are a bit crispier than the inside. 


Of course, the addition of ice cream is a must. 


We found that the with all that lovely cobbler on top the rhubarb did NOT need anywhere near 1 1/2 cups of sugar. The marshmallows add a layer of sweetness without making the cobbler gooey. 


It can be difficult to tell if the cobbler is cooked through - just make sure the top is a dark, golden brown before removing it from the oven, and when tapped it sounds hollow. 


Be sure to stop by Carole's Chatter for more tasty links!

Saturday, June 3, 2017

Watermelon, Strawberry, and Feta Salad


6 years ago yesterday, Sue and I published our very first blog post. (See it here - The Adventure Begins) And now, 6 years and over 1,000 posts later, we are still happy to be here, sharing our recipes and adventures with you. 
It's hard to believe it's been that long. I guess it's true - time flies when you are having fun. We can't thank you, our readers, enough for all the support you have given us. You can still follow us on Facebook (HERE), Instagram (HERE), Twitter (HERE), and Pinterest (HERE) to see what we are up to when we are not on the blog. 
We decided to go with something simple yet beautiful for our blogiversary post. This watermelon, strawberry, and feta salad is ridiculously easy but I was quite surprised at how amazing it tastes. The addition of a balsamic drizzle just compliments the sweet & salty of the fruit and cheese. 
And can we just talk about that gorgeous color for a second. 
Gaaaah!
So pretty. 
Anyhooo...... we hope you have enjoyed our blog thus far and we definitely hope to continue to see you as we grow and learn and make more delicious things! 


Watermelon, Strawberry, and Feta Salad

Ingredients
2 cups watermelon, cubed
2 cups strawberries, sliced
1/4 cup feta, crumbled (divided) 
2 purple onion slices (thin)

Dressing
2 tsp balsamic vinegar
1 tsp olive oil
salt & pepper

Directions
Combine watermelon, strawberries, half the feta, and purple onion slices. 


In a small bowl, whisk together balsamic vinegar, oil, and salt & pepper. Drizzle over the fruit and gently toss to coat. Sprinkle the remaining feta on top. 
Serve immediately. 


From start to finish in about 10 minutes. 
It is best served right away. If you want to make it in advance - just cut up the watermelon, strawberries, and onion together but don't add the feta and dressing until you are ready to serve it. 


According to MyFitnessPal, one serving (recipe makes 4), is: 86 calories, 13 carbs, 3 fat, 3 protein, and 2 fiber. A serving is about one cup. 
This is definitely the next dish you want to bring to your next summer get-together or BBQ. It is super easy to double or triple it for a crowd.   

Monday, May 29, 2017

Chicken Fajita Lettuce Tacos


I'm calling these lettuce "tacos" because of the whole fajita/taco seasoning theme. If it makes you feel better then you can call them lettuce wraps. Tacos sound way more fun though. Just sayin'.
Anyway, this is one of the most simple meals I have ever made for how tasty it is. There is 7 ingredients in total (more if you are making your own taco seasoning) and only takes about 30 minutes from prep to table. Can't complain about that. 
Something else to love about this recipe? The nutritional counts. According to MyFitnessPal one serving (recipe makes 1) is - 343 calories, 20 carbs, 12 fat, 39 protein, 6 fiber. (FYI - The nutritional counts include the sour cream.)


Chicken Fajita Lettuce Tacos

Ingredients
Taco Seasoning
1 Tbsp chili powder
1/2 Tbsp paprika
1/4 tsp garlic powder
1/4 tsp onion powder
1 tsp ground cumin
1/2 tsp black pepper
1/8 tsp cayenne pepper

Tacos
2 small bell peppers (any color), cut into slices
1/2 onion, cut into slices
1 boneless, skinless chicken breast, raw, cut into strips
1 tsp oil
2 tsp taco seasoning
4 leaves romaine lettuce

Garnish
1/2 Tbsp sour cream

Directions
In a small bowl, stir together the spices. (Note - if you are using bought taco seasoning then skip this step.) Set aside.


Preheat oven to 425. Line a small tray with parchment paper or a Silpat. Place sliced pepper, onion, and chicken on tray. 


Drizzle with the oil and then sprinkle with the taco seasoning. Toss all together to evenly coat. 
Cook at 425 until peppers are soft and chicken is cooked - about 20 - 25 minutes. 


Assemble tacos - stack 2 lettuce leaves together for a more stable taco "shell". Repeat with the other 2 leaves. Fill each with half of the chicken and pepper filling. 


If desired, drizzle with some sour cream.


Serve hot. 


Note - You can make this with raw chicken or you can make this with chicken that is already cooked. I had some frozen, cooked breasts to use up. I simply sliced them while frozen and tossed them in as per the recipe. Because they were frozen when I did this they were heated through and ready to eat by the time the peppers were done.  Also, if you want it more taco-y then just sprinkle more taco seasoning on there. I only ever use 1 to 2 tsps but you can go as nuts as you like!
Quick, easy, healthy, delicious. 

Sunday, May 28, 2017

Indian Inspired Stuffed Peppers


Stuffed peppers are one of those dishes that can be customized a bazillion ways. 
We posted our Quinoa Stuffed Peppers (HERE) and they are one of our most popular posts. They had a more Southwest-y thing going on. They were also vegetarian whereas these tasty morsels are completely vegan. Most stuffed peppers, in my experience, are stuffed with some kind of hamburger and rice mixture. I love them all ways but I will admit - the Indian spices in these have moved them up to the top of the list. 
This recipe makes 8 peppers - so 16 halves, but can easily be halved for a smaller batch. I like to make the full lot as they can be frozen and reheated later! 
According to MyFitnessPal 1 serving (recipe makes 8) is: 197 calories, 29 carbs, 5 fat, 7 protein, 5 fiber. 


Indian Inspired Stuffed Peppers

Ingredients
8 medium peppers, halved & seeded
1 Tbsp oil
1 tsp mustard seed
1/4 tsp cumin seed
1 onion, finely chopped
2 medium carrots, shredded
1 Tbsp curry powder
1 tsp garam masala
1 tsp tumeric
3 cups basmati rice (cooked)
1 cup canned lentils
1 cup frozen peas
1/3 cup cashews, coarsely chopped
salt & pepper

Directions
Preheat oven to 350. Line a cookie sheet with parchment paper. Place bell peppers, cut side down, on the prepared cookie sheet. 


Cover with a piece of tinfoil. Bake at 350 for 20 - 25 minutes, or until peppers become tender. 
Make sure your other ingredients are prepped and ready to go!


While peppers are baking, in a large skillet over medium heat, heat the oil with the mustard and cumin seeds.


When the seeds start popping, add in the carrots and onions. Saute for about 5 minutes, until onions soften. Add in the curry powder, garam masala, and tumeric. Stir to combine. 
Add in the rice, lentils, peas and cashews. 


Cook and stir until everything is heated through. Remove from heat. 
Stuff the pepper halves with the rice mixture.


You may have some filling leftover, depending on the size of your peppers. (FYI - It is fabulous to eat on its own.) Bake at 350 for 10 to 15 minutes - until everything is heated. 


Serve hot. Leftovers also reheat very well in the microwave.


You can also throw in a handful of golden raisins to the filling if you like. I didn't have any on hand but they would make a lovely addition to the peppers. I love the crunch of the cashews in there and the squishy raisins would add a nice contrast, along with their hint of sweetness. Just keep in mind that would change the nutritional counts listed above. 

Friday, May 26, 2017

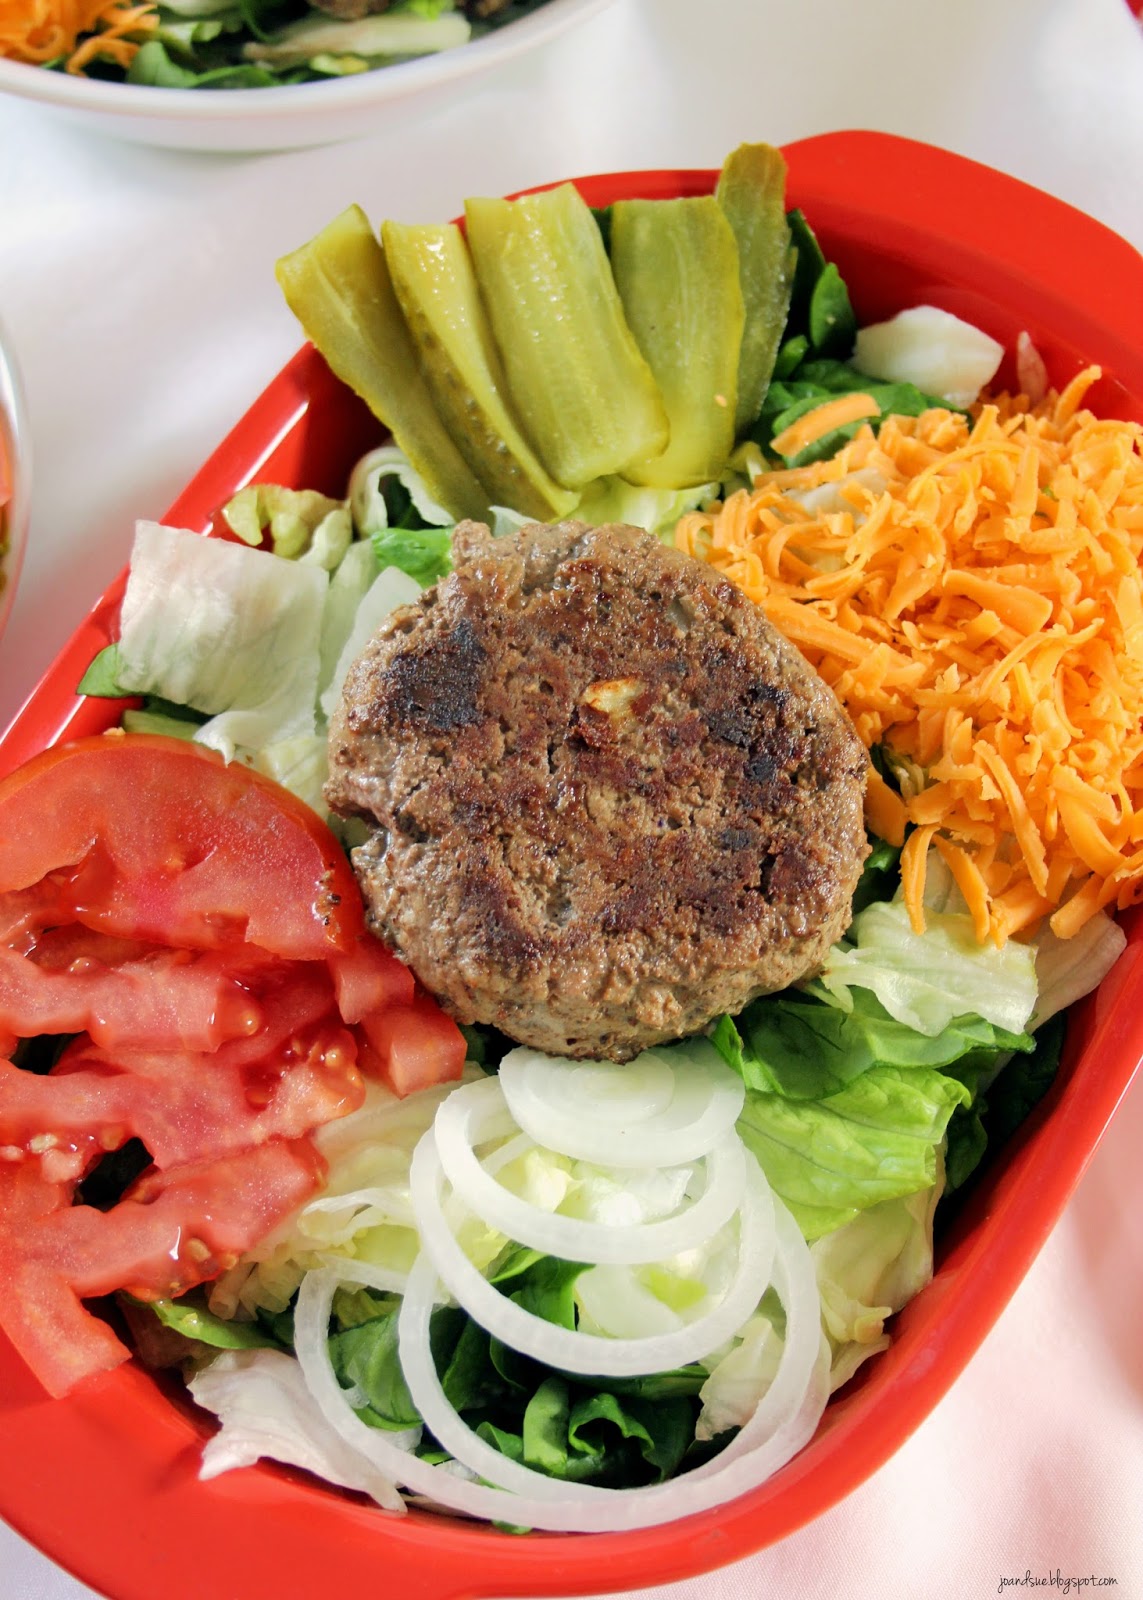
Burger Bowls


Way, way back in 2013 we posted a Cheeseburger Salad (See post HERE) . 
It has remained one of my favorites ever since. Here's the thing though - salads just aren't as cool as they were in 2013. You have to make "bowls" now. You have to place them in the bowl so as to see all the ingredients and have it look fancy schmancy. 
You HAVE to.
It's kind of the rule now. 
Anyway...this is basically a re-do of that post but updated so we are all trendy and cool. #arewepopularyet


Burger Bowls
(Slightly adapted from our Cheeseburger Salad) 

Ingredients
Dressing
2 Tbsp light mayo
2 Tbsp 0 fat Greek yogurt, plain
2 Tbsp ketchup
2 tsp water
1 tsp white vinegar
1 Tbsp hot dog relish (the green stuff)
1 tsp Sugar Twin (or other sugar sub)
dash of hot sauce
1/2 tsp sea salt
1 tsp olive oil

Burger patties
1 lb lean ground beef
1 slice onion, diced
4 cloves garlic, minced
1 Tbsp HP sauce
1 egg
salt & pepper

Bowl
16 cups lettuce, chopped or shredded
2 cups grape tomatoes, halved
4 slices onion
4 pickles, sliced
4 oz aged cheddar, shredded

Directions
Prepare dressing - In a small bowl, whisk together dressing ingredients until well combined. Cover and chill until ready to use.
Prepare burgers - In a mixing bowl, combine burger patty ingredients. 


Mix very well - I find using my hands works best. Form into 4 equal patties.


In a frying pan, over medium heat, cook burgers until desired level of done-ness is reached (at least 160 degrees). Note - you can also bake in the oven or on the BBQ if you prefer. 
Prepare bowl - Place 4 cups of lettuce in a serving bowl. Top with 1/2 cup tomatoes, 1 slice onion, 1 sliced pickle, 1 oz of shredded cheese, and 1 burger pretty. 


Repeat with remaining ingredients 3 more times.


Top each with 2 Tbsp of the dressing. 


Serve immediately.


According to MyFitnessPal one serving (recipe makes 4) - 
With no dressing: 420 calories, 10 carbs, 27 fat, 35 protein, 3 fiber.
2 Tbsp dressing: 35 calories, 4 carbs, 2 fat, 1 protein, 0 fiber.
Grand total: 455 calories, 14 carbs, 29 fat, 3 fiber. 
One filling is VERY generous. 
You an also keep ingredients, separate, in the fridge until ready to eat. I brought mine to work the next day, simply reheating the burger in the microwave briefly before topping my bowl. 
You can make it the fancy, new, trendy way OR make it the old fashioned way. Either way - it works and tastes delicious! 


We're sharing over at Carole's Chatter. Be sure to click over and say hi!