Sunday, October 26, 2014

Halloween Dinner 2014


Woohoo! Halloween party time has arrived.
Sue and I had a dinner for family and friends this year and, once again, went a little crazy with the food!
It is just so much fun coming up with fun, spooky, and just plain gross Halloween food. 
Sue really outdid herself this year. 
She took on most of the projects herself with me just being her assistant. 
I am posting photos of the dishes and - where available - I am posting links to the individual posts that include the instructions and/or recipes.
Starting with the above Guacamole Witch. She looks super cool and is surprisingly easy to put together. (Click HERE for that recipe and how-to!)


We took our popular Brain Dip from a previous post (Click HERE for the recipe) and made it in a skull mold this time. A little black pasta hair, some mozzarella and olives for eyes and *voila* Spooky Skull Dip!


These little guys take about 5 minutes to cut out. Just like carving a pumpkin!
They sure make a veggie tray look Halloween-y.


Speaking of veggie trays....
How cool is this cauliflower skull? Our guest, Kari, brought this to the party. 
Love how creepy it looks.


I made some deviled eggs a little more Halloween-y by boiling them, gently cracking the shells and then soaking the cracked eggs in water dyed red with food coloring. 


These little guys were definitely a big hit for the night.
Jalapeno Popper Mummies! (Click HERE for the how to and recipe!)
So cute and so easy too!


We found this guy in a Woman's World Magazine and decided to put our own spin on the recipe. 
He is a Mummy Pizza Dip with Crispy Ravioli Dippers.
Something a little different than the usual chips and dip!


Sue made these Cheesy Macaroni Pumpkins and they were to die for! (Click HERE for the recipe and how-to!!)
We were going to make them jack o' lanterns by painting them with some of the black ketchup in the background but ran out of time. They were every bit as tasty without their faces though. 
Sue said she might make this her new go-to macaroni recipe!


Here's a Jack O'Lantern Cheese Ball that definitely is better with a face. Our sister, Orra, brought this to share. Very cheesy, very Halloween-y.


Moving into the realm of grossness...
Can we offer you a finger on a bun? That is - a hot dog carved to look like a finger...
Very quick and easy and certainly made an impact on our guests!


Speaking of gross....
This Meatloaf Mummy was a huge hit. We simply mixed up our meatloaf with our usual spices and chopped onion and a little red pepper, then pressed it into a face mask mold to shape it, then used onion for the eyes and teeth, and then wrapped it bacon before cooking it. 
So much eeeewww.... (but delicious!)


The Meatloaf Mummy was the topper for our Gruesome Meat Man.
Disgusting, right?
But so tasty. 
He consists of the meatloaf face, BBQ ribs (for the ribs, obviously) and then some cooked sausages brushed with a little BBQ Sauce (for the intestines). 


Another idea for deviled eggs, in case you don't want to make eyeballs...
I made these for Thanksgiving but they work equally well for Halloween!


Another pumpkin treat I made at Thanksgiving but works for Halloween too - Cheesy Pumpkin Biscuits. 
All you need is some Pillsbury Crescent Rolls, paprika, cheese, a little dill, and a pumpkin cookie cutter.
You could even make a jack o' lantern face with some chopped black olives if you wanted to!


Pretty fancy schmancy looking spread!
But, of course, it wouldn't be a party without dessert!!


And tons of desserts there were.....


My Chocolate & Caramel Covered Popcorn Balls were pretty addicting. 
(Click HERE for recipe and how-to)
Plus they looked pretty.


Our guest, Steph, brought some Witches hats to share. They are made with a chocolate cookie, Hershey's kiss and some orange frosting. Simple yet very cute!


These guys just crack me up.
Killer Bees.... 
Too funny. Sue gets credit for putting together these murderous beasts but, in my defense, I came up with the idea. Just sayin'...
They body is a raspberry filled marshmallow cookie (such as Viva Puffs) with some yellow frosting for the strips and a marshmallow for wings. We used edible candy eyes for the eyes, and plastic food pics for the machetes. 


Sue made some traditional Caramel Apples that were amazing.
Ooey gooey, sticky, and a few peanuts for crunch! 
Perfection!


And it just wouldn't be a party without some homemade chocolate cake. 
Topped with some adorable marshmallow fondant ghosties of course.


But, if pie is more your thing then you might want to try some Pumpkin Hand Pies! (Click HERE for recipe)
You could even make them jack o' lanterns by cutting out little triangle eyes and a mouth before baking them to make them more Halloween-y.


Thanks to Oriental Trading we had some spooky glasses to drink out of...
This one is filled with my attempt at a Shirley Temple.


Looks pretty nasty but this was our Apple Juice and Fireball Whiskey "Specimen" Shooters.
They taste just like apple pie!! So good.


Sue and I wish everyone a happy Halloween!!
(That's me on the white, covered in blood - and Sue is the Coke can!)
We hope you enjoyed our dinner ideas for this year and would love to hear and comments, questions, or suggestions you have.
 
Be sure to check out these fun linky parties for tons of great links - Kitchen Fun With My 3 Sons, My Turn (for us),  
 

Thursday, October 23, 2014

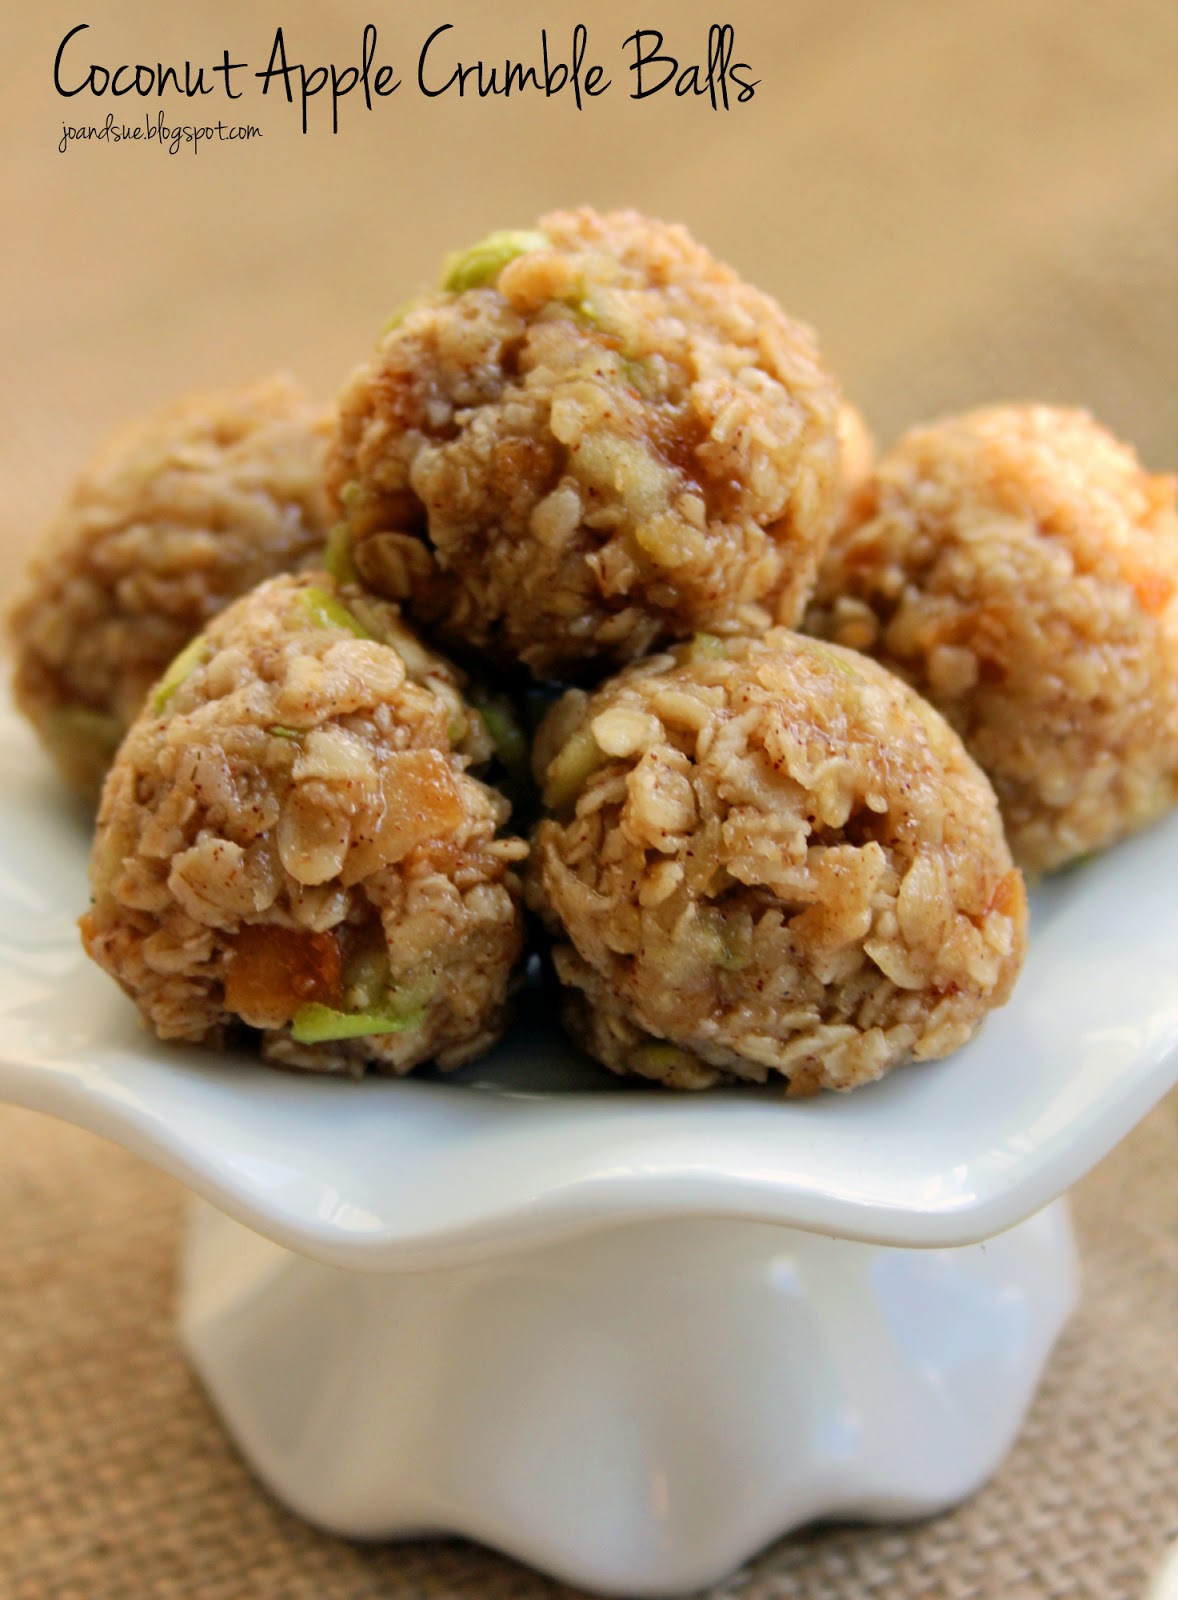
Coconut Apple Crumble Balls


Hey!
Do you guys want a recipe for a super quick and easy, NO BAKE, delicious, gluten free, dairy free treat?
Of course you do.
Well, you are in luck. 
I was inspired by those no bake oatmeal haystack cookies that everyone always makes and decided to try something a little different. I love that these really taste like bites of apple crumble!
You don't want to eat too many of these - they are pretty high in calories and carbs - but one or two is a real energy boosting treat PLUS they are ready in about 10 minutes. Not even lying. 


Coconut Apple Crumble Bites

Ingredients
1/4 cup coconut oil
1/2 cup sugar
1 large apple (I used Granny Smith)
1/2 tsp cinnamon
1/2 tsp vanilla
1 1/4 cup Quaker Quick Oats
1/4 cup toasted coconut flakes

Directions
Line a cookie sheet with plastic wrap or a silpat mat, set aside.
In a medium saucepan stir together the coconut oil and sugar over medium heat. 
When coconut oil is melted stir in shredded apple, cinnamon, and vanilla. Bring to a simmer and then simmer for 2 minutes, stirring constantly.


Remove from heat and stir in oats and coconut flakes.


Let mixture cool for about 5 minutes.
Using a small cookie scoop, scoop balls of the mixture onto prepared cookie sheet. You can either leave the scoops as is OR you can then roll them in your hand so you have a nice round ball shape. (See photo - top of the pic is rounded balls, bottom is the scoops, not rounded)


Chill for a few minutes to set up.
*Boom*
Done.
Just like that.


A couple of notes....
I get 28 balls out of this using the small cookie scoop.
You can use butter instead of coconut oil if you want to.
Make sure your oats are marked gluten free - some oats aren't. 
I didn't peel my apple - I like the peel - but you can peel it if you want to.
I used the big flakes of coconut but you can always use toasted, shredded coconut as well. 
 
Be sure to visit these fab sites for tons of great links - The Chicken Chick, Ms enPlace, Carole's Chatter

Sunday, October 19, 2014

Spicy Spaghetti Squash Soup


I couldn't believe how tasty this soup was for how easy it was AND the nutritional count blows my mind.
For 1/10th of the recipe (approx a heaping cup) it is 58 calories, 11 carbs, 0 fat, and 3 protein. 
Crazy, right?
58 calories. NO fat. 
I checked it on Myfitness pal twice. 
I'm dying from happiness over here. I had a serving of this for lunch and it was very filling - I actually had to go looking for something else to eat to bring up my calorie count for the day. (P.S. - I ended up having half a toasted whole wheat bun with the soup to up my calories another 80)
You can, of course, throw in other veggies than the ones I've chosen but that will change your nutritional values. 


Spicy Spaghetti Squash Soup

Ingredients
3 large cloves garlic, chopped
1 large onion, diced
1 small jalapeno, seeded & diced
3 tsp curry powder
1/2 tsp cumin
salt & pepper
1 large spaghetti squash, roasted
4 cups vegetable broth
1 cup 0 fat Greek yogurt, plain

Directions
Place large pot over medium high heat. Add in garlic, onion, and jalapeno.


Cook and stir until veggies soften. Stir in the curry powder, cumin, and salt & pepper. 


Take your roasted spaghetti squash and shred it with a fork.


Reserve about 2 cups of the shredded squash to add to your soup at the end. Add the rest of the squash to the pot with the other veggies.
Stir in the vegetable broth.


Bring to a boil and simmer for 5 minutes. Remove from heat and let cool for about 20 minutes.
Blend, in batches, in blender until smooth.
Pour back into the pot and place back over medium high heat.
Add in the reserved spaghetti squash.


Bring to a simmer and then stir in the Greek yogurt.


Remove from heat and serve. 
(I topped mine with a little spoonful of Greek yogurt)


A couple of notes - If you have an immersion blender then this is even easier. No need to remove it to a blender, you can just blend it right in the pot.
If you don't want to roast your spaghetti squash (it takes about an hour) them microwaving it will work just as well (this only takes about 10 - 15 minutes).
Want it spicier? Add more jalapeno, curry and cumin. It's a very forgiving recipe. 
This also freezes very well. I simply scooped it into muffin tins (my muffin trays are 1/2 cup volume) and froze them then placed all the frozen "pucks" into a Ziplock bag. 2 "pucks" is one serving. To reheat you can microwave it for a few minutes or in a small pot on the stove top. 

Saturday, October 18, 2014

Lemon Meringue Pie Cheesecake


Know what tastes delicious?
Lemon meringue pie.
Know what else tastes delicious?
Cheesecake.
Know what happens when you combine these two desserts into one super mega fantastic creation?
Most. Delicious. Dessert. Evah.
Don't believe me? Make it... you'll see...
Oh.
You'll see.


Lemon Meringue Pie Cheesecake

Ingredients
Crust
or your favorite single pie crust recipe

Cheesecake
4 X8oz bricks Philadelphia Cream Cheese, room temp
1 1/4 cup sugar
6 eggs
1 vanilla bean (scraped and pod discarded)
juice of 1 large lemon (approx 1/4 cup)
zest of 1 large lemon
1 cup Greek yogurt, plain

Lemon Curd
1 cup sugar
5 egg yolks (reserve whites for meringue)
juice of 6 lemons (approx 1 cup)
zest of 1 lemon
1/2 cup butter, cubed

Meringue
5 egg whites
1/4 tsp cream of tartar
1/3 cup sugar

Directions
Preheat oven to 350. Lightly spray a 10 inch springform pan with cooking spray, set aside.
Roll out pie crust and place in bottom of springform pan. Pie crust should go up the sides about an inch or so. (You can also crumble in the dough and press in the crust using your fingers if this works better for you.) 
Set aside.
Prepare cheesecake - In a large mixing bowl, beat cream cheese on low, scraping sides often, until smooth. Add in eggs, one at a time, scraping sides as necessary. 
Stir in the vanilla bean seeds, lemon juice/zest, and Greek yogurt by hand. 
Pour over crust into pan.
Bake at 350 for approx 45 mins to an hour, turn off oven and let cheesecake sit in oven until cool. 
Prepare lemon curd - In a saucepan, whisk together sugar, eggs, and lemon juice/zest over medium heat. Whisk constantly until mixture thickens enough to coat the back of a spoon. Remove from heat and whisk in butter until smooth. 


Refrigerate until thickened and cool.
Spread cooled lemon curd onto the cooled cheesecake. **NOTE - you may not use all the lemon curd. Use just enough to fill the slight "dip" in the center of the cheesecake. ** 


Prepare meringue - Preheat oven to 350.
In a mixing bowl, beat the egg whites and cream of tartar until foamy. Add sugar about a tablespoon at a time, continuing to beat at the highest speed.
Meringue is ready when egg whites form stiff peaks. Spread meringue on top of cheesecake - being careful not to touch sides of pan with the meringue.


Bake in 350 oven until meringue is golden brown - about 15 minutes or so. Keep an eye on it!


Let cheesecake cool completely and then chill in fridge for at least 4 hours (up to overnight).
Run a knife around the edge of the cheesecake to loosen it from the springform pan. Remove the sides of the pan and serve. 


*cue angels singing*
A few notes - If you want to save some time you can use a store bought crust and use store bought lemon curd/lemon pie filling. 
This dessert does take a little prep. I made the cheesecake the day before and then the lemon curd and meringue the next day and it worked great. Totally worth the extra effort!
I find my homemade lemon curd is a little bit runnier than store bought but it still works just dandy for this recipe! I also don't use all the meringue the recipe makes as it would be piled a mile high BUT feel free to pile it on if you enjoy meringue! 
If you don't have vanilla beans feel free to use vanilla extract.
We had this as one of our Thanksgiving desserts but it would work well for Easter or Christmas too! it makes a HUGE cheesecake so there is lots to go around. 
 
Be sure to stop by these fab sites for tons of fun links - Ms. enPlace, The Chicken Chick, Carole's Chatter
 

Friday, October 17, 2014

Pecan Pie


My first pecan pie ever.
I can't believe I haven't made one before this point and, after tasting it, I REALLY can't believe I've waited this long to make one.
So. Darn. Tasty.
Very sweet. I mean.... it's pretty much made of syrup and sugar.... but WOW this was fantastic as one of our Thanksgiving desserts. I'm pretty sure we are deep in sugar coma territory here but I'm not complaining about it. 
This may have been my first pecan pie but it won't be my last!


Pecan Pie

Crust
or your own favorite, single crust pie dough

Filling
3 eggs
3/4 cup light corn syrup
2 Tbsp dark corn syrup
1 vanilla bean pod, scraped (pod discarded)
3/4 cup brown sugar
3 Tbsp butter, melted
pinch salt
1/2 cup pecans, chopped fine
 1 cup pecan halves

Directions
Preheat oven to 375. Roll out pie crust and place in a 9 inch pie plate. Set aside.
In a mixing bowl, whisk together eggs, corn syrups, vanilla bean scrapings, brown sugar, butter, salt, and the 1/2 cup of finely chopped pecans.
Pour mixture into crust in the pie plate.


Gently place the remaining pecan halves on top of the filling. (Just "float" them on top, don't push them down.)


Place in oven and bake at 375 for 10 minutes. Turn heat down to 350 and continue cooking until filling is browned, puffed up, and set up (no longer jiggly), about 45 mins to an hour. If you find the crust getting to dark just carefully cover the edges with strips of tinfoil. 


Let cool to room temp before serving so filling can set. (The filling will deflate a bit as it cools!)


You can add more pecans on top if you like. 
Be careful not to overcook it as most people like pecan pie a teeny bit gooey! 
Oh, and if you don't have a vanilla bean to use then just put in 2 tsp of vanilla extract. 
Pretty simple to whip up - I think the toughest part for me was getting it into the oven without spilling it. 
Definitely a treat that is perfect for a family get together.