Sometimes the most delicious foods are just not terribly pretty.
Take this dip, for example.
Not pretty at all...but so so so good.
I brought it to our Easter dinner as an appetizer and it disappeared in about 10 minutes. The kids absolutely loved it. Sue and I have made the "regular" Mexican layered dip in the past and we both agreed this version is way better. Baking it in the oven just puts it over the top.
Just be careful when you go to serve it. It is crazy hot when you take it out of the oven and will burn the heck out of your tongue if you dive into it.
Not that it happened to me.
Okay. It happened to me.
I may have been a little too eager to try it. Lesson learned. Let it sit for a bit to save yourself some grief.
Baked Mexican Layered Dip
Ingredients
Bottom Layer
1 can (14 oz) refried black beans
1/2 cup salsa
2nd Layer
1 cup prepared guacamole
3rd Layer
1 (8oz) brick cream cheese, softened
1/2 cup sour cream
3 tsp taco seasoning
4th Layer
3/4 cup salsa
5th Layer
Directions
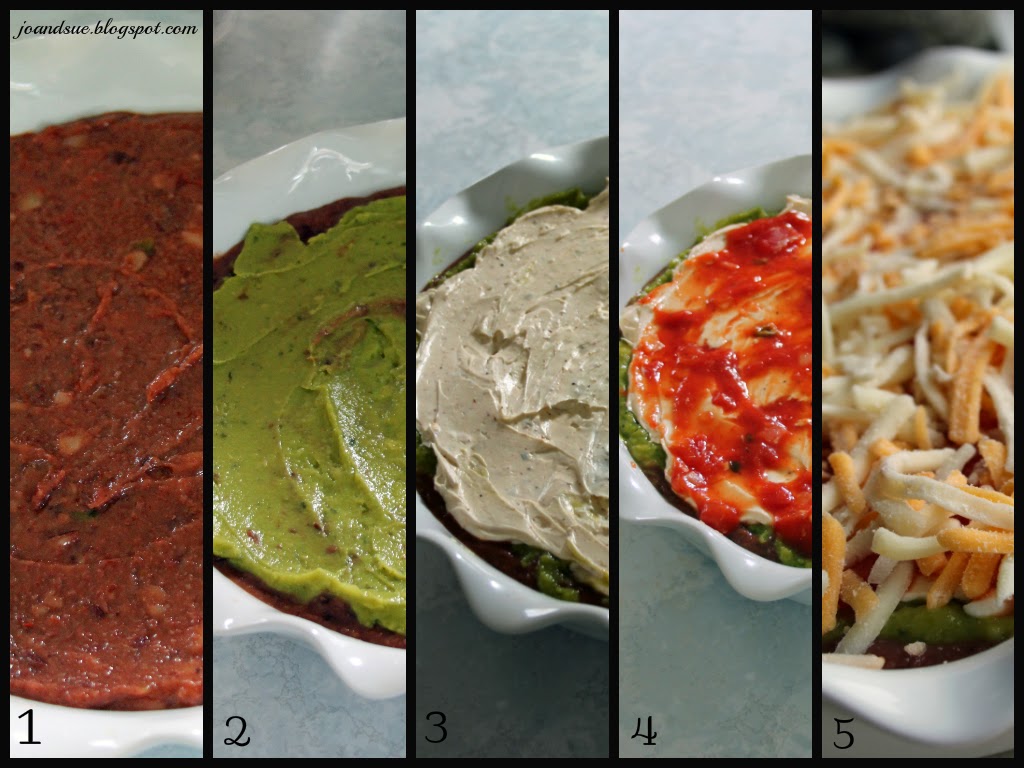
Preheat oven to 350. Lightly spray a 9 inch, deep dish pie plate with cooking spray, set aside.
In a small bowl, stir together the black beans and salsa.
Spread evenly in prepared pie pan.
Next - spread the guacamole over the beans in the pie plate.
In another bowl, beat the cream cheese until smooth, scraping down sides as needed. Add in the sour cream and taco seasoning and beat until smooth.
Spread over the guacamole. **HINT - it helps to drop the mixture by spoonfuls over the dish and then gently spread them together. (see photo below)
Top the cream cheese mixture with the salsa. Spread evenly.
Finally - top with the shredded Tex-mex cheese.
Here is the layers in one photos --
Bake in 350 oven for approx 30 minutes - until cheese is melty and dip is bubbling.
Remove from oven and serve hot with Tostitos "Scoops" tortilla chips or regular tortilla chips. *Note - it is extremely hot when it comes out of the oven - be careful*
You can make this as spicy as you like. I used mild salsa but you could easily use medium or hot, you could add some cayenne pepper to the taco seasoning or a dash of hot sauce, you could use a different blend of cheese - ie: Kraft Habanero shredded cheese.
Also, the amounts are forgiving too: For the salsa layer I just used up what I had left (3/4 cup) but you could use 1/2 cup or a full cup if you wanted to. And for the amount of cheese, we like things cheesy so we used a good 2 handfuls of the Tex-Mex but you could cut back if you wanted to.
Another note - I cooked this for 20 minutes, to where the cheese was just melting, took it out of the oven, wrapped it in a towel to keep it warm, then drove to my sisters house (15 minutes) and popped it in her oven for another 10 minutes or so to finish cooking it.
You could just as easily prepare this ahead of time and keep it refrigerated until ready to cook it. Just remember to bring it out of the fridge while your oven is preheating to warm it up a bit.
Be sure to stop by these blogs and check out all the great links! - The Chicken Chick, Ms. enPlace, Hungry Happenings, Hun...What's For Dinner?, Carole's Chatter


Delicious dip! All the flavors I love.
ReplyDeleteMe too :) Thanks Catherine!
DeleteYUM! Thanks so much for sharing.
ReplyDeleteThank you :)
DeleteI think it looks so scrumptious! Cheers from Carole's Chatter
ReplyDeleteThank you Carole :)
DeleteLooks delicious! Thanks for sharing.
ReplyDeleteThank you Tara :)
DeleteWe love Mexican layer dip. I'm totally going to have to try it baked! Thanks so much for sharing at Simple Supper Tuesday.
ReplyDeleteYou totally need to bake it! :) It is sooo much better
DeleteI agree that sometimes the best food is not the prettiest. And sometimes the best food is the messiest.
ReplyDeleteA party has to have Layered Mexican dip. Love the idea of baking it to get it all hot and gooey. Thank you for sharing this week.
(Hope your tongue has recovered from the dip)
Thank you Michelle, my tongue is now fine - ice cream, and lots of it, definitely helps :)
DeleteI love it, because it's so rich and I like rich food and the sweet too. I'm sure my son will love it too. Thanks for the recipe.
ReplyDelete