Wednesday, December 27, 2023

Baklava Cheesecake


This just might be the best cheesecake… nay, dessert… in the universe. 
Bold claim, I know, but it’s true. The combination of the crispy sweet baklava and the smooth and creamy cheesecake is *chef’s kiss*. 
My sister’s boyfriend said I could become a millionaire if I decided to sell it. I think he’s right. Once you have a taste you want more. The only thing that is a bit of a bummer is the fact that it takes a bit of time and effort to put it together. If you’ve ever made a baklava and a cheesecake then you know what I’m talking about. Totally worth it though. 
Do it.


Baklava Cheesecake

Ingredients
Baklava Base
20 phyllo sheets
1 cup butter, melted
1 cup finely chopped walnuts
1 cup finely chopped pecans
1/4 cup sugar
1 1/2 tsp cinnamon

Cheesecake Layer
3 bricks cream cheese (24 oz), softened
1 1/2 cups sugar
Pinch salt
3 tsp vanilla extract
3/4 cup sour cream
1 Tbsp lemon juice
3 eggs

Honey Syrup
1/2 cup sugar
1/4 cup water
1/4 cup honey

Directions
Preheat oven to 325. Line the bottom of a 10 inch springform pan with parchment paper.
Layer 1 phyllo sheet in the prepared pan. Gently press the sheet against the sides of the pan and over the top. Brush all over with a little melted butter. Continue layering a phyllo sheet and butter until you have used 10 phyllo sheets. 
Combine the chopped walnuts, pecans, sugar, and cinnamon in a small bowl. (Reserve 1/3 of a cup for decorating the top of the cheesecake later). Spread half of the mixture into the pan. 
Layer 5 more phyllo sheets and butter on top of the nuts.
Spread the remaining chopped nuts mixture in the pan. 
Layer in the last 5 phyllo sheets and butter. 
 Set aside and prepare the cheesecake.


Prepare cheesecake - Beat cream cheese until smooth, scraping down sides of bowl as needed. Beat in sugar, salt, and vanilla. Beat in sour cream and lemon juice. Lastly, beat in eggs until just combined. 
Pour into the pan and spread evenly. 


Gently fold the excess phyllo up and over the top, leaving the centre of the cheesecake open. It’s okay to trim off some phyllo if you don’t want it too thick on top. IMPORTANT NOTE - Set the cheesecake on a cookie sheet as it will drip and smoke up your oven otherwise! 


Bake at 325 for 60 - 70 minutes. FYI - I actually ended up baking mine for almost 2 hours before it was done. The centre should be almost completely set with just a slight jiggle to it if you gently shake the pan. The phyllo should be golden brown.
When the cheesecake is done, shut the heat off and let it sit while you prepare the honey syrup.
Prepare the syrup - Bring sugar, water, and honey to a boil over medium heat. Simmer for 5 - 6 minutes. 
Remove cheesecake from oven to a wire rack. Slowly drizzle the honey syrup over the phyllo pastry. Make sure to try and get it in all the cracks and crevices. Drizzle a little over the centre of the cheesecake as well. 


Let cool to room temperature before removing the sides of the pan. Don’t worry if a bit of the phyllo falls off as you do this, it’s normal. 
Chill the cheesecake in the fridge for at least 4 hours, up to overnight.


Before serving, sprinkle the reserved 1/3 cup of chopped nut mixture around the edge of the cheesecake. Slide a spatula under the chilled cheesecake to remove the bottom of the springform pan and transfer the cake to a serving plate. 


This makes a huge cheesecake so is perfect to bring to a family gathering or potluck. It also lasts for several days, covered, in the fridge. I had a piece 3 days after first making it and it was totally fine. The phyllo was a teeny tiny bit not as crunchy but it was not soggy or anything like that. 


Look at all those delicious layers!
So. So. So. Good.
I will definitely be making this again. 

Monday, December 25, 2023

Yam Mochi in Sticky Gochujang Garlic Sauce


This year for Christmas I decided to try something new. I had never had mochi before and I saw several absolutely delicious looking recipes on Pinterest and knew I had to give it a try. 
I ended up searching through several dozen recipes because there are a million different ways to make it. I combined a few to come up with this one and the family was pretty happy with the results. 
I will definitely be making this for future dinners. It takes a little time to roll all the balls out but is otherwise super simple! 


Yam Mochi In Sticky Gochujang Garlic Sauce 

Ingredients
Mochi 
3 cups mashed yams (about 2 medium)
2 cups cornstarch 
2 cups tapioca flour
1 Tbsp salt
Olive oil
Sauce
4 Tbsp soy sauce
4 Tbsp water
2 Tbsp sugar 
2 tsp fish sauce
2-3 tsp gochujang 
5 cloves garlic, minced
1 tsp sesame oil
2 tsp cornstarch
1/3 cup chicken broth
Garnish 
Green onions
Sesame seeds

Directions
Boil yams until very soft  - about 20 minutes. Let cool completely. 


Mix the cooled, mashed yams with the cornstarch, tapioca flour, and salt. Mixture should form a firm yet pliable dough.


If it is too sticky, add a bit more tapioca flour a little at a time. If it is too dry, add a little water. 
Pinch off grape sized pieces of dough and roll into balls. Place on parchment paper lined sheet. 
If you don’t want to use all of the dough you can freeze it for a later time. 


Once the balls are ready bring a large pot of salted water to a boil. Drop about 1/4 of the balls in (not too many as you don't want the water to stop boiling). 


Boil until the balls float to the surface - about 3 - 5 minutes. Using a slotted spoon, remove the mochi from the water and drop into a bowl of cold water to stop the cooking process. Drain and set aside. Repeat until all the balls are cooked. 


Toss in a little bit of olive oil to prevent the balls from sticking together. 
At this stage you can refrigerate the balls until ready to make the sauce and serve. 
When ready to eat - prepare the sauce.


Place soy sauce, water, sugar, gochujang, fish sauce, garlic, and sesame oil in a large pan. Bring to a simmer over medium heat. Add in the mochi and stir to coat. Whisk together cornstarch and chicken broth and add to pan. Turn heat to low and cook until heated through, stirring often.
If sauce thicken too much, add a bit more chicken broth. 


Remove from heat and sprinkle with green onions and sesame seeds. 


You can make this with potatoes, sweet potatoes, or yams. The yams give them that beautiful orange color. A great recipe to use up leftovers.  
I sampled the mochi without the sauce and they taste just like plain yams. It’s the texture that makes these so intriguing. Chewy and sticky and deliciously different. 
The gochujang adds so much flavor but it also adds heat. Start with a little and add more as you like it. I went with about 1 Tbsp total and it was just spicy enough. 
We love trying foods we haven’t had before and this one is definitely going into regular rotation! 


Friday, September 1, 2023

Keto Eclair Dessert


Have you ever tried the famous eclair dessert? You know the one… layers of graham crackers, pudding, and chocolate. It’s heavenly but obviously not keto friendly. 
I decided to try and ketofy it. 
This version has 3 steps to make so it is a bit of work but, trust me, it’s worth it. I find it fairly close to the original. You don’t get the graham cracker-iness obviously because you are using meringues instead but other than that it’s super-de-duper close. 
Note - my pastry cream and ganache both separated a tiny bit because I didn’t whisk them vigorously enough. Just an FYI - it looks a little sketchy but does not affect the deliciousness at all! 


Keto Eclair Dessert 

Ingredients
Pastry Cream 
1 1/4 cup heavy cream
3 egg yolks
1/4 cup Swerve sugar replacement
Pinch salt
1 Tbsp arrowroot starch
2 Tbsp butter, cut up
1 1/2 tsp vanilla

Meringue
3/4 cup fine almond flour
1/3 cup Swerve powdered sugar replacement
4 egg whites
2 Tbsp Swerve sugar replacement 
1/2 tsp vanilla 
pinch salt
1/4 tsp cream of tartar 

Chocolate Ganache
5 Tbsp butter
2 oz (scant 1/3 cup) Lilly’s chocolate chips
1/4 cup Swerve powdered sugar replacement 
1/2 tsp vanilla 

Directions
Prepare pastry cream - Bring heavy cream to a simmer in a pan. In a separate bowl, whisk together egg yolks, Swerve, salt, and arrowroot starch. Temper the eggs by very slowly whisking in the hot cream until we’ll combined. Return mixture to pan, place back on low heat, and stir until thickened. Note - this happens quickly so keep stirring and don’t leave it alone on the heat. Remove from heat once thickened and stir in butter and vanilla. Chill pastry cream until completely cool. 
Prepare meringues - Line a cookie sheet with parchment paper and preheat oven to 350. Draw 3 - 5 x 10 rectangles (or 24 - 2 inch circles) on the parchment paper to use as templates for the meringue. 
Whisk together almond flour and powdered Swerve, set aside. Beat egg whites, Swerve, vanilla, salt, and cream of tartar until stiff peaks form. Fold in the almond flour mixture. Gently spread or pipe the meringue on to the forms on the parchment paper.
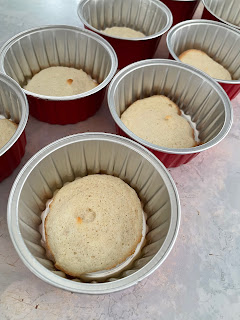
Bake for 15 minutes at 350 then turn the oven off and prop the door open with a wooden spoon. Let cool completely in the oven. 


Above photo is before being baked. 


Above photo is after being baked. 
When pastry cream and meringues are both completely cool you can prepare the dessert. 
Layer one meringue on the bottom. 


Follow with a layer of half of the pastry cream.


Then another meringue layer. Top with the rest of the pastry cream. Set aside while you make the ganache. 
Prepare ganache - Melt butter and chocolate over low heat. Remove from heat and stir in Swerve and vanilla. Stir until smooth. If butter seems to separate just stir a little more vigorously! 
Let cool about 5-10 minutes, until thickened but still pourable. 
Spread evenly over the last meringue layer. 


Chill dessert for at least an hour. If making ahead of time, be sure to bring dessert out of the fridge and let sit for 15 minutes to soften ganache before serving. 


Recap - layers are: meringue, pastry cream, meringue, pastry cream, meringue, ganache. 


Photo above you can see my ganache separated a little as there is a bit of butter around the edges. Just be sure to whisk your ganache well and this shouldn’t happen to you! It doesn’t affect the taste at all either, just doesn’t look as pretty. 


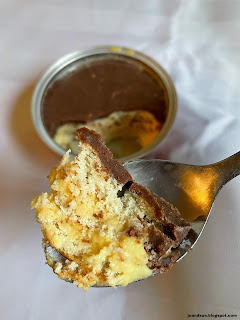
You can see those tasty layers when you dig in! 
I decided to do 8 individual servings in little containers but you can make it as a 5 x 10 dessert if you prefer. 
Nutritional info per serving (recipe makes 8 servings): 335 calories, 33 fat, 7.8 carbs, 3.6 fiber, 6.4 protein. That’s 4.2 net carbs. 
Reminder: if the pastry cream or ganache looks separated it won’t affect the taste. Just be sure to whisk well while you are making it! 


Tuesday, August 15, 2023

Thai Chicken Buddha Bowl


I’m going to be honest with you. This recipe is going to take some prep work. It’s a bit of a pain in the butt BUT you will not regret making it. It’s sooooo good. 
So much healthiness in one bowl. 
When I was making it I was hopeful that it would turn out to be “just okay” or not good so I could justify not having to do that much prep again. Guys… it was amazing. The textures, the flavors… everything about it I loved. The people I made it for absolutely loved it as well. 
I will 100% be making this again. 


Thai Chicken Buddha Bowl

Ingredients 
3 Tbsp peanut butter
2 Tbsp lime juice
1 Tbsp soy sauce 
2 tsp brown sugar
2 tsp chili paste (optional) 

1 cup dry quinoa
1 1/2 cups chicken broth

1/4 cup chicken broth
1 Tbsp brown sugar
1 Tbsp lime juice

1 lb chicken, diced
1 Tbsp cornstarch
1 Tbsp fish sauce
1 Tbsp oil
2 cloves garlic, minced
1 shallot, minced
1 tsp ginger, minced

2 cups kale, shredded
1 1/2 cups purple cabbage, shredded
1 cup bean sprouts
2 carrots, shredded

Fresh cilantro
1/4 cup roasted peanuts, chopped

Directions
Prep all of your ingredients. 


Whisk together first 5 ingredients (peanut butter, lime juice, soy sauce, brown sugar, chili paste), set aside.
Cook quinoa in 1 1/2 cups chicken broth, set aside.
Whisk together 1/4 cup chicken broth, brown sugar, and lime juice. Set aside.
Toss chicken in cornstarch and fish sauce. 
Heat oil in pan and cook chicken until no longer pink. Add in the garlic, shallot, and ginger. Cook another minute. Add in the chicken broth and lime mixture you set aside earlier. Cook until sauce thickens. 


Make up your Buddha bowls: 
Place 1/2 cup shredded kale, 1/3 cup shredded cabbage, 1/4 cup bean sprouts, 1/4 cup shredded carrot, 1/2 cup quinoa, and 1/2 cup chicken in each bowl. (Makes 4) 


You can make it look fancy schmancy or just place it all in a bowl willy nilly… completely up to you


When ready to serve, drizzle with the peanut sauce - approximately 2 Tbsp per bowl. Garnish with fresh cilantro and chopped peanuts, if desired. 


Recipe is easy to double if you do meal prep or have a bigger crowd to feed.


Once it’s all mixed up with the sauce it doesn’t look as pretty but it’s absolutely delicious.


Recipe makes 4 large servings. 
Like I mentioned above, I was hoping I wouldn’t find this tasty because it is a bit of a pain to do all the prep. Sorry to say it is amazing! 
I hope you give it a try because I am positive you will fall in love with it too. 
Healthy, hearty, delicious. 


Sunday, July 16, 2023

Easy Gluten Free Flatbread


Flatbread is a favorite around our house because it’s easy to whip up with minimal ingredients, it’s inexpensive, and it’s delicious with any toppings! I had a friend ask me to make some gluten free flatbread for her so I took a couple recipes from online and tweaked them and mixed and matched them to come up with this one. FYI - I use either Bob’s Redmill or Cup4Cup brand gluten free flour blends, I’m not sure how others would work.
From start to finish, it took me under half an hour to make these. 
You get a total of 8 approximately 8” flatbreads. 


Easy Gluten Free Flatbread

Ingredients
1 1/2 cups plain, 0 fat Greek yogurt
8 tsp olive oil
2 tsp baking powder
1 tsp salt
2 cups Gluten Free Flour Blend (I use Cup4Cup)

Olive oil
Extra gluten free flour
Optional: parsley 

Directions
Whisk together Greek yogurt and olive oil. In a separate bowl, stir together flour, baking powder, and salt. 


Stir the wet ingredients into the dry ingredients until stiff, but not too sticky dough forms. If too dry, add water a spoonful at a time. If too sticky, add more flour a spoonful at a time. 
Divide dough into 8 pieces.


Roll each piece out on a floured work surface to approximately 1/4 inch thick. 


Heat cast iron pan over medium low heat. (A non-stick pan will work but cast iron is better if you have the option). Brush pan with a little olive oil and fry one flatbread at a time. Each side takes about 2 minutes. You may need to adjust the heat - too hot and it will burn, too cool and you won’t get the color and crispness. 


When done, remove from pan, brush with a little more olive oil, and sprinkle with a little parsley. This is optional - you can leave it plain if you like. 


Repeat with remaining flatbreads, brushing the pan in between each one with a little oil.


Serve immediately. 


I love these with tzatziki or hummus. They are just the thing to serve with a curry too. 


They will last, covered, on the counter for a day or two or you can freeze them for a month or so. Just pop them in the oven to reheat.


Sliced into triangles they make the perfect potluck dish or appie. 


These have a lovely, slightly chewy, slightly crispy texture. If you eat them plain they have that hint of gluten free flour taste to them but it’s not at all noticeable when served with a dip. 
I used a garlic olive oil which is great for adding extra flavor. You could even add some minced garlic to the dough if you want it more savory.