Monday, June 30, 2014

Rhubarb Relish


Here is a good example of something tasting delicious but looking...well....looking like it wouldn't taste delicious. 
It's brown and lumpy and just plain not pretty. 
I didn't have high expectations for this when I was canning it but, I have to tell you, I was VERY pleasantly surprised. I made it and brought it in for Jo and the family to try and they all loved it too.
My mother-in-law gave me the recipe and encouraged me to try it to use up the mountains of rhubarb we had this year. 
I'm glad I tried it. This goes really well with pork and beef and, when Jo made her Baked Chicken Samosas (recipe HERE), it was superb with that as well. We also put some in our Bacon Cheeseburger Pop Tarts to add some zing!


Rhubarb Relish

Ingredients
6 cups chopped rhubarb
4 cups chopped onions
1 tsp ground cloves
1 tsp ground allspice
1 tsp ground cinnamon
2 tsp salt
1/2 tsp cayenne pepper
4 cups brown sugar, lightly packed
2 cups apple cider vinegar

Directions
Chop up rhubarb and onion. 


Place in large pot and add spices, brown sugar, and vinegar.


Stir together well.


Place over medium - high heat and bring to boil. Reduce heat so mixture stays at a simmer and cook approximately 40 - 60 minutes, stirring often.


After 40 (to 60) minutes relish is ready to use. You can either let cool and refrigerate or you can can the relish while it is at this stage. 
Follow regular canning instructions to finish processing. (I processed the jars in a water bath for 10 minutes.)


I believe I got 7 - 1 cup jars of rhubarb relish out of this recipe. 
I thought it was going to be too sweet for me but it wasn't. It was something really different. Tons of flavor that goes great with soooooo many things. 
Try it on your hot dogs and hamburgers, roasts, turkey, maybe even a little on a cracker with some cream cheese, or even as a dip for samosas, egg rolls, and whatever else you can think of!

We're sharing at these great linky parties - Memories By The Mile, Anyonita Nibbles, Hun...What's For Dinner, 

Sunday, June 29, 2014

Raspberry Pie (Take 2)


I was going to be all fancy schmancy and make a really cool Canada Day dessert. 
Thing is... I discovered that I'm not that good at making things look like a Canadian flag. 
At all.
It's so sad.
I had originally decided that I wasn't going to share the photos of the supposed flag looking dessert from afar and only show close up so as not to give away my sad, sad decorating abilities.
Then I said....what the heck. 
It still kinda looks like a Canadian flag. 


Have you stopped laughing yet?
Anways.....
It's delicious and it's low calorie so even if you don't want to make this a Canada Day dessert you should still make it. For realz.
We shared this previously HERE. When we made it that time we prepared it in a store bought graham cracker pie shell so it looked more like a traditional pie. We also mixed the 2 separate layers into one instead of leaving them apart. Either way will work. (Check out the other version HERE.) 


Raspberry Pie (Take 2)

Ingredients
Crust
1 1/2 cups graham cracker crumbs
3 Tbsp coconut oil (or butter)

Pie
3/4 tsp unflavored gelatin
2 Tbsp hot water
1 cup light Ricotta cheese
3 tsp Splenda
1 tsp vanilla
1 pkg sugar free Raspberry Jello
1 cup boiling water
2 cups frozen raspberries
1 - 2 cups 95% fat free Cool Whip

Directions
Prepare crust - in a medium bowl, combine graham cracker crumbs and coconut oil until well mixed. Press very firmly into an 8 X 12 tart pan. (Optionally you can prepare this in a 9 inch pie pan) Set in fridge until ready for next step.


Prepare pie filling - In a small bowl, whisk together the unflavored gelatin and hot water until gelatin dissolves. Set aside.
In a large mixing bowl, beat together Ricotta, Splenda, and vanilla until smooth. Beat in the dissolved gelatin mixture. 
Spread over the crust. (This can be tricky as the graham crumbs tend to lift up. It helps to spoon the Ricotta mixture in little spoonfuls all over the crust and then use the back of a spoon to spread them together.) 
Place in fridge while preparing final layer.


In a medium mixing bowl, whisk together Jello powder and boiling water until Jello is dissolved. Stir in the frozen raspberries. Let sit 5 - 10 minutes so mixture can thicken up a bit. 
When raspberry mixture is a bit thickened, spoon over Ricotta mixture and spread evenly.


Now, you can either spread the Cool Whip on top OR cut and serve with a dollop of Cool Whip OR you can design a fabulous Canadian Flag on top. 
Yes. I realize mine is not fabulous.


According to Myfitness pal - 1/8th of the recipe is 195 calories, 22 carbs, 9 fat, and 6 protein. 
What what!
In the photo above you can see one huge piece has been cut out. I wanted to show you how big of a piece you can have for 195 calories.
Crazy, right? 1/8th of a pie is big piece. (FYI - I used 1 Cup of Cool Whip to design the flag and to figure out the nutritional counts.)


Perfect for Canada Day.
Especially if you guests are trying to watch what they are eating.


Also a great dessert for Christmas or Valentines Day.
Heck, you don't have to wait for a holiday to make this. Anytime is a good time for pie and, at only 195 calories a serving, you can eat it without guilt! 
Tart pan or pie pan - either will work and either makes for a beautiful presentation. 
You can also use butter instead of coconut oil for the crust too. I just like the little bit of coconut flavor that the coconut oil lends to the recipe. 

Be sure to visit these fun sites for tons of great links - The Chicken Chick, Ms. enPlace, The Mandatory Mooch, Jam Hands

Saturday, June 28, 2014

Skinny Peanut Butter Cookie Dough Shake


I've been having way too much fun coming up with skinny shakes lately. There are so many flavor combos I want to try. This one came to me while I was looking through some of our old blog posts. I came across our post about healthy cookie dough bites - see HERE. 
As I am fond of peanut butter, I decided to turn those healthy cookie dough bites into a shake. (And when I say "fond" of peanut butter I mean I want to marry it.)
This turned out really good. 
Like... *jazz hands* good.
So rich and creamy and VERY peanut buttery. Perfect for breakfast or dessert. This recipe may be a little more in calories than our other skinny shakes BUT that doesn't mean it's not healthy. It is choc full of protein, gluten free, no added sugar, and it has peanut butter - which is delicious. 
You do have to prep your shake ahead of time so everything can freeze, but other than that it is super simple.


Skinny Peanut Butter Cookie Dough Shake

Ingredients
Cookie Dough Bites
2 Tbsp smooth peanut butter, light
3 Tbsp raisins or craisins
1 Tbsp roasted, salted peanuts
1/2 tsp vanilla

Shake
1/2 cup 0 fat, plain Greek yogurt
2 Tbsp smooth peanut butter, light
1/3 cup 1% milk
ice

Directions
Prepare Cookie Dough Bites - In a blender or food processor, blend 2 Tbsp peanut butter, raisins, peanuts, and vanilla until no big lumps remain. (Because you are doing such a small amount it can take a little while as you have to stop and scrape down the sides often.)


Roll this mixture into 12 small balls. (It helps to wet your fingers in a dish of water to prevent sticking. If you find it is just too sticky - place in freezer and chill 20 minutes and then roll into balls.FYI - the balls are approximately 1 tsp each)


Cover the balls and freeze until solid.
Prepare shake ingredients - Place Greek yogurt and peanut butter in a dish and freeze until solid.


Prepare shake - Place frozen Greek yogurt and peanut butter into a blender (or food processor). Add in the milk and a few ice cubes. Process until smooth. (Add a bit more milk or ice to get to your desired consistency.) 
When you have reached the desired consistency - throw in 6 of the frozen cookie dough bites.


Pulse the mixture only 4 or 5 times. Just enough to break up the cookie dough bites a little bit.
Serve immediately with the remaining cookie dough bites on top. (Recipe makes 2 servings.)
Per serving, according to Myfitnesspal - 260 calories, 22 carbs, 15 fat, and 15 protein.


The cookie dough bites are a great snack on their own as well. Be sure to check out our previous post - 2 No Bake Cookie Dough Bites That Are Good For You.  The peanut butter bites are there as well as a tasty German Chocolate Fudge Bite recipe. 
I love it when healthy and delicious come together. 

Friday, June 27, 2014

Nick & Kenzie's Grad


So these two gorgeous kidlets are the reason Sue and I haven't been blogging a heck of a lot this month.
They both graduated from high school this year....the last of the babies to graduate.
Yes.... we may have shed some tears.
We have been super busy preparing for the parties and overall shenanigans so haven't had too much time to do anything else. 
Anyway... we wanted to share some photos of the celebration and, of course, all of the food at the party afterwards. We have a lot of photos to get through so I will start without further ado. 


Let's start with prom night!
This is Kenz given her cousin Nick a peck on the cheek. Aren't they adorable?


There is Nick with his mama, our sister, Orra. 
Could her smile be any bigger?


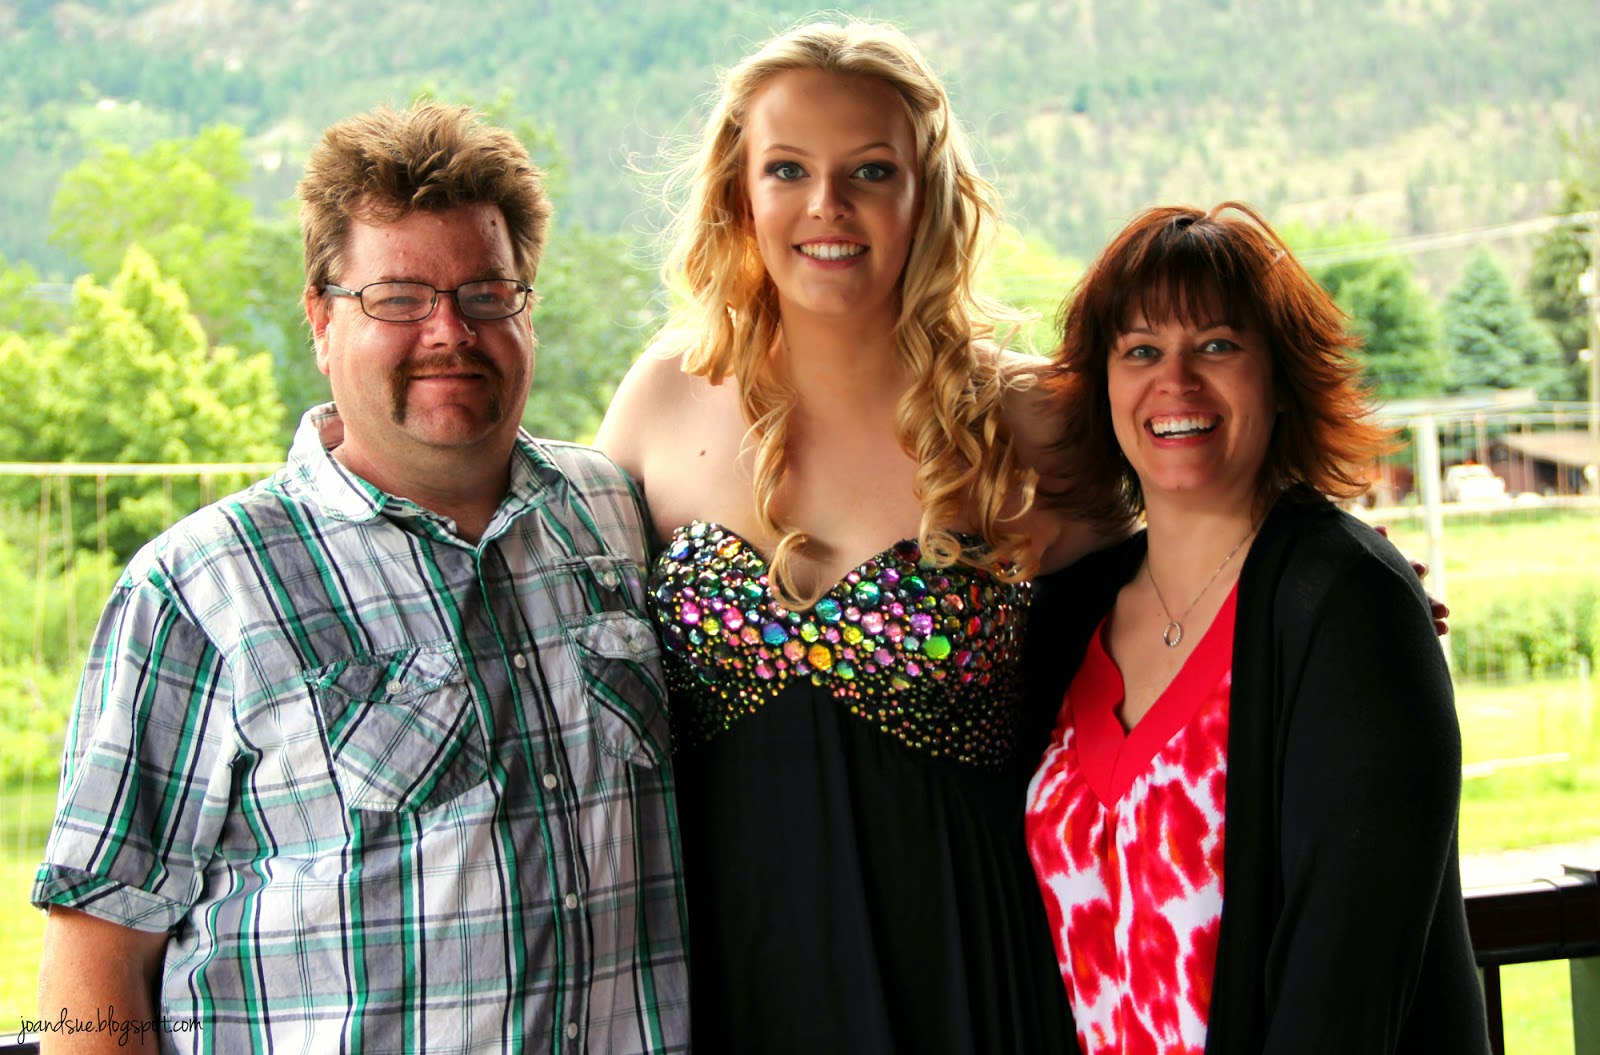
Kenzie with Sue and her dad, Rob. Pretty good looking family I think.


Here's Nick with his Prom dates and their ride to the prom.
First off - Yes, I said dates... plural. (Lucky kid)
Secondly - Yes, that is a firetruck. Nick's dad is a fireman so they offered to take Nick and the girls.


And here is Kenz with her date and ride to prom. 
I would just like to say, Kenzie is 6'1" without heels and in this pic she is wearing 4 inch heels. Look how much taller her date still is. Crazy, right?
Oh, yes, and that car is suh-weet.


Last pics of prom. Kenz by her beautiful self.
I may be a little biased but, isn't she crazy beautiful?


Now, that is how you wear a tux.
Am I right?
Handsomest boy at the party, right there! (Again, I may be a little biased....)

Now, on to convocation.


Aaaawww....my babies are so cute.
And grown up.
How'd that happen?


Nick with his mama, Orra, again.
Like the signs she is holding?
We ordered a dozen of each of them and gave them out to family/friends in the crowd to wave whenever the kids were on stage. It was a surprise to them. *he he he* Oh the eye rollings we got from them. 
By the way, that gold cord around Nick's neck means he maintained an "A" average all year.
Mr. Smarty Pants.


Kenzie with Sue and Rob.
Those are some happy smiles right there.
By the way (again), see that gold sash around Kenzie's neck. Yup, that's right. She was the valedictorian.
Could we be any more proud?


Okay, I will share the one pic I got with them.
They called this the Aunty Jo sandwich. 
*Aaaawwww*

Now...on to the Grad BBQ at Sue's awesome house.


Cute little grad hat treat boxes.
We ordered these from Oriental Trading online. They made great table decorations.


Some Sesame Garlic Noodle Salad. You can find the recipe for that  HERE
This is a great salad to bring for a potluck or large crowd as it makes a lot.


Mom made her famous macaroni salad. 
We haven't shared this recipe yet but we probably should. It's amazing.
It's also great for a crowd as it is super de duper easy to increase or decrease the amount you make. 


Fruit salad.
Again, super easy to increase or decrease to suit your needs.
Plus.... it is delicious.


Some Broccoli Salad. Find that recipe HERE
Okay, pretty much all of these salads can be made to whichever amount you want....
Just sayin'


Pretty kale and mixed green salad with pecans and cranberries.


The only thing different in this salad from the recipe linked up...is we used mushrooms in it instead of strawberries. It's pretty versatile and easy to change up.


One of Kenzie's favorite - Pineapple Jalapeno Poppers. Find that amazing recipe HERE
These really are crazy good. Everyone ALWAYS wants the recipe.


Salmon And Cream Cheese Stuffed Puff Pastry. We've made these several times and they are always a hit. You can find the recipe HERE


Our Aunty Pat and Cousin Karen spent some time cutting up all sorts of flavored cheese and meat for trays. Unfortunately I forgot to snap a photo of the meat tray. 
Trust me, it was just as pretty looking as this cheese one.


Sue made this gorgeous antipasto platter.
She made up a few skewers so people could just pick them up and go. 


But... because she is a super genius...
She also filled the tray with individual  antipasto pieces so people could make up their own.
Beautiful, right?


Okay, we had to make up some Donut Bacon Cheeseburgers.
It's not a BBQ until the crazy burgers start making an appearance. Get that recipe HERE


Of course there was ham.
Nick's favorite.


Aaaaand...some turkey. Light and dark meat separated for easier choice.
:)


BBQ smokies.
Oh. Em. Gee.
They are as tasty as they look. 
Sue and Rob are amazing BBQ'ers.
There was also an impressive looking BBQ salmon but, once again, I forgot to snap a photo of that.


And you know there had to be treats by the car load.
Above is our Rice Krispie Grad Cap.
We found this over at Hungry Happenings but will post a blog later about our experience making it. (Check back for link)


These adorable cake push pop hats we found at Michael's Craft Store.
We made our Vanderwolf's Family Secret Chocolate Cake for the cake inside the push up. You can find that recipe HERE


Yes, we cheated for the big cake.
Thank you Costco.


Great big thanks to friends, Holly and Taylor, for making these yummy sugar cookies. 
Love the way they are decorated!


And for those who wanted something not so sweet...
a selections of banana bread, scones, cookies, and lemon coconut squares.


These were the markers we put out along the roadway so people could find Sue's house.
It is in a rural area. 
So fun.


There's Sue's house with the guests starting to arrive.
Hmm.... just a few cars.
It got a little crazy.


A close up of the deck.
This was before the majority of the guests arrived. The inside of the house very quickly filled up too.
Does Sue know how to throw a party, or what?

There you have it.
We made it through the last of the babies graduating.


There is a photo of aaaaaaaaallllll the babies.
*Sigh*