Sunday, October 4, 2020

Salty Pirate Monkey Cocktail


The toughest part of creating a new recipe is coming up with a name. I am TERRIBLE at naming recipes. I either go with way too much information in the title and it ends up being 4 paragraphs long, or I try to be all clever and completely miss the mark. 
This time I went to my friends on Facebook and had them help me out! 
My friends are all geniuses, in case you were wondering! They came up with names like "Bananas Faster (like bananas foster but with coffee)", "the boozy monkey", "the drunken monkey", "caramel banana dalgona", "spiked caramel banana split", and so many more great ideas. 
My friend Melissa came up with The Salty Pirate Monkey and I'm sticking with it. So fun, right? It has hints about what's in the drink and at the same time is just super fun to say. 
Let's make the Salty Pirate Monkey the new viral cocktail. It's half dessert, half drink and aaaaallll deliciousness! Recipe, as written, makes 1 large boozy milkshake cocktail but can easily be doubled or tripled. If you are a fan of boozy milkshakes then it is juuuuust the right size! 


The Salty Pirate Monkey Cocktail

Ingredients
Dalgona Coffee Whip
1 Tbsp instant coffee
1 Tbsp brown sugar
1 Tbsp very hot water

Banana Bailey's Milkshake
1 frozen banana
1/2 cup milk
1/3 cup salted caramel Baileys
2 Tbsp dark rum
ice

Directions
Prepare the dalgona coffee whip - in a small bowl, whisk (or use beaters) the instant coffee, brown sugar, and hot water until super foamy. This takes a few minutes and should resemble whipped cream when ready. 
Prepare the milkshake - place frozen banana, milk, Salted Caramel Baileys, rum, and ice into a blender and blend until smooth. If you like it thick then add more ice. I usually add 2 good sized handfuls of ice. 
Pour the milkshake into a large glass and top with the whipped coffee topping.


I like to serve it like that as it looks pretty impressive BUT when you go to drink it you definitely want to give it a good stir. 
The coffee whip is very strong so a mouthful of it right out of the gate will shock you. Make sure you mix it up well. 


Still looks pretty. 


And tastes soooooo good! Salted Caramel Baileys and rum, banana milkshake with a coffee twist. Everything you didn't know you needed. 

Sunday, September 27, 2020

Oreo Beignets (Mini Oreo Donut Bites)


I love donuts of all kinds. Beignets are adorable little bite sized donuts that... if you stuff with Oreos... are exactly what heaven tastes like. Pretty sure. 
Donuts of any kind are always a little bit of work because you have to make the dough, let it rise, shape it, let it rise, then cook it. They are ALWAYS worth the effort though. Don't let anyone tell you different. These little pillows of deliciousness are no different. All the tastiness of a beignet with a little secret surprise inside! 


Oreo Beignets (Mini Oreo Donut Bites)

Ingredients 
one bag Mini Oreo Cookies
icing sugar, for dusting

Directions
Prepare dough as per original recipe (HERE) to just after the first rise. 
Punch dough down and roll to about 1/4 inch thickness. Using a 2 - 3 inch cookie cutter, cut out circles of dough. 


Place a mini oreo into the center of each round. 


Pinch the edges together very tightly. Place on parchment paper lined cookie sheet. (NOTE - I like to cut the parchment paper into small squares, this makes it easier to transfer to the oil without deflating the dough.)
Let rise for another 30 minutes, then start heating oil to 350 degrees.


When oil reaches 350 (for best results use a thermometer), fry 5 or 6 beignets at a time. One minute, then flip and another minute on the other side. Dough should be golden brown. 


Remove from oil to paper towels to cool. 
When all are fried and cool, sprinkle generously with icing sugar. Donuts must be cool or the icing sugar will disappear. 


These are best eaten the day they are made but can be kept for a day in an airtight container. 


You get A LOT of these bad boys. I didn't count but I'd say about 4 - 5 dozen? Next time I make them I will count so I have a better idea! 


A perfect treat to make to share with friends and family! 
You can freeze them before you put the icing sugar on and then thaw them at a later time. Once completely thawed you can then sprinkle with icing sugar. 

Thursday, September 10, 2020

Big Batch Chocolate Chip Cookie Cupcakes


I've been on a bit of a cupcake making bender lately. 
Remember when cupcakes were at the top of the social media dessert food chain? Cupcakes...everywhere...
Let's bring those days back. 
I mean... cupcakes are everything. Cake you can hold in your hand... the perfect dessert. And options? holy heck the choices cupcakes offer! There's a million bazillion. 
I know you're on my side. #cupcakesforever


Chocolate Chip Cookie Cupcakes with Cookie Dough Frosting and Mini Chocolate Chip Cookie

Ingredients
Cookies
1/2 cup melted butter
1/2 cup sugar
1/4 cup brown sugar
1 egg
1 tsp vanilla
1 cup + 3 Tbsp flour
1/2 tsp baking soda
pinch salt
2/3 cup mini chocolate chips

Cupcakes
3 cups flour
2 1/2 tsp baking powder
pinch salt
1 cup butter, softened
1 3/4 cup sugar
4 eggs
1 cup milk
1 tsp vanilla
1 cup mini chocolate chips

Cookie Dough Frosting
1 cup butter, softened
1/2 cup brown sugar
2 cups icing sugar
2/3 cups flour
pinch salt
2 Tbsp cream (milk will also work)
1 tsp vanilla
1 cup mini chocolate chips

Directions
Prepare cookies - Preheat oven to 350. 
Beat together butter, sugar, egg, and vanilla until smooth. Add in the flour, baking soda, salt, and chocolate chips and beat briefly to combine. Finish stirring with a wooden spoon a dough will be very stiff. 
Scoop with a small cookie scoop (about 1 Tbsp) on to a large cookie sheet lined with parchment paper. Bake at 350 for about 8 - 10 minutes, cookies should be ever-so-slightly brown at the edges but still appear a little under done in the middle. Take them out and let them cool on wire racks. 


Prepare cupcakes - Preheat oven to 350. In a bowl, stir together flour, baking powder, and salt. In a separate bowl, beat butter and sugar until light, scraping bowl as needed. Beat in eggs, one at a time. Beat in vanilla. Alternately beat in dry ingredients with the milk until just combined. A few flour streaks may remain. Stir in the chocolate chips. Scoop into 24 muffin tins lined with muffin cup papers.
Bake at 350 until toothpick inserted near center comes out clean and top is light, golden brown - about 15 - 20 minutes. Let cool completely on wire racks. 


 Prepare cookie dough frosting - Beat together butter and both sugars until smooth, scraping sides of bowl as needed. Beat in flour and salt, cream, vanilla, and chocolate chips. You may have to finish with a wooden spoon as frosting gets very thick. (FYI - if you are worried about using "raw" flour then simply toast it at 350 for about 5 minutes before adding it to dough.)
Scoop about 2 Tbsp of frosting onto each cupcake and then flatter slightly with your fingers. 


I used a medium cookie scoop and had just enough for the 24 cupcakes. 


Lightly press a cooled cookie on top of the frosting. 


24 delightful, handheld treats that are going to make ALL THE PEOPLE happy. 
Well, maybe not all.... some people just want to watch the world burn...
I mean... who doesn't love chocolate chips... *sigh*


I love using mini chocolate chips for these but feel free to use regular, butterscotch, mini m&ms, peanut butter, skor bits, or even white chocolate chips. 


You can half the recipe for only 12 cupcakes, if you like, but these do freeze very well so making a bigger batch is always a good idea! :) 
Can't decide between vanilla and chocolate? Split the difference and go with chocolate chip!

Tuesday, September 1, 2020

Savory Gingerbread Man Cheese Ball


Anyone else about done with this year? I mean... I know it's only just barely coming into fall but I figure if we start with the Christmas/Thanksgiving/Halloween posts maybe we can just rush through the rest of this year and start new in January....
It might help. You never know.
Anyway, this adorable little guy is super easy and super delicious and you definitely want to Pin him or save him however you do. 
Bacon makes everything better... especially cheese balls. #youknowimright


Savory Gingerbread Man Cheese Ball

Ingredients
2 pkg (8 oz each) cream cheese, room temp
2 cans crab meat (about 1/2 cup shredded)
1/4 cup finely diced onion
generous dash of Worcestershire sauce
salt & pepper

Toppings
bacon bits
sour cream
red pepper

Directions
Place all ingredients in a bowl, except for the toppings. Beat until well mixed and creamy. 


Chill mixture for about half an hour to let it firm up a little. 
Shape into gingerbread man shape on a serving platter. Wet your finger in a bit of cold water and smooth the surface and edges. 


Press the bacon bits all over the cheese ball. 


Clean off any extra bacon bits and chill the cheese ball for about an hour to let set. Put a small amount of sour cream, about 2 Tbsp, into a small plastic baggie and snip off a tiny, tiny bit of the corner. Pipe squiggles on the arms and legs, a face, and three dots on his tummy. 
Press 3 small round bits of red pepper on his tummy where the sour cream dots are. The sour cream will help them stay in place. 


FYI - if you don't want to use crab you can sub in canned ham instead. 


Chill until ready to use. 
Serve with crackers, baguettes, veggies, or pretzels. 


Couple of notes - You can make this up a day ahead of time; just keep covered in the fridge until you need it.
If you find it too hard to shape because it is "gloopy", just chill it longer before shaping. 
This makes a LARGE cheese ball but can easily be halved for smaller gatherings! 
Leftovers store well for several days in the fridge.... if you have leftovers...

Sunday, August 2, 2020

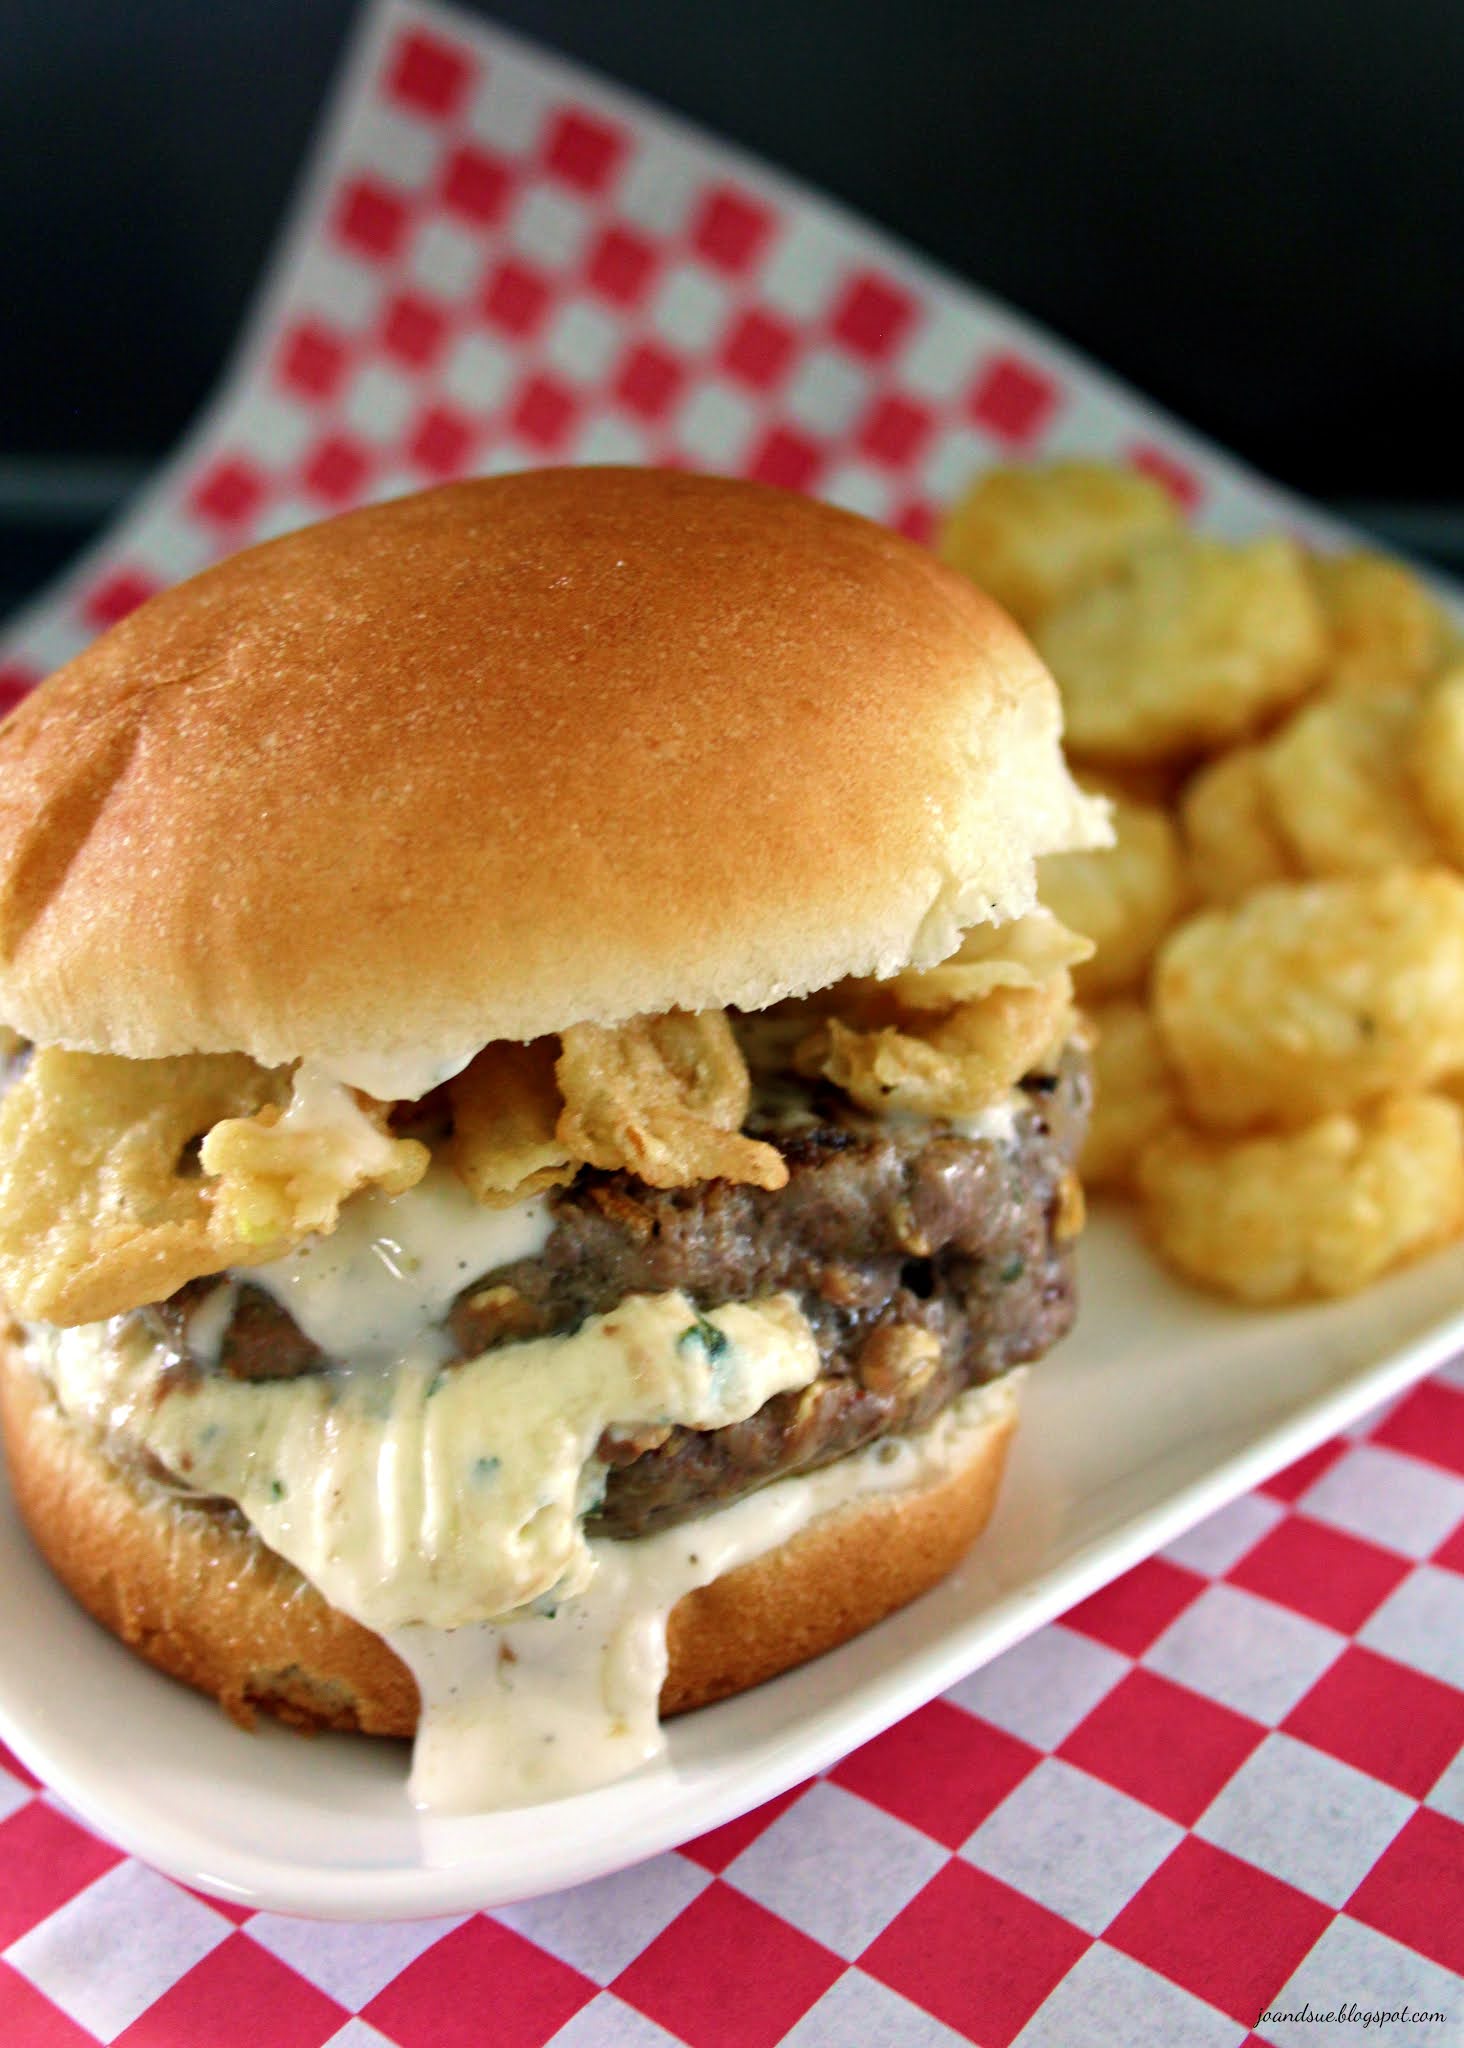
Garlic Overload Burger


Hold on to your hats garlic lovers. This burger is going to blow your mind!
I used garlic grown in our nephew's garden so it was SUPER garlic-y. If you are using mild garlic then I would recommend using more than the recipe calls for. 
After you eat one of these bad boys you should be able to clear the room... so... yeah... super de duper garlic-y. 
The basil and garlic cream cheese stuffed into the middle of the burger patties will have you hooked. So different and so delicious. 
Probably not the burger you want to make for date night but it is the burger you will want to make pretty much every other night... just sayin' #garlicrules


Garlic Overload Burger

Ingredients
Basil Garlic Cream Cheese
8 oz cream cheese, room temp
2 cloves strong garlic, minced
2 - 3 Tbsp fresh basil, finely chopped
1 Tbsp fresh parsley, finely chopped

Garlic Aioli
1/2 cup mayo
6 cloves strong garlic, minced
4 Tbsp lemon juice
salt & pepper

Burger Patties
2 lbs lean ground beef
3 cloves strong garlic, minced
1 Tbsp fresh parsley, finely chopped
1/2 cup oats
2 eggs
salt & pepper

Buns
8 brioche style buns (or your fav soft hamburger buns)

Burger Toppings
French's fried onions

Directions 
Prepare the cream cheese mixture - Beat cream cheese until smooth, scraping sides of bowl as needed. Add in the minced garlic and fresh basil and parsley. Mix until well combined. Divide into 8 equal portions. Chill until ready to use.
Prepare the garlic aioli - whisk together the mayo, garlic, lemon juice, and salt and pepper. Set aside. 
Prepare burger patties - mix together the beef, garlic, parsley, oats, eggs, and salt & pepper until well combined. I find it works best if you use your hands. Divide into 16 equal portions. 
Stuff the patties - Take one portion of beef and flatten it in your hand. Press one portion of the cream cheese mixture into the center of the beef. 


Top with a second portion of the beef and seal the cream cheese in the center of the two patties. Make sure you seal the edges well. 


Chill the patties until ready to use, at least an hour. 
When ready to eat - cook burgers on the grill or pan fry them until done. Don't worry if a little of the cream cheese filling leaks out, you can just scoop it on top of the patty before you put it on the bun!


To serve the burger - put a generous spoonful of garlic aioli on the bottom half of the bun. Top with a burger patty and then more garlic aioli!


Add on a generous amount of the French's fried onions then top with a little garlic aioli on the top half of the bun. 


It's a beautiful thing...


Like garlic? Looooove garlic?
You need to make this burger. 
The hints of fresh basil in the cream cheese take this burger to the next level. If you can find locally grown garlic then I highly recommend it. It's so much stronger and more garlic-y than garlic from overseas. 


Oh yeah baby. 

Monday, July 27, 2020

Pina Colada Cloud


Nothing beats a frosty pina colada when the summer heat gets crazy.
Even better? This Pina Colada Cloud dessert! It'll transport you to the tropics while you are staying at home in your own backyard. Make it in a 9 X 13 pan for a bigger group OR in 2 - 8 inch pans if you want to share it! 
Layers of graham crumbs, rum cheesecake, pineapple, banana, and coconut ensure this dessert will be your go-to for BBQs all summer long! 


Pina Colada Cloud 
(Slightly altered from Ramona Johnson, Valleyview Alta)

Ingredients
Crust Layer
2 cups graham cracker crumbs
1/2 cup melted butter

Rum Cheesecake Layer
1 1/2 cup whipping cream
1 - 8 oz brick cream cheese, softened
1/2 cup icing sugar
2 tsp rum extract

Banana Layer
3 medium bananas

Pineapple Layer
2 cans (398 ml each) crushed pineapple (do not drain)
1/4 cup water
1/2 cup brown sugar
1 tsp lemon juice
3 Tbsp cornstarch

Coconut Whipped Cream Layer
1 1/2 cup whipping cream
2 tsp coconut extract
1/3 cup toasted, shredded coconut

Directions
Prepare Crust Layer - combine graham crumbs and butter until well mixed. Press firmly into bottom of pan. Chill while preparing next layer. 
Prepare Rum Cheesecake Layer - beat 1 1/2 cups whipping cream until stiff peaks form. In a separate bowl, beat cream cheese, icing sugar, and rum extract. (NOTE - if you do not have rum extract you could use 2 Tbsp of rum) until smooth. Beat the cream cheese mixture into the whipped cream until just combined. Spread over the crumb base. 
Prepare Banana Layer - Slice bananas into a single layer on top of the cheesecake layer. Cover and chill while preparing the pineapple layer. 
Prepare Pineapple Layer - in a saucepan, combine pineapple, water, brown sugar, lemon juice, and cornstarch. Cook over medium low heat until thickened. Remove from heat and let cool completely - it speeds things up if you pop it in the freezer for about 15 - 20 minutes, stirring every 5 minutes. 
Spread the cooled pineapple mixture over the bananas.  


Prepare Coconut Whipped Cream Layer - beat 1 1/2 cups whipping cream with the coconut extract until stiff peaks form. Spread over the pineapple layer. Sprinkle evenly with the toasted coconut. 


Chill until ready to serve. At least 3 hours. 


If you like Pina Coladas then you will love this dessert. 


Layers of pineapple, banana, coconut, and rum.... what's not to love?


This is best the day it is made but will last in the fridge for a couple of days. I usually make it the morning I am planning to serve it so it has time to chill for several hours. I've made it the night before and it is fine too - the crust just gets a bit soggy the longer it sits.