Showing posts with label Canada Day. Show all posts

Sunday, August 2, 2020

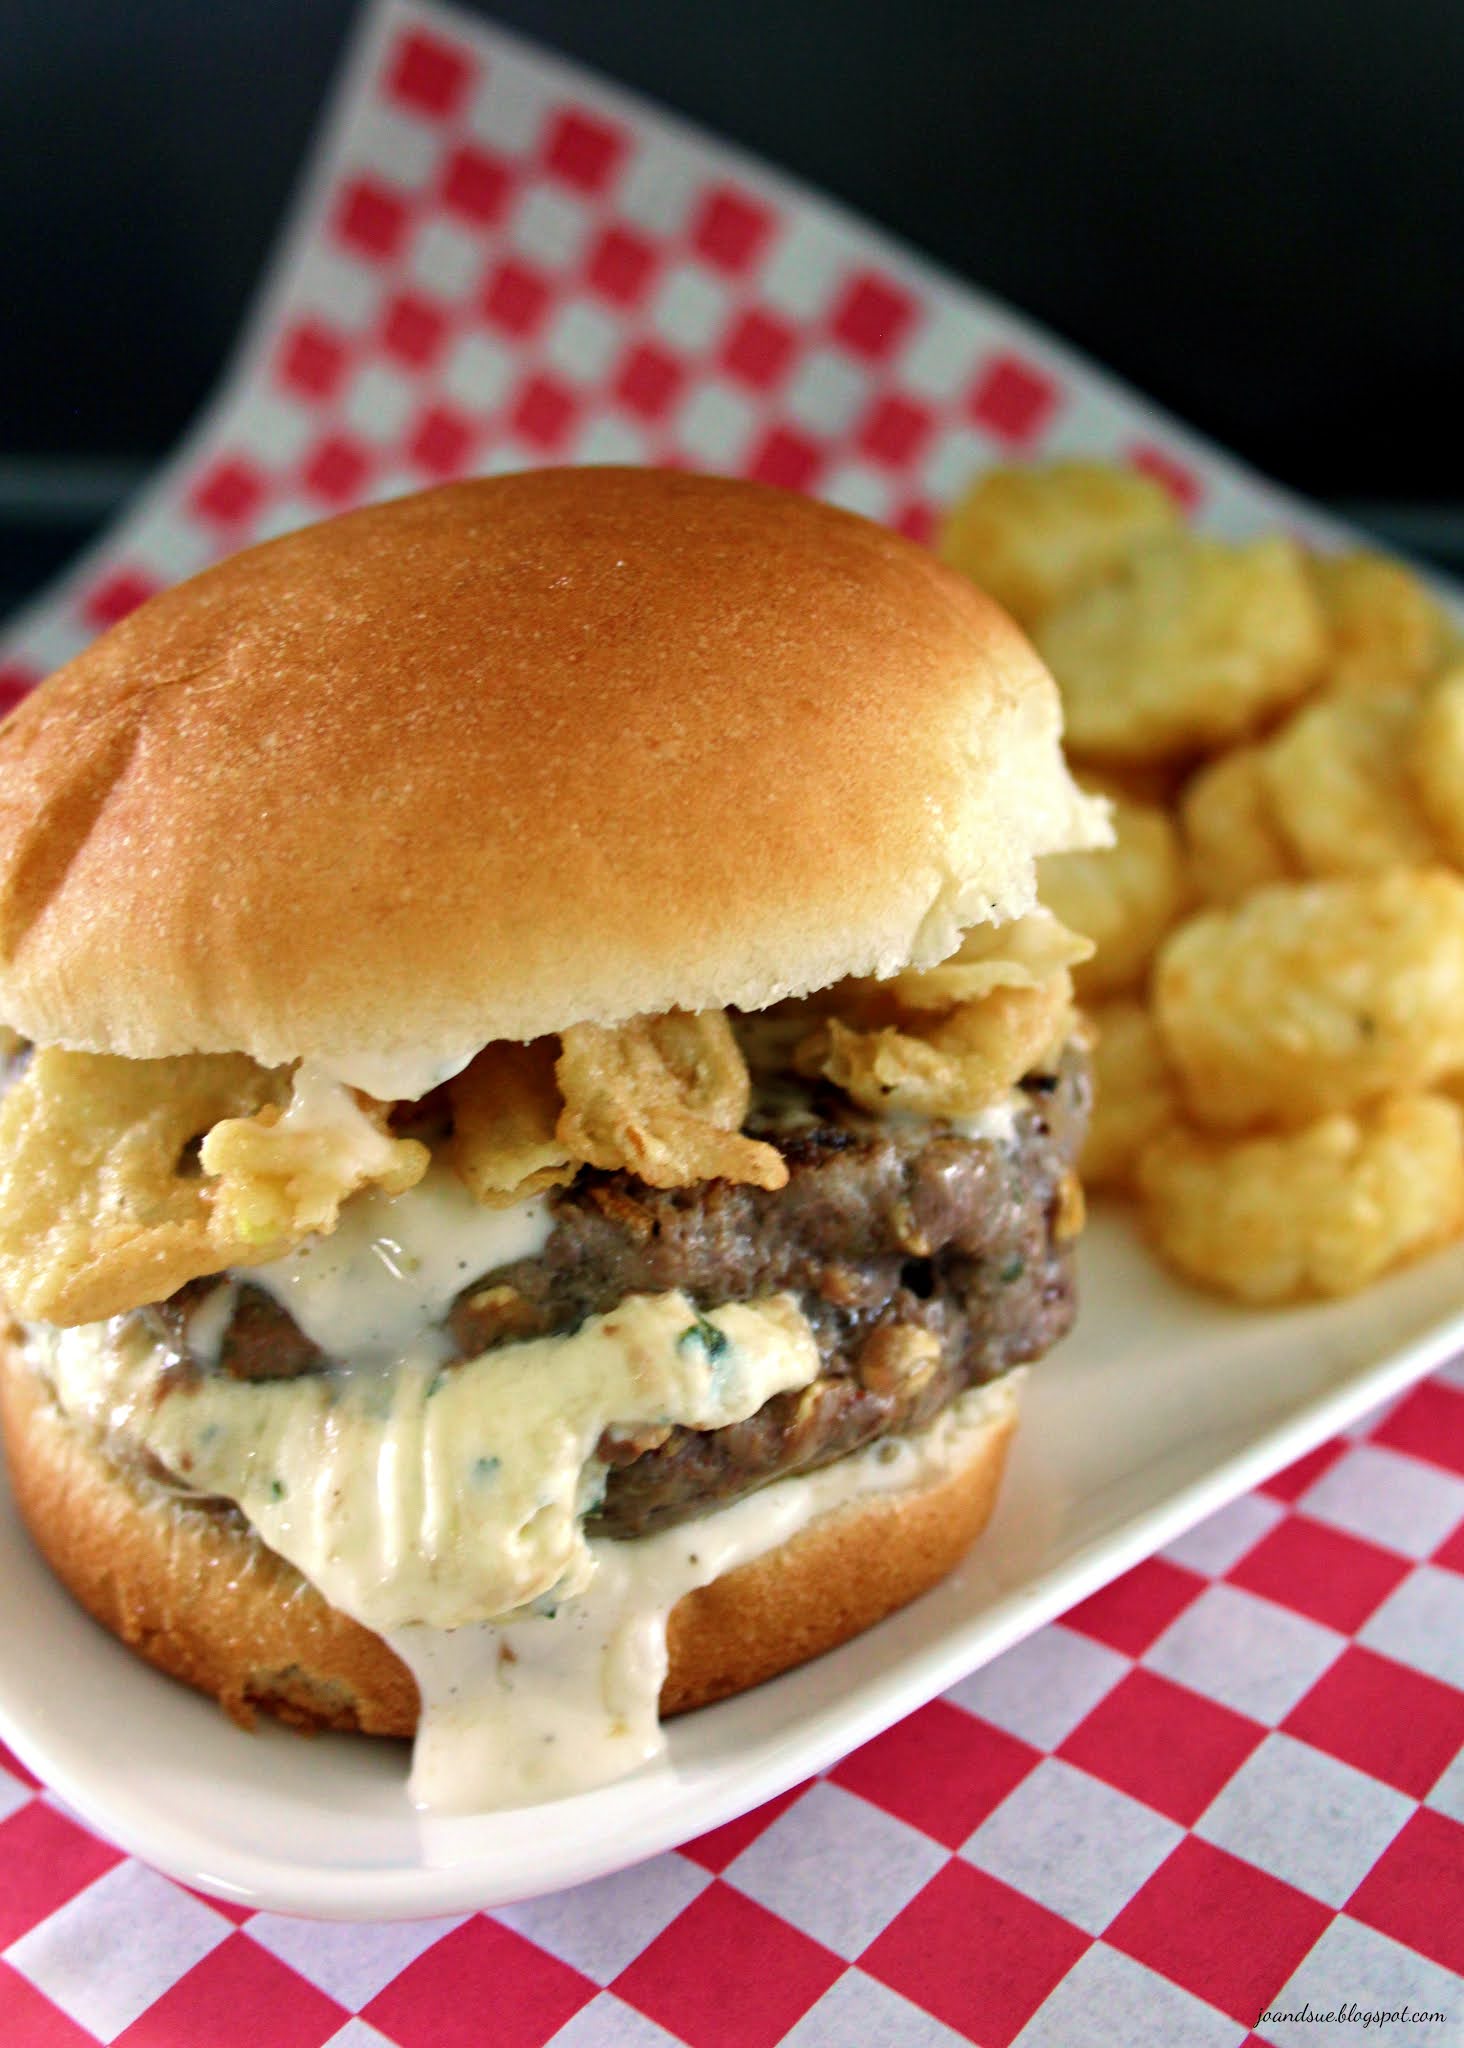
Garlic Overload Burger


Hold on to your hats garlic lovers. This burger is going to blow your mind!
I used garlic grown in our nephew's garden so it was SUPER garlic-y. If you are using mild garlic then I would recommend using more than the recipe calls for. 
After you eat one of these bad boys you should be able to clear the room... so... yeah... super de duper garlic-y. 
The basil and garlic cream cheese stuffed into the middle of the burger patties will have you hooked. So different and so delicious. 
Probably not the burger you want to make for date night but it is the burger you will want to make pretty much every other night... just sayin' #garlicrules

Garlic Overload Burger

Ingredients
Basil Garlic Cream Cheese
8 oz cream cheese, room temp
2 cloves strong garlic, minced
2 - 3 Tbsp fresh basil, finely chopped
1 Tbsp fresh parsley, finely chopped

Garlic Aioli
1/2 cup mayo
6 cloves strong garlic, minced
4 Tbsp lemon juice
salt & pepper

Burger Patties
2 lbs lean ground beef
3 cloves strong garlic, minced
1 Tbsp fresh parsley, finely chopped
1/2 cup oats
2 eggs
salt & pepper

Buns
8 brioche style buns (or your fav soft hamburger buns)

Burger Toppings
French's fried onions

Directions 
Prepare the cream cheese mixture - Beat cream cheese until smooth, scraping sides of bowl as needed. Add in the minced garlic and fresh basil and parsley. Mix until well combined. Divide into 8 equal portions. Chill until ready to use.
Prepare the garlic aioli - whisk together the mayo, garlic, lemon juice, and salt and pepper. Set aside. 
Prepare burger patties - mix together the beef, garlic, parsley, oats, eggs, and salt & pepper until well combined. I find it works best if you use your hands. Divide into 16 equal portions. 
Stuff the patties - Take one portion of beef and flatten it in your hand. Press one portion of the cream cheese mixture into the center of the beef. 


Top with a second portion of the beef and seal the cream cheese in the center of the two patties. Make sure you seal the edges well. 


Chill the patties until ready to use, at least an hour. 
When ready to eat - cook burgers on the grill or pan fry them until done. Don't worry if a little of the cream cheese filling leaks out, you can just scoop it on top of the patty before you put it on the bun!


To serve the burger - put a generous spoonful of garlic aioli on the bottom half of the bun. Top with a burger patty and then more garlic aioli!


Add on a generous amount of the French's fried onions then top with a little garlic aioli on the top half of the bun. 


It's a beautiful thing...


Like garlic? Looooove garlic?
You need to make this burger. 
The hints of fresh basil in the cream cheese take this burger to the next level. If you can find locally grown garlic then I highly recommend it. It's so much stronger and more garlic-y than garlic from overseas. 


Oh yeah baby. 

Wednesday, June 24, 2020

Big Batch Rhubarb Raspberry Streusel Cake


Did you know that rhubarb and raspberry are an amazing combo? I thought they'd be too tart together but when you mix them in a cake and throw on some streusel they are juuuuuuuust right. 
I didn't add nuts to the topping but, believe me, they're a great addition as well. I developed this recipe to be a big batch because I needed a LOT of cake to gift to several families. This makes 4 - 8 inch pans, or 2 - 9 X 13 pans. You could probably stretch it out to 5 - 8 inch pans if you wanted it more like a square than a cake. I prefer the thickness of a cake myself. If you do try 5 then be sure to adjust the cooking time accordingly. 


Big Batch Rhubarb Raspberry Streusel Cake

Ingredients
Cake
1 cup butter, softened
3 3/4 cups sugar
4 tsp vanilla
4 eggs
8 cups flour
4 tsp baking powder
2 tsp baking soda
1 tsp salt
4 cups buttermilk
8 cups rhubarb, finely chopped
2 cups raspberries

Streusel
1 cup butter, melted
2 cups flour
2 cups brown sugar

Directions
Preheat oven to 350. 
In a large bowl, beat together the butter, sugar, and vanilla until creamy, scraping bowl as needed. Beat in eggs. In another bowl, stir together flour, baking powder and soda, and salt. In another bowl, measure out the buttermilk. Lastly, in a separate bowl, measure out the rhubarb and raspberries. 


Combine the dry ingredients into the wet ingredients alternating with the buttermilk until just combined. It's okay if a few streaks of flour remain. 
Stir in the rhubarb. Batter will be very thick. 


Spread the batter evenly among the 4 - 8 inch pans. Top each cake with 1/4 of the raspberries. (Note - you can also stir the raspberries into the cake batter with the rhubarb but they will get smushed. The cake will still taste delicious but will be streaked with color.) 


Prepare streusel - in a mixing bowl, stir together the melted butter, flour, and brown sugar. (If you'd like to add any nuts, do so now) Sprinkle the streusel evenly over the 4 cakes. 


Bake at 350 for 40 - 50 minutes. Depending on how your oven cooks, it may take a bit longer. The cakes are done when they are golden brown on top and toothpick inserted near center comes out clean. 
FYI - place a cookie sheet or oven liner at the bottom of the oven to catch any spills, these do bubble up and over a bit.


Remove from oven and let cool completely on wire racks. 


You can serve the cake warm or room temp. They are delicious either way. This is a very dense cake and is very moist so no frosting is required. Although, it does go fabulously with a scoop of ice cream or dollop of whipped cream!


The perfect tea time snack. It is a very large batch of cake so it's great for larger gatherings or potlucks. It also freezes very well so you can have cake whenever you like in the future too! Just cover the cooled cakes very well with plastic wrap and then a layer of tinfoil before placing in the freezer. 
Tangy and sweet, just the way I like it!

Sunday, May 24, 2020

Mom's Macaroni Salad (AKA: Best Macaroni Salad Ever)


I know you saw the title of this recipe and came here to see what makes it the best macaroni salad ever. 
You're skeptical, I get it. 
Thing is.... it's ridiculously simple and delicious and has absolutely nothing but the basics in it but it's magic and will have you hooked in 1 bite. Maybe 2 bites...
There are no measurements, you've got to make it like mom does... with your heart. 
Ha. Sappy. But accurate. 
Eyeball it. You got this. 


Mom's Macaroni Salad

Ingredients
elbow macaroni
green peas
radishes
pickles
green pepper
onion
aged cheddar cheese
mayo or miracle whip
salt & pepper 

Directions
Boil macaroni as per package directions until soft. (Mom likes hers a little more well done than al dente so do it up right!) At the end of cooking, throw in a handful of frozen green peas and let cook for a minute. Drain and let cool to room temp. 
Cut up a few radishes into slices. About 2 - 4, just enough to add some color to the pasta.
Cut up one or 2 pickles into tiny cubes. 
Cut up about 1/4 of a green pepper into tiny cubes.
Finely dice about 1/4 of an onion.
Cube up aged cheddar cheese into tiny cubes. (Do NOT shred it, that is not mom's way. Cube it.)


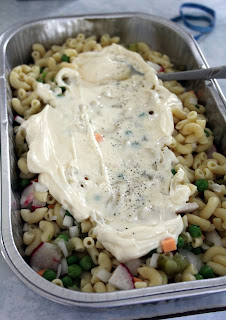
Give it a good stir. Can you see little bits of all the different color ingredients?
If yes, you're good to go. If no, add a bit more of whatever ingredient isn't showing up enough. When you think it looks good, stir in the mayo.


Make it good and creamy. Stir it well then let it sit for 5 minutes so the pasta can soak up some of the mayo. Creamy enough? Ok. Still seem dry? Add in more mayo a spoonful at a time. 


Chill until ready to eat. Definitely give it at least an hour or two in the fridge. Just before serving, season with salt and pepper!
Word of advice - if you want to make this ahead of time: mix in the ingredients but DO NOT mix in the mayo. Cover and chill until ready to serve. Mix in mayo about half an hour before serving and place back in fridge until ready to use.


One of the best things about this salad is you can make a little bit or a huge amount. 
For those of you insisting on measurements. *Sigh* I get it. I'll do my best to guesstimate here, but you really do have to go by how it looks. 
For about 4 cups cooked macaroni I'd say 1/3 cup peas, 3 radishes, 2 baby pickles, 1/4 of a green pepper, 1/3 cup onion, 1/2 cup cheese, and 1 cup mayo. Totally guesstimating here guys.... use your mom-senses to make sure it feels right. 
You should be able to see all the ingredients every time you give it a stir. And if you're unsure about the mayo, start low and add slow. You can't take it out after if you've added too much. 
Let us know if you give it a try! We're pretty sure you'll fall in love with it! 

Thursday, April 30, 2020

Aunty Pat's Summer Slush (Large Batch)


Our Aunty Pat used to make this for us every summer when we would visit. I can remember eating it with a spoon while we sat beside her pool in our bathing suits. We got the kiddie version while the adults got the adult version. I'm sharing the adult (read: alcoholic) version here but by just leaving out the booze it is totally kid friendly. 
Have extra bananas but don't feel like more banana bread? This is the perfect way to use up those overripe bananas. This makes a large amount, which is great for sharing with family and friends! 


Aunty Pat's Summer Slush (Large Batch)

Ingredients
Base
2 cups sugar
6 cups water
5 bananas
1 can (48 oz) pineapple juice
1 can (12 1/2 oz) frozen orange juice
1 can (12 1/2 oz) frozen lemonade

Mix
coconut rum (I use Malibu Rum)
lemon lime soda (such as 7up or sprite)

Directions
Bring the 2 cups of sugar and 6 cups of water to a boil. Let boil for 3 minutes. Remove from heat and let cool completely. 
Mash bananas in a large bowl. I use beaters to make is easier. 


Add in pineapple juice, frozen orange juice, and frozen lemonade. (NOTE - I couldn't find the 12 1/2 oz containers of frozen orange or lemonade so I used 2 of the smaller sizes. This works just fine.) 


Add in the sugar water. Beat to combine. 


Pour  into ice cream bucket OR several smaller containers if you are going to share. (It makes about 10 - 12 cups) 


Cover and freeze until completely frozen. This takes at least several hours. When ready to serve:
Fill glass half full of slush. Add in a shot glass of rum (or to taste). 


Top up glass with the lemon lime soda. 


Give it a good stir. Top with a cute umbrella and cherry.


Serve immediately. 


Sue had hers in her margarita glass and it looks beautiful. 
You can add any liquor you prefer. I believe my aunt used to add gin. I've added vodka in the past too. Coconut rum is my favorite though - the coconut goes really well with the pineapple and banana flavors. How many serving it makes depends entirely on the size of the glasses you use. It makes a lot though, which makes it perfect for summer BBQs OR for giving as gifts. In a covered container it will last a long time in the freezer. 

Monday, February 17, 2020

Keto Nanaimo Bars


You guuuuuuuys! 
These Nanaimo Bars are going to change your life! Okay.... maybe not... but they might. You don't want to not try them and take the chance you're missing out. 
They taste like "normal" Nanaimo bars, they look like "normal" Nanaimo bars, and the texture is totally like "normal" Nanaimo bars. You'd never know they were keto/gluten free/diabetic friendly. 
I even had some taste testers say they preferred these over "normal" Nanaimo bars because they weren't quite as overwhelmingly sweet. 
I wanted to keep some of the Bird's Eye pudding powder in the recipe because that is what makes a Nanaimo bar a Nanaimo bar. It adds the most carbs to the recipe but also adds the authentic flavor and color. Per bar (recipe makes 24) the nutritional counts are: 191 calories, 17.5 fat, 5.9 carbs, 3.2 fiber, 2.7 protein. That's 2.7 net carbs per slice.
Doing keto you often can feel like you are missing out. Not with these bars. These keep well in the freezer so you can just pop one out whenever you need a keto friendly sweet treat!


Keto Nanaimo Bars

Ingredients
Bottom Layer
1/2 cup butter
1/4 cup Swerve brown sugar 
1 egg
5 Tbsp unsweetened baking cocoa
1/4 cup chopped walnuts
1 cup almond flour
1 cup unsweetened coconut, toasted

Middle Layer
3/4 cup butter, room temp
2 Tbsp Bird's Eye custard powder
1 cup Swerve icing sugar
4 Tbsp whipping cream

Top Layer
3 Tbsp butter
6 oz (scant 1 cup) sugar free milk (or dark) chocolate chips
2 Tbsp Swerve icing sugar

Directions
Prepare bottom layer - In a heat safe bowl, stir together butter, brown sugar Swerve, and egg. Place over a pan of simmering water over medium heat (or in a double boiler). Stir until well mixed. Stir in the cocoa powder. Stir until thickened. 
Remove from heat and stir in walnuts, almond flour, and coconut until well mixed. Press into a 10 X 10 pan lined with tinfoil. Set aside. 


Prepare middle layer - beat together butter, custard powder, and Swerve icing sugar. Beat in the whip cream until smooth. Drop by the spoonful over the crust.


Use the back of a spoon to spread the layer evenly. Note - it helps to dip the spoon in water and shake it off, then spread to prevent sticking. You can also use your fingertips dipped in water to help spread it out. 


Chill the two layers for at least half an hour before doing the last step - or pop in the freezer for 20 minutes. It is very important you do not skip chilling it!! Spreading the chocolate layer on top will be almost impossible if the bottom layers are not chilled. 
Prepare the last layer - Melt butter and chocolate chips in a microwave safe bowl in 20 second increments, stirring well in between, until smooth. Stir in the Swerve icing sugar. 
Working fairly quickly, drop the chocolate in spoonfuls over the yellow layer and then spread it with the back of a spoon. This can be a little tricky because the chocolate starts to melt the middle layer, making it difficult to spread. Don't worry if your chocolate isn't completely even - just do the best you can. 


Chill until set. 
Use the tinfoil to remove the bar from the pan - this will make it much easier to cut. 
Cut into 24 pieces. You can keep these in the fridge or on the counter. I tend to leave them in the fridge in a lidded container and take them out about half hour before serving them. 


Only 2.7 carbs per slice!!


Look me in the eye and tell me that doesn't look EXACTLY like a "normal" Nanaimo bar. 


I love one of these with my keto coffee for those days I'm craving sugar. Totally satisfies the need for sweets. 


Texture is a big thing for me when it comes to replicating recipes to a keto friendly format. The texture of these, IMO, is spot on. A healthified, gluten free, keto friendly, diabetic friendly treat that I guarantee everyone will enjoy. 


FYI - you can also make these in mini muffin tins - I got 30. Just spoon about a tablespoon of the base into each muffin tin and press it down, then a Tbsp of the filling, spread it out, and then about 1 tsp of the chocolate topping, and spread it over the filling. 

Sunday, February 9, 2020

Orange Cranberry Pie


I initially made this pie for Christmas because the color and flavors seemed Christmas-y to me. Thing is, once we tried it, we fell in love with the flavor! It's tangy and refreshing and rich-yet-light, making it perfect for so many things. The color also works for Valentine's Day or Canada Day - if you're thinking about holiday desserts. Orange and cranberry may seem to be Christmas flavors but I'm thinking they also scream Springtime. 
You can make this pie the night before you plan to serve it, or the day of, you just want to let it sit for at least 4 hours or so to let it set completely. It will last for a couple of days in the fridge before your crust will start to be a little soggy. I topped it with fresh cranberries and orange slices but you may want to warn your guests NOT to eat the cranberries. Raw, fresh cranberries, while totally safe, are very bitter/sour. You could sugar them, if you wanted to, but I always just tell people not to eat them unless they want to give their taste buds a shock! 


Orange Cranberry Pie

Ingredients
1 baked, 9 inch pie shell

Filling
2 3/4 cup fresh cranberries
1 cup sugar
1/4 cup water

3 eggs
2 egg yolks
2 tsp grated orange rind
1/2 cup fresh orange juice
pinch salt
1/2 cup sugar
1/2 cup butter

Whipped cream
1 cup whipping cream (heavy cream)
2 Tbsp instant vanilla pudding powder

Optional Decorations
orange slices
fresh cranberries

Directions 
Prepare filling - In a medium saucepan over medium heat, cook, stirring often, the cranberries, sugar and water. Boil about 10 - 15 minutes, until moisture is gone and cranberries have broken down. 


Remove from heat and let cool 10 minutes. Puree until smooth, about 3 - 4 minutes. 


Add the puree to a double boiler. Add in the eggs, egg yolks, orange rind and juice, salt, and sugar. Cook in a double boiler (or in a bowl over gently simmering water - see pic below), stirring often, until thickened, about 10 minutes.


Strain the thickened curd through a strainer into a bowl. Beat the warm curd, adding a little of the butter at a time. Beat until lighter in color, about 5 minutes.
Pour into the baked pie shell. 


Let cool completely. 
Prepare the whipped cream - whip the cream with the vanilla pudding powder until stiff peaks form. Pipe onto the top of the pie as desired. (Can also just be spread on top.)


Top with oranges slices and cranberries to decorate, if desired. 


Chill until ready to serve - at least 4 hours. 


The lighting is Sue's house is a little odd so the color does not appear as bright in these photos as it really is! 


The texture is a little like a lemon meringue..... but thicker and not quite as smooth. 


A refreshing option after a heavy meal. 
If you don't have a double boiler then you can use a bowl over a pot - as I did in the photo up above. It works just as well - just make sure you use precautions when lifting the bowl out; it will get fairly warm over the simmering water. 
Also, the vanilla pudding powder in the whipping cream helps to stabilize it. If you want to leave it out and just use plain, sweetened whipping cream, that will work too.