Showing posts with label coconut. Show all posts

Wednesday, July 5, 2023

Coconut Banana Cream Pie For Two


I tell you, sometimes you just need some banana coconut cream pie. Like *NEED*. 
I came up with this recipe after a craving hit me one afternoon. I didn’t want to make a whole pie (because I would eat a whole pie). I just wanted enough for mom and I to share for dessert. You could probably get 3 or 4 smaller servings out of this but…. We did 2. #ILovePie 
I think it was about 15-20 minutes to whip this up….plus about 2 hours of cooling time. You probably have all the ingredients in your kitchen right now, nothing fancy schmancy required! 
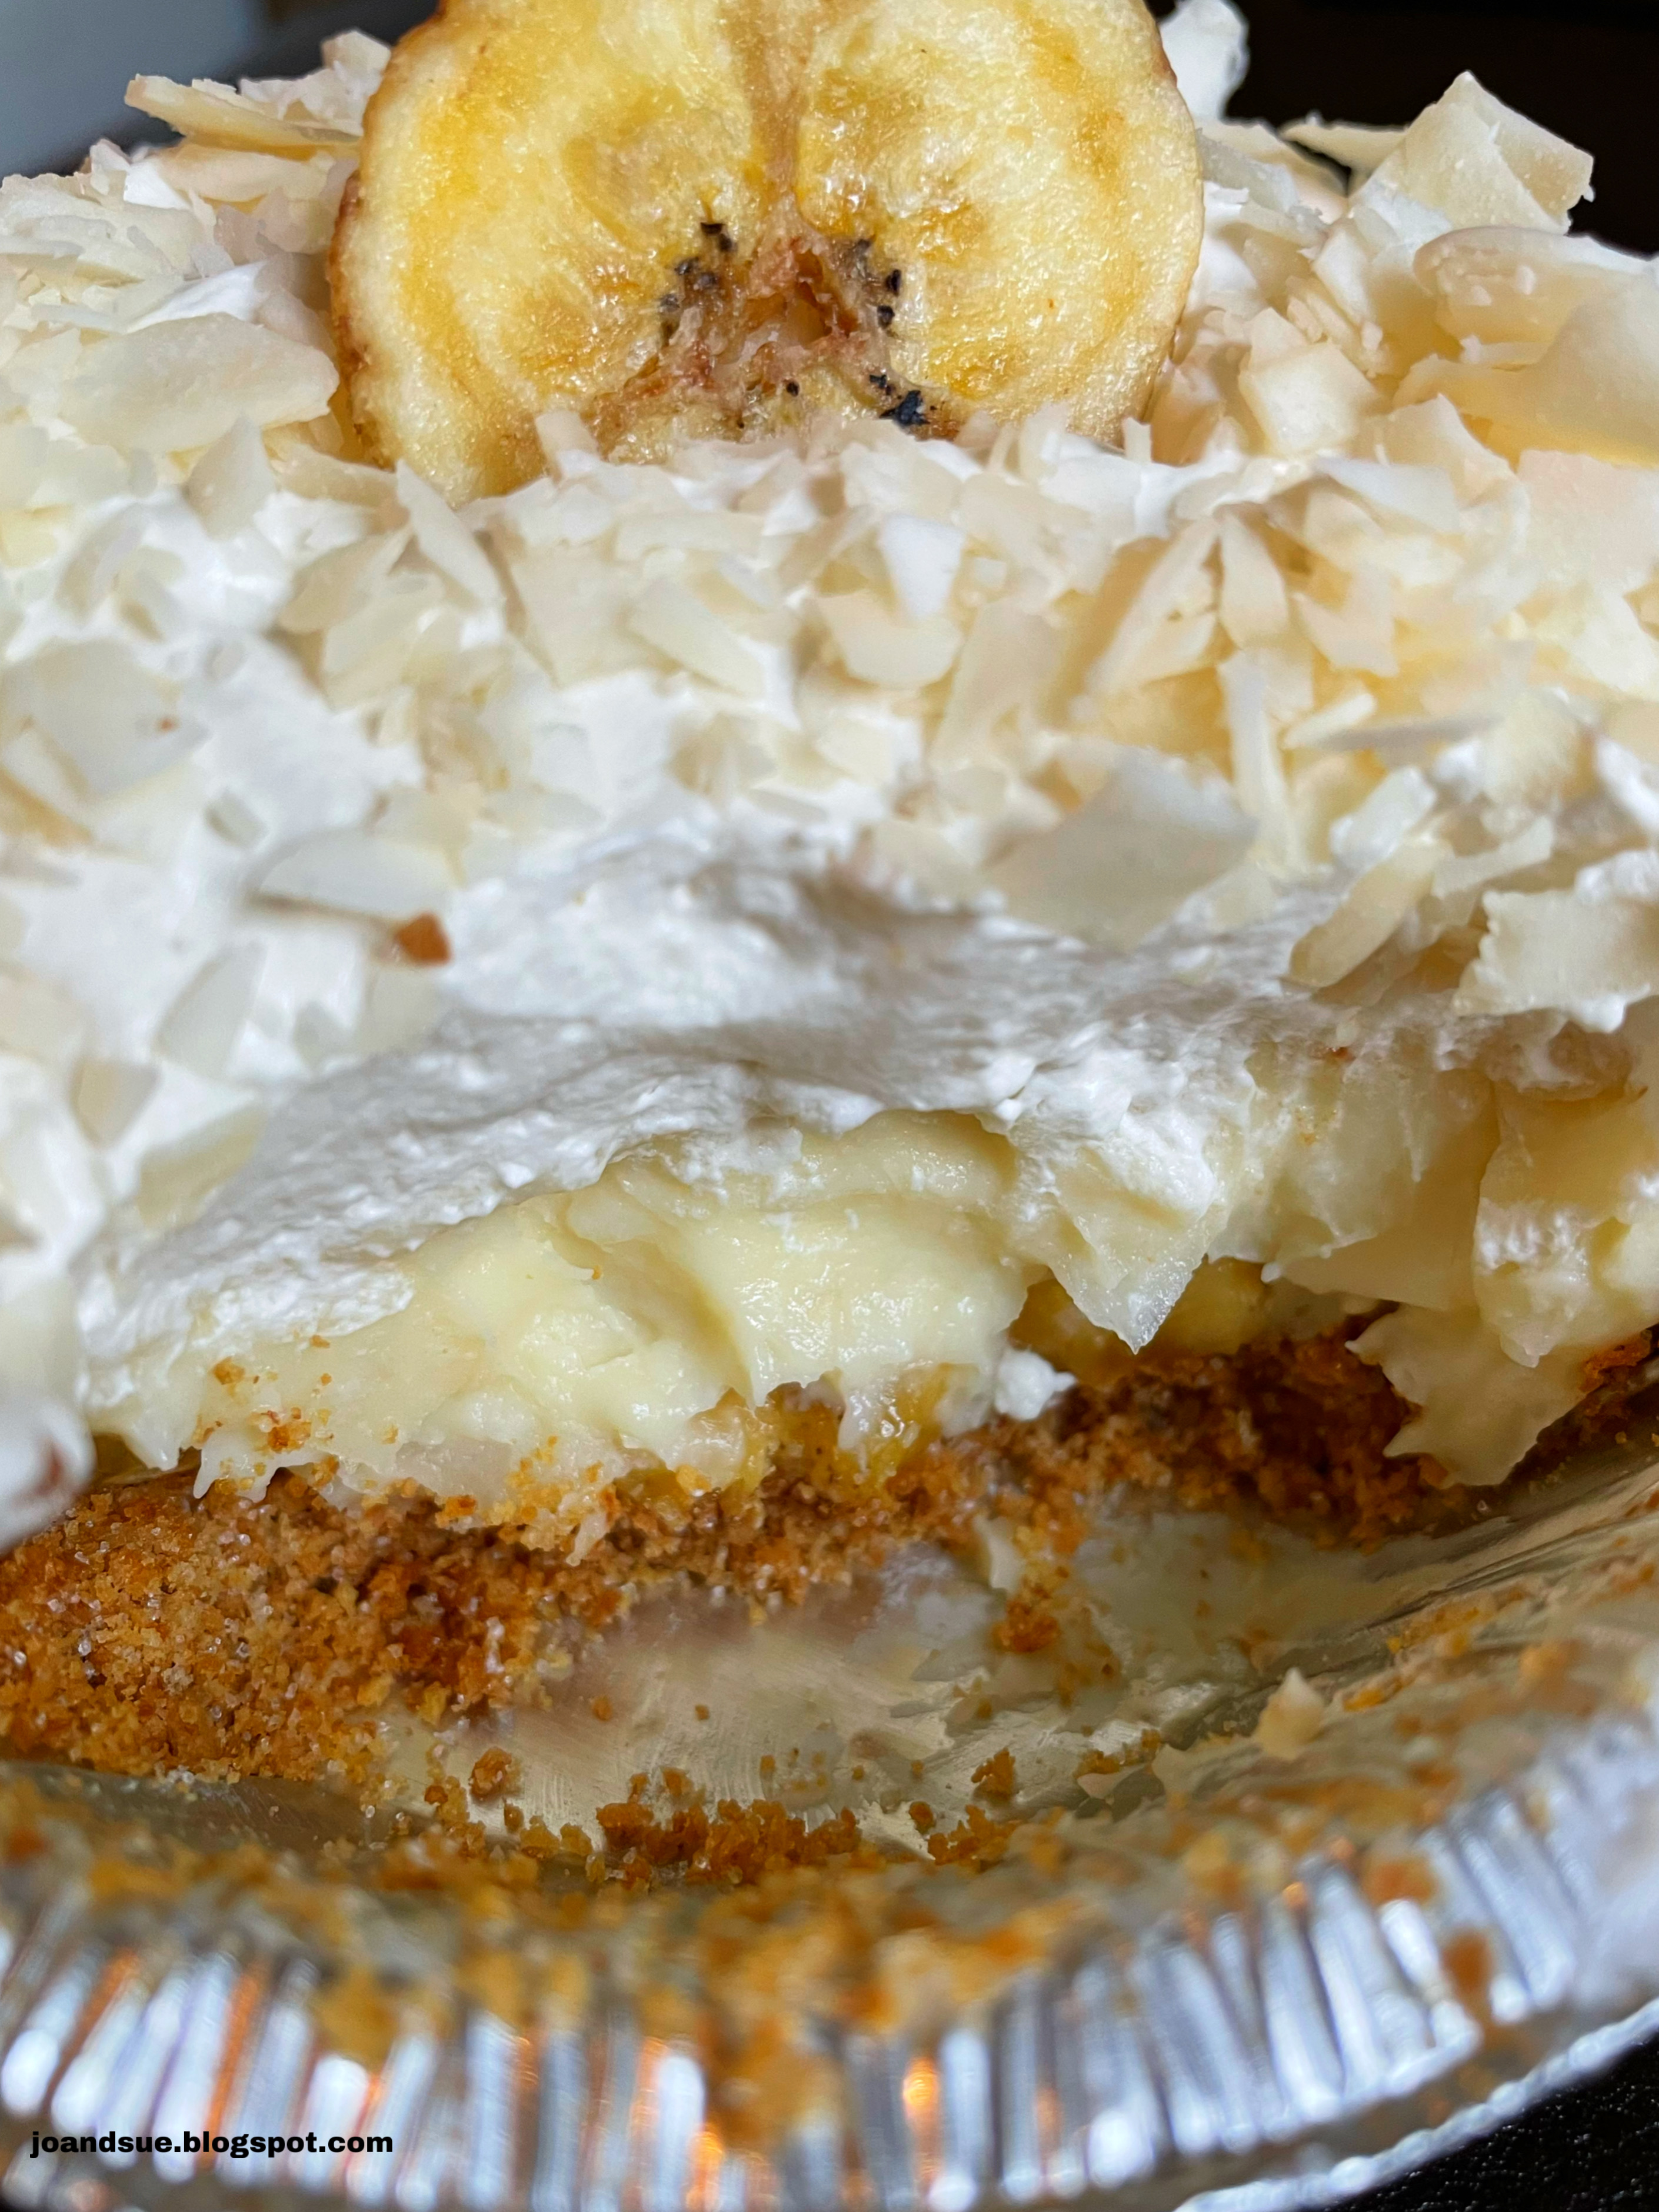

Coconut Banana Cream Pie For Two 

Ingredients
Crust
2/3 cup graham cracker crumbs
2 Tbsp brown sugar
2 Tbsp butter, melted

Filling
3 Tbsp sugar
1  1/2 Tbsp  cornstarch
Pinch salt
1 cup heavy cream (or half and half will work)
1 egg yolk
1 tsp vanilla
1/2 tsp coconut extract
1/2 Tbsp butter
1/2 cup toasted coconut
1/2 banana, sliced

Topping
1/2 cup whipping cream
1/2 tsp vanilla
1-2 Tbsp sugar

Directions
Preheat oven (or toaster oven) to 350. 
Prepare crust - mix graham crumbs, brown sugar, and butter. Press into bottom and up the sides of 2 - 5 inch containers. Bake at 350 for about 8-10 minutes, until lightly browned. Remove from oven and set on counter while you prepare filling.
Prepare filling - Stir together sugar, cornstarch, and salt in a small pan. Slowly whisk in heavy cream until we’ll mixed. Set over medium heat and cook, stirring constantly, until steaming. 
In a small bowl, whisk egg yolk. Slowly, about 1 Tbsp at a time, whisk in the steaming cream mixture to temper the eggs. Don’t mix it in too quickly or you will scramble the egg!
When all mixed, place back in pan, over medium heat and cook, stirring constantly, about 1-2 minutes, until thickened. Remove from heat and stir in vanilla, coconut extract, and butter. Stir until combined. Stir in the toasted coconut. 
Place sliced banana pieces into the two graham cracker crusts. Pour the cream filling evenly into the two pans. Set in fridge and cool completely. 


Prepare topping - whip cream with vanilla and sugar to stiff peaks. Spread half of cream on each cooled pie. 


Chill until ready to eat. Optional but you can sprinkle with a little more coconut and a slice of banana to fancy it up a bit. 


When I say that this hit the spot…. I mean…*jazz hands*…it hit the spot! 


Leave out the banana if you want a classic coconut cream pie. Add more bananas and leave the coconut out if you want a banana cream pie. Personally I like both in there. 
I count this as “for two” but the servings are very generous. You could make it in mini cupcake tins and probably get around 6? maybe… let us know if you give it a try. 
I’m cool with eating a big ol’ piece of pie so I’m still counting it as 2. 


Monday, July 27, 2020

Pina Colada Cloud


Nothing beats a frosty pina colada when the summer heat gets crazy.
Even better? This Pina Colada Cloud dessert! It'll transport you to the tropics while you are staying at home in your own backyard. Make it in a 9 X 13 pan for a bigger group OR in 2 - 8 inch pans if you want to share it! 
Layers of graham crumbs, rum cheesecake, pineapple, banana, and coconut ensure this dessert will be your go-to for BBQs all summer long! 


Pina Colada Cloud 
(Slightly altered from Ramona Johnson, Valleyview Alta)

Ingredients
Crust Layer
2 cups graham cracker crumbs
1/2 cup melted butter

Rum Cheesecake Layer
1 1/2 cup whipping cream
1 - 8 oz brick cream cheese, softened
1/2 cup icing sugar
2 tsp rum extract

Banana Layer
3 medium bananas

Pineapple Layer
2 cans (398 ml each) crushed pineapple (do not drain)
1/4 cup water
1/2 cup brown sugar
1 tsp lemon juice
3 Tbsp cornstarch

Coconut Whipped Cream Layer
1 1/2 cup whipping cream
2 tsp coconut extract
1/3 cup toasted, shredded coconut

Directions
Prepare Crust Layer - combine graham crumbs and butter until well mixed. Press firmly into bottom of pan. Chill while preparing next layer. 
Prepare Rum Cheesecake Layer - beat 1 1/2 cups whipping cream until stiff peaks form. In a separate bowl, beat cream cheese, icing sugar, and rum extract. (NOTE - if you do not have rum extract you could use 2 Tbsp of rum) until smooth. Beat the cream cheese mixture into the whipped cream until just combined. Spread over the crumb base. 
Prepare Banana Layer - Slice bananas into a single layer on top of the cheesecake layer. Cover and chill while preparing the pineapple layer. 
Prepare Pineapple Layer - in a saucepan, combine pineapple, water, brown sugar, lemon juice, and cornstarch. Cook over medium low heat until thickened. Remove from heat and let cool completely - it speeds things up if you pop it in the freezer for about 15 - 20 minutes, stirring every 5 minutes. 
Spread the cooled pineapple mixture over the bananas.  


Prepare Coconut Whipped Cream Layer - beat 1 1/2 cups whipping cream with the coconut extract until stiff peaks form. Spread over the pineapple layer. Sprinkle evenly with the toasted coconut. 


Chill until ready to serve. At least 3 hours. 


If you like Pina Coladas then you will love this dessert. 


Layers of pineapple, banana, coconut, and rum.... what's not to love?


This is best the day it is made but will last in the fridge for a couple of days. I usually make it the morning I am planning to serve it so it has time to chill for several hours. I've made it the night before and it is fine too - the crust just gets a bit soggy the longer it sits. 

Saturday, April 18, 2020

Raspberry Coconut Jelly Roll


Jelly roll cakes always seem so much more complicated than they actually are. Granted they are a little trickier than a "regular" cake to make but they look so pretty and taste so amazing that the extra effort is totally worth it. 
Sue and I had a little Chopped style competition going on while we were self isolating and raspberry jam and coconut chips were our Chopped ingredients we had to use. She made a raspberry mini cheesecake with a coconut shortbread crust, stuffed with a raspberry, and topped with raspberry jam (she won by the way... kicked my butt in the voting we did on Facebook). I made this raspberry coconut jelly roll which I think was totally underappreciated. I mean... it's beautiful and delicious... not that I'm bitter about losing...at all.. I mean... it's fine. I'm fine. Everything's fine. 


Raspberry Coconut Jelly Roll

Ingredients
Cake
5 eggs
3/4 cup sugar
1 tsp coconut extract
3/4 cup flour
1 tsp baking powder
pinch salt

Filling
1 cup raspberry jam

Topping
2 egg whites
1/2 cup sugar
1/2 tsp coconut extract
1/2 tsp vanilla

Decorations
1/3 cup coconut chips, toasted

Directions
Preheat oven to 350. Line a 12 X 17 (or 13 X 18) jelly roll pan with parchment paper and lightly spray with cooking spray. 
Beat the eggs. Beat in sugar about 1/3 add a time. Beat in the coconut extract. Continue to beat about 7 minutes, until thick and creamy. Add in the flour, baking powder, and salt. Fold in gently. Pour into prepared pan and spread evenly. 


Bake at 350 for about 12 minutes, until top is light golden brown. 


Run a knife around the edge of the pan to loosen the cake from the edges. Place a large piece of parchment paper on top and then another cookie tray. Invert the cake onto the other cookie tray and remove the pan from it. Gently peel off the parchment paper. 


Carefully roll up the cake, from the short end, with the parchment paper in it. (See photo below for clarification)


Let cool for 15 minutes. 
After 15 minutes, gently unroll the cake and spread the raspberry jam evenly over the cake. 


Roll the cake back up, this time peeling off the parchment paper as you go. 


Set aside to cool completely. Don't worry if there are a few little cracks or tears, you will be covering them with the meringue frosting. 


Prepare meringue: in a bowl over a pot of simmering water, whisk the egg whites with the sugar and extracts until the sugar is dissolved. Make sure the bottom of the bowl is not touching the water below it. 
Remove the bowl from the heat and whip with beaters for about 5 - 7 minutes, until thick and fluffy. 


Spread over jelly roll. You can leave as is OR... get out your kitchen torch and add a little color to the meringue. Then sprinkle the toasted coconut chips on top.


Chill until ready to serve.


So pretty. 


Slice it up!


You could also top with whipped cream if you prefer it over meringue. I really like the marshmallowyness of the meringue with the delicate crumb of the cake. Although I'm not one to pass up sweetened whipped cream either. 

Monday, February 17, 2020

Keto Nanaimo Bars


You guuuuuuuys! 
These Nanaimo Bars are going to change your life! Okay.... maybe not... but they might. You don't want to not try them and take the chance you're missing out. 
They taste like "normal" Nanaimo bars, they look like "normal" Nanaimo bars, and the texture is totally like "normal" Nanaimo bars. You'd never know they were keto/gluten free/diabetic friendly. 
I even had some taste testers say they preferred these over "normal" Nanaimo bars because they weren't quite as overwhelmingly sweet. 
I wanted to keep some of the Bird's Eye pudding powder in the recipe because that is what makes a Nanaimo bar a Nanaimo bar. It adds the most carbs to the recipe but also adds the authentic flavor and color. Per bar (recipe makes 24) the nutritional counts are: 191 calories, 17.5 fat, 5.9 carbs, 3.2 fiber, 2.7 protein. That's 2.7 net carbs per slice.
Doing keto you often can feel like you are missing out. Not with these bars. These keep well in the freezer so you can just pop one out whenever you need a keto friendly sweet treat!


Keto Nanaimo Bars

Ingredients
Bottom Layer
1/2 cup butter
1/4 cup Swerve brown sugar 
1 egg
5 Tbsp unsweetened baking cocoa
1/4 cup chopped walnuts
1 cup almond flour
1 cup unsweetened coconut, toasted

Middle Layer
3/4 cup butter, room temp
2 Tbsp Bird's Eye custard powder
1 cup Swerve icing sugar
4 Tbsp whipping cream

Top Layer
3 Tbsp butter
6 oz (scant 1 cup) sugar free milk (or dark) chocolate chips
2 Tbsp Swerve icing sugar

Directions
Prepare bottom layer - In a heat safe bowl, stir together butter, brown sugar Swerve, and egg. Place over a pan of simmering water over medium heat (or in a double boiler). Stir until well mixed. Stir in the cocoa powder. Stir until thickened. 
Remove from heat and stir in walnuts, almond flour, and coconut until well mixed. Press into a 10 X 10 pan lined with tinfoil. Set aside. 


Prepare middle layer - beat together butter, custard powder, and Swerve icing sugar. Beat in the whip cream until smooth. Drop by the spoonful over the crust.


Use the back of a spoon to spread the layer evenly. Note - it helps to dip the spoon in water and shake it off, then spread to prevent sticking. You can also use your fingertips dipped in water to help spread it out. 


Chill the two layers for at least half an hour before doing the last step - or pop in the freezer for 20 minutes. It is very important you do not skip chilling it!! Spreading the chocolate layer on top will be almost impossible if the bottom layers are not chilled. 
Prepare the last layer - Melt butter and chocolate chips in a microwave safe bowl in 20 second increments, stirring well in between, until smooth. Stir in the Swerve icing sugar. 
Working fairly quickly, drop the chocolate in spoonfuls over the yellow layer and then spread it with the back of a spoon. This can be a little tricky because the chocolate starts to melt the middle layer, making it difficult to spread. Don't worry if your chocolate isn't completely even - just do the best you can. 


Chill until set. 
Use the tinfoil to remove the bar from the pan - this will make it much easier to cut. 
Cut into 24 pieces. You can keep these in the fridge or on the counter. I tend to leave them in the fridge in a lidded container and take them out about half hour before serving them. 


Only 2.7 carbs per slice!!


Look me in the eye and tell me that doesn't look EXACTLY like a "normal" Nanaimo bar. 


I love one of these with my keto coffee for those days I'm craving sugar. Totally satisfies the need for sweets. 


Texture is a big thing for me when it comes to replicating recipes to a keto friendly format. The texture of these, IMO, is spot on. A healthified, gluten free, keto friendly, diabetic friendly treat that I guarantee everyone will enjoy. 


FYI - you can also make these in mini muffin tins - I got 30. Just spoon about a tablespoon of the base into each muffin tin and press it down, then a Tbsp of the filling, spread it out, and then about 1 tsp of the chocolate topping, and spread it over the filling. 

Saturday, November 24, 2018

Pineapple Coconut Cake


Pineapple and coconut may seem a bit out of place in November but I say there is no better time to have them! It's cold, it's rainy, it's a stay under the covers watching movies kind of month BUT if we add a little pineapple and coconut it's like summer is here again.
Okay. Maybe not. But, it doesn't hurt to try. 
Plus... you get to eat delicious cake sooooo pretty much worth your time regardless of if it makes the sun shine again or not. 


Pineapple Coconut Cake

Ingredients
Cake
3 cups flour
1/4 cup cornstarch
1 tsp salt
5 tsp baking powder
1 cup butter, room temp
2 1/2 cups sugar
4 eggs
2 tsp vanilla
1 tsp coconut extract
1 3/4 cup buttermilk
1 cup flaked coconut

Pineapple Filling
1 cup sugar
1 1/2 Tbsp cornstarch
1 tsp vanilla
2 cups drained, crushed pineapple (reserve juice)
1/2 cup butter, room temp

Frosting
4 cups icing sugar
1 tsp vanilla
3 Tbsp pineapple juice (more if needed)

Topping
1 cup toasted coconut

Directions
Prepare Cake - Preheat oven to 350. Lightly spray 3 - 9 inch pans with cooking spray and line bottom with parchment paper, set aside.
In a mixing bowl, stir together flour, cornstarch, salt, and baking powder.
In a separate mixing bowl, beat butter and sugar until creamy, scraping sides of bowl as needed. beat in eggs, one at a time, beating between each addition. Beat in vanilla and coconut extracts. 
Alternately beat in the flour and buttermilk until well mixed - scrape the sides of the bowl between each addition. 
Divide the batter between the 3 prepared pans.
Bake at 350 until toothpick inserted near the center of the cake comes out clean - about 30 - 40 minutes. Remove from oven and let cool for 10 minutes before inverting cakes onto wire racks to cool completely. 


Prepare Pineapple Filling - Add the sugar, cornstarch, vanilla, and pineapple to a pan. Whisk well. Add in the butter and bring mixture to a boil over medium heat. Reduce the heat to low and, stirring constantly, add in 1/4 cup of the reserved pineapple juice, simmer 5 minutes to thicken, then remove from heat and let cool completely. 
Prepare Frosting - in a mixing bowl, beat together icing sugar, vanilla, and pineapple juice until spreading consistency. Add in more juice if too firm, or more icing sugar, if too runny. 
Assemble Cake - Place one layer of cake on a serving platter. Scoop frosting into a piping bag (or plastic bag) and pipe a ring of icing around the rim of the cake. Spread half of the cooled pineapple filling in the center of the cake, spreading to meet the icing. (See photo below for clarification)


Place a second layer of cake on top and repeat the ring of frosting and the rest of the pineapple filling. Top with the last layer of cake. 
Pipe (or spread) the last of the frosting on top of the cake.


Lastly, top with the toasted coconut.


Unfortunately this cake disappeared so quickly I didn't get a chance to take a photo of it sliced. I like the "naked" look of the cake that comes from not frosting the sides. If you want to frost the sides I would recommend doubling the frosting recipe so you have enough. You could then press toasted coconut on to the sides too, if you wanted to. 
Pineapple and coconut is a classic pairing that is sure to have your guests coming back for more. 

Saturday, August 25, 2018

No Bake Penotti Monster Cookies


Quite a while ago we received a gift from Penotti Canada of two jars of their product. One jar we used to create our Crunchy Cookie Butter and Coconut Biscotti (Recipe HERE). The other jar we used to make these frightfully good no bake monster cookies. 
No bake cookies are soooooo great, aren't they? Super easy to whip up at the last minute. Throw some spooky candy eyeballs on and *voila*  a Halloween snack the kids will love. And adults. And ghouls. And vampires. Pretty much everyone....


No Bake Penotti Monster Cookies

Ingredients
2 cups sugar
1/4 cup butter
1/2 cup milk
1/4 cup baking cocoa powder
1 tsp vanilla
2 1/2 cups old fashioned oats
1 cup coconut
candy eyes

Directions
In a large saucepan mix sugar, butter, and milk. Bring to a full roiling boil (Full, rolling boil = bubbles can't be stirred down). 
Boil for one minute, stirring constantly. 
Remove from heat and stir in the Duo Penotti and vanilla until smooth.


 Stir in the oats and coconut.


Working fairly quickly, drop by spoonfuls onto parchment paper covered cookie sheet (you can also use plastic wrap). 


Press two eyes into each blob. Let cool completely. 


You can make them all different sizes if you like. They harden up enough to go in a lunchbox if you want to send some to school with the kidlets. 


You can also make these without the eyeballs of course! But.... cooooome ooooon


They're just so cute with the eyeballs. 
I mean.... terrifying.... they are so terrifying with the eyeballs. 
These are basically just a fun update to a classic "haystack" cookie. The Duo Penotti instead of peanut butter makes these extra tasty!