Showing posts with label blueberry. Show all posts

Thursday, September 5, 2019

Fruit Pizza


Sue and I have been a little sporadic with our posts this summer because things have been crazy around here. Sue has been working all summer and I recently went back to work after having several months off. Hopefully things will be getting back to some sort of a routine and we can get back to posting a little more regularly!
I wanted to share this pizza before summer was completely gone as summer fruit is perfect for decorating it with. Any kind of fruit will work - just be sure to use fresh and not frozen. Frozen tends to bleed into the crust and make it not as pretty. 


Fruit Pizza

Ingredients
Crust
1 batch Sugar cookie dough (homemade or store bought)

Sauce
1 8 oz brick cream cheese, room temp
1/4 cup butter, room temp
1/2 cup icing sugar
2 tsp vanilla

Toppings
your choice of fruit 

Glaze
1/3 cup apricot or crab apple jelly (or any very light/clear jelly)

Directions
Press your sugar cookie dough onto a parchment paper lined pizza pan. Bake at 350 until cookie is lightly browned on top - about 12 - 15 minutes. (You don't want to over bake it or your crust will be crunchy.) When done, remove from heat and let cool completely. 


Prepare sauce - beat together the cream cheese, butter, icing sugar, and vanilla until smooth. Spread evenly onto the cookie crust. 


Now comes the fun part! Decorate with your fruit. I used strawberries, blueberries, pineapple, green grapes, and mandarin oranges. When you have it decorated how you want it heat up the jelly in the microwave for about 20 seconds - just enough to have it liquefy. Using a pastry or basting brush, brush the jelly over the top of the fruit, letting the extra drip down on to the pizza. (You may or may not need all of the jelly. Once all the fruit is covered you can stop.)


Chill until ready to serve. 
This is such a pretty dessert and a great recipe to get the kids involved. They love putting the fruit on top. Use your favorite fruits to change it up... you could even add a few little extras like chocolate chips or nuts or coconut if you wanted to. 
A simple treat that is still impressive enough to bring to your next family gathering! 

Thursday, July 11, 2019

Saskatoon Scones


Saskatoon season around Lillooet is always highly anticipated. Saskatoons grow wild around the area and are always a welcome addition to baking. The berries are similar to blueberries but are smaller, have more teeny seeds, and have a different flavor (maybe sweeter? It's hard to describe!).
If you don't have access to saskatoons you could sub in blueberries, no problem. 
This is our basic, go-to scone recipe and can easily be used for tons of different flavor combos. I get 12 fairly good sized scones out of it but it can be halved to just get 6, if you prefer. Scones freeze well though so I say make the full batch!


Saskatoon Scones

Ingredients
4 cups flour
2/3 cup brown sugar
3 Tbsp baking powder
2 tsp baking soda
1 cup butter, cold
1 1/2 cups saskatoons
1 cup sour cream
1 cup buttermilk

Directions
Whisk together the flour, sugar, baking powder, and baking soda. Cut in the butter using 2 knives (or a pastry blender or pulse in a food processor) until mixture resembles coarse crumbs.  Stir in the saskatoons. 


Mix together the sour cream and buttermilk. Stir into the dry ingredients until dough comes together.
Place on lightly floured work surface and knead once or twice. You don't want to over work the dough, just have it come together. 
Roll into a rectangle about 1 inch thick. Cut into 12 triangles. You can also use a biscuit cutter if you want them a different shape. Just make sure they are about 1 inch thick. 


At this point you can cover them and place in fridge overnight, to be baked in the morning OR you can continue on to baking them. 
Preheat oven to 400. Line a cookie sheet with parchment paper and place scone wedges on the sheet about 2 inches apart. 


Bake at 400 for approx 20 minutes - tops will be lightly golden and appear dry. 


Remove from heat and serve warm or let cool to room temp.


Scones freeze very well. Just pop in the microwave for a few seconds to thaw and reheat. They are best eaten the day they are made but for a day or two they will still be good. I recommend reheating in the microwave for a few seconds to freshen. 
Our saskatoon scones make a great on-the-go breakfast. They are sweet but not too sweet and travel well in a lunch bag. 

Thursday, May 16, 2019

Spiked Blueberry Lemonade Slushie


Are you ready to discover your new favorite *adult* summer drink? 
Got a pen and paper? Okay.. okay... you're on your phone, I get it. Get ready to Pin the heck out of this one. 
I created this recipe for a BC Blueberries recipe contest a while ago and...guess what??? It won!! I get why it won. It's sweet, but not too. It's refreshing. It's tangy. It's boozy. It's soooo tasty. It's got those delicious BC Blueberries that make everything tastier. 
I don't usually like to toot my horn but *toot toot*. 
It's a keeper. 


Spiked Blueberry Lemonade Slushie

Ingredients
4 cups frozen blueberries
1 can (295 ml) frozen lemonade concentrate
2 Tbsp sugar
1 cup vodka
3 cups ice

Garnish
lemon slices
blueberries

Directions
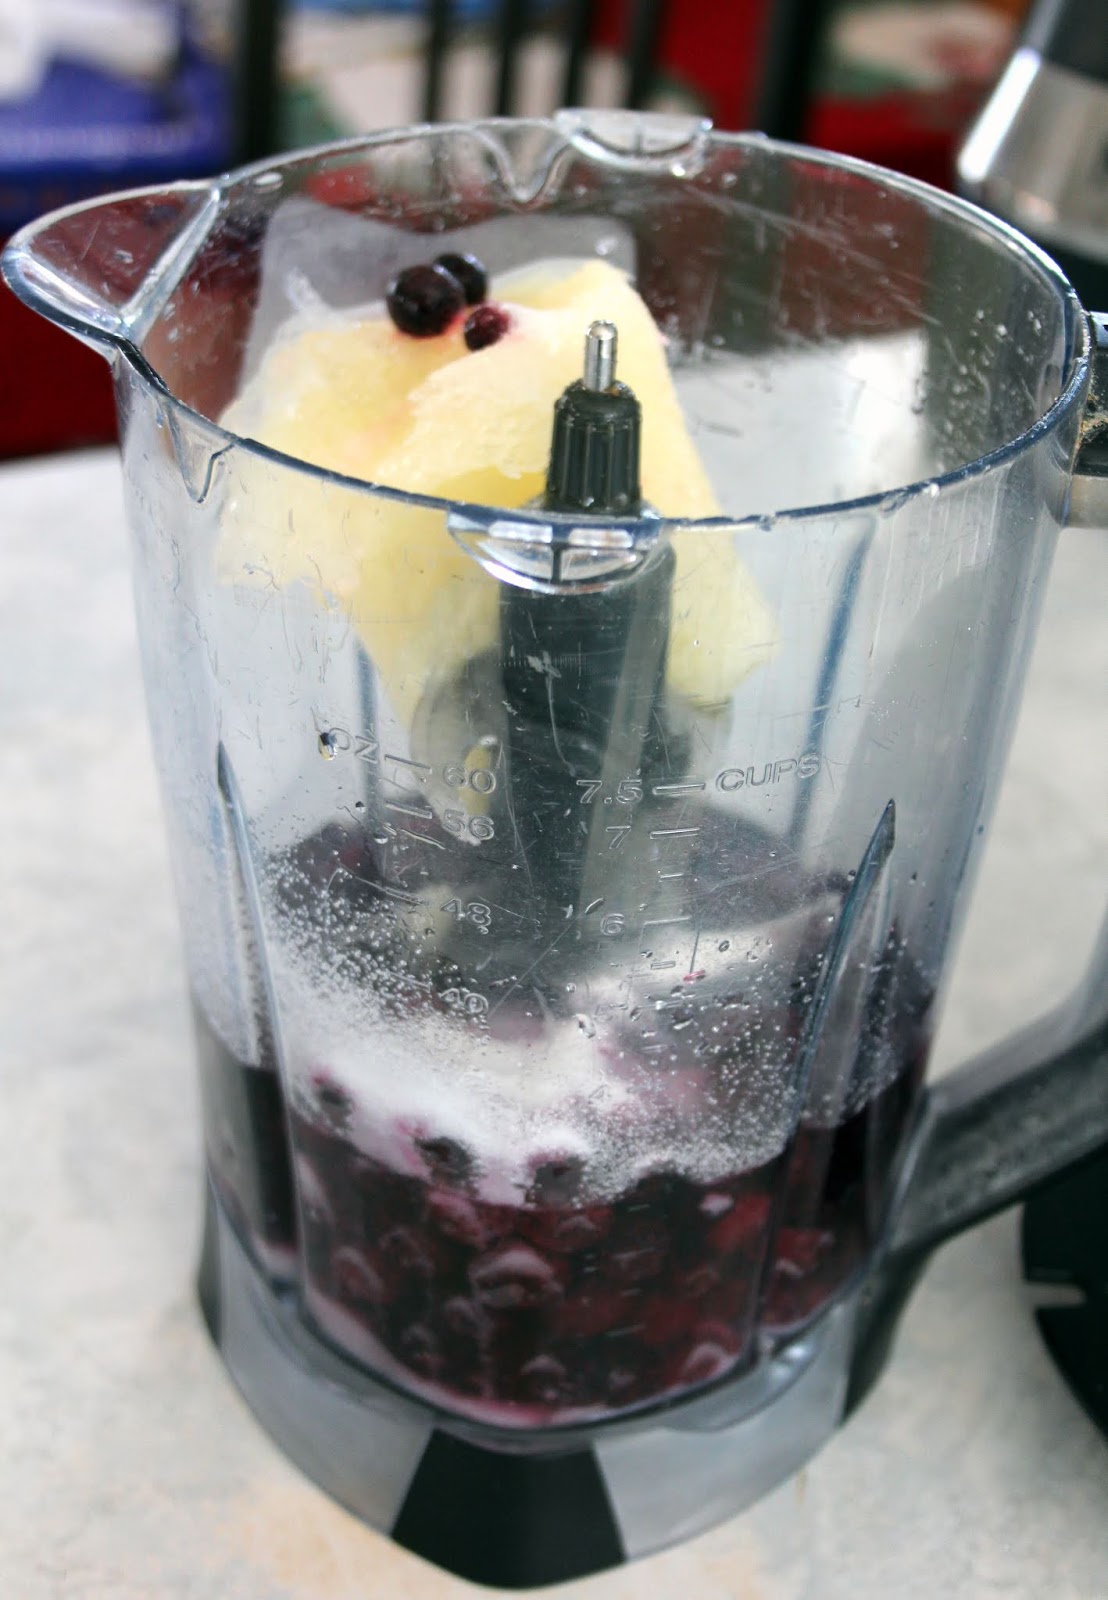
Place frozen blueberries, lemonade, sugar, vodka, and ice in a blender.


Blend the heck out of it. Add more ice if you want it slushier (but it should be pretty slushy!).
Garnish your glass with a slice of lemon and a few blueberries on a little skewer. Totally not required by the way, but it does make things all fancy schmancy. 


Yeah. Not too shabby. Look at that pretty color. 


Recipe makes 4 servings. You can place any leftovers in the freezer (I use a freezer bag) and then just blend again when you are ready to enjoy them! 


This has summer written all over it, am I right? 
Like all good things, please enjoy responsibly! 

Thursday, May 2, 2019

Blueberry Lemon Tart


For Easter dessert I wanted something a little different this year. I usually do carrot cake or cheesecake or trifle. This year I went with an Old Fashioned Strawberry Pie (recipe HERE) and this pretty blueberry lemon tart. I had hoped for a lighter purple color but the color entirely depends on your berries. Mine just happened to be darker so the color was darker. Still pretty. Still delicious. 
This tastes quite similar to a lemon meringue pie but is sweeter due to the blueberries. It makes a lovely addition to any meal and you can leave it plain, topped with whipped cream or meringue, or all fancy schmancy with whipped cream and berries and pie crust cut outs. 
Start with a homemade crust or a store bought crust, or even a graham cracker crust! Completely up to you.


Blueberry Lemon Tart

Ingredients
Crust
dough for a single 8" pie crust

Blueberry Lemon Curd
2 cups fresh blueberries
zest from 3 lemons
1 Tbsp water
1/2 cup butter, room temp
1 1/4 cup sugar
2 eggs
3 egg yolks
juice from 3 lemons (about 1/2 cup)
pinch salt
2 tsp cornstarch

Directions
Preheat oven to 400. 
Roll out pie dough to fit your pan. I used a 4 X 13 tart pan but you can make this in an 8 inch pie pan, or other shaped pan. Bake at 400 for 5 minutes, then reduce heat to 350 and cook until crust is lightly browned, about 15 - 20 minutes. Let cool completely. 


Prepare curd - In a medium saucepan over medium heat, bring blueberries, lemon zest, and water to a boil. Reduce heat and simmer 7 minutes. Let cool about 15 minutes and then press through a sieve into a bowl. Discard pulp leftover.


In a mixing bowl, beat butter and sugar until creamy. Beat in eggs and yolks, one at a time, until smooth. Slowly mix in the lemon juice, salt, and cornstarch. Lastly, mix in the berry puree. 
Place into a saucepan over low heat and stir until thickened. Remove from heat, let cool about 15 minutes, then press through sieve again. 
Pour into the cooled pie shell. Let cool completely before topping. 


You can also enjoy the blueberry lemon curd without a crust, if you prefer!


I put the leftover curd in dishes so our gluten free guests could enjoy it as well. 


It's beautiful served this way as well. 


However you decide to serve it; it's going to impress your guests. 
I love how different the color is and that sweet and tart thing it has going on. 
I'd love to try it with a graham cracker crust just to see how it changes the flavor. That might just be next on my list! 
Now you know what to do with all those blueberries you have this blueberry season! 

Friday, August 24, 2018

Blueberry Ice Cream


Blueberry ice cream is not one of my favorites, if we are being honest. I just find that blueberries are so mild that it doesn't impart a lot of flavor to the ice cream. I decided to try and up the blueberry flavor by adding in a swirl of reduced blueberries. 
It worked!
Not only does it add a textural element, it definitely boosts the blueberry-iness of it. Blueberry ice cream has now moved up the list of favorite flavors for me. The beautiful color helped push it into the top 10. If you are one of those people that only eats ice cream in the summer (weeeeeeird) then you still have lots of time to whip some up!


Blueberry Ice Cream

Ingredients
Swirl
1 cup fresh blueberries
1 Tbsp sugar

Ice Cream
2 cups fresh blueberries
1/4 cup sugar
1 Tbsp lemon juice
2 cups whipping cream, divided
1 cup half and half cream (or whole milk)
3/4 cup sugar
1/4 tsp salt
1/2 tsp vanilla
3 egg yolks
1 Tbsp blueberry vodka (optional)

Directions
Prepare swirl - on a small saucepan over medium-low heat, stir together blueberries and sugar.


 Keep stirring while blueberries come to a boil and start to breakdown and thicken - about 10 minutes (you want it to be jam-like). Remove from heat and let cool completely. 
Prepare ice cream - Place blueberries, sugar, and lemon juice in a medium pan. Cook and stir until mixture breaks down (much like the swirl, above). Remove from heat. Place a strainer over a bowl and strain the blueberry mixture through. Discard the bits left in the strainer. Set the bowl with the blueberry puree aside. 
In a medium saucepan over medium-low heat, stir together 1 cup of the whipping cream, the half and half, sugar, salt, and vanilla. Keep stirring constantly until mixture starts to steam. Remove from heat.
In a small bowl, whisk egg yolks. Very slowly whisk in a little of the hot cream mixture - about 1/4 cup at a time. (Do this slowly so you don't curdle the eggs). Stir the the yolk mixture back into the cream and place back on heat. Continue to stir until mixture thickens enough to coat the back of a spoon. When thickened remove from heat.
Place remaining 1 cup of cream in a bowl with a strainer on top. Pour the hot mixture through the strainer into the cream. Stir in the blueberry vodka, if using. 
Stir in the blueberry puree.
Chill mixture at least 4 hours.
When chilled: place in ice cream maker and process according to manufacturer's instructions.
When the ice cream is done processing, scrape half of it into a container. Place half of the swirl mixture on top and swirl with a butter knife. Scrape the remaining ice cream on top, then swirl on the last of the swirl mixture.


Freeze until firm. 


I use a bit of blueberry vodka to help prevent the ice cream from freezing too hard. It's not necessary though. You can use plain vodka or just leave it out. If your ice cream freezes really hard just be sure to take it out about 10 minutes before you want to serve it. 

Saturday, January 20, 2018

Refreshing Blueberry And Coconut Rice bars


This post was sponsored by USA Rice Canada. We were compensated monetarily but all opinions and experiences are our own. 

When the opportunity came up to create a recipe using rice Sue and I jumped at the chance. We love rice and eat it a lot. Like... a LOT lot. Why? Well, not only is it delicious and extremely versatile, its nutritious and low in calories (only 108 calories per half cup),  plus it's a source of B vitamins, phosphorus and zinc. Sue's favorite - brown rice - is also full of magnesium, selenium, manganese, and fiber (4 gr of fiber for 1 cup!). 
Not to mention, for those of us on a budget, it is very affordable. When I am meal prepping I make up a large batch and simply freeze the rice in single serving portions in bags. It freezes beautifully and is super handy - just pop it in the microwave and  *boom* good to go. 
I wanted to come up with a recipe that was different and fun. Obviously desserts or treats came to mind. I used sticky rice to create these tasty bars that are gluten free (rice is the original gluten-free grain), low sugar, and vegan! 
Healthy, refreshing, delicious, cheerful, and so purdy- What's not to love?!


Refreshing Blueberry And Coconut Rice Bars

Ingredients
3 cups uncooked sticky rice (sushi rice)
2 1/2 cups water
2 cups light coconut milk
3/4 cup coconut cream
1/3 cup maple syrup (or honey)
3 Tbsp lemon juice

Filling
2 cups blueberries
1 tsp cornstarch
1 Tbsp water

1/2 cup shredded, unsweetened coconut

Directions
Combine rice, water, and coconut milk in a large pot (or rice cooker). Bring to a boil, reduce heat, simmer for 20 minutes - until rice is done. 
Transfer cooked rice to a large bowl and add in coconut cream, maple syrup (or honey), and lemon juice.


Stir to combine. Set aside to cool.
While rice is cooling, prepare berries. In a medium saucepan over medium heat, place blueberries, cornstarch, and water. Cook and stir until berries have broken down and thickened, about 5 - 8 minutes. Mixture may still be a bit runny. 


Remove from heat and let cool. 
While everything is cooling, take the 1/2 cup of shredded coconut and pulse it in a blender or food processor until powdered (or very finely shredded)
When rice and berries are both cool continue with the bar. 
Sprinkle half of the powdered coconut into the bottom of a 9 X 13 pan lined with parchment paper.  


Top with half of the cooled rice mixture. Press the rice down firmly. 


Top with the cooled berries.


Then top with the remaining rice. Again, press the rice down firmly. 


Sprinkle with the remaining powdered coconut and press down lightly.


Chill, covered, for at least an hour, up to overnight. 
When the bar has chilled to firm up, use the parchment paper to remove the bar from the pan. Set on a cutting board and slice into squares.


Note - you can use your favorite berry in place of blueberries if you like. I also made this with raspberries and the color is lovely.


Store any leftovers in the fridge. 


Look at all that gooey goodness.


Basically the prettiest thing ever. 


You can go ahead and eat with your fingers! Warning - things may get a little messy. 


Or you can use a fork and be all prim and proper. 


However you decide to enjoy your treat, just remember there is no guilt attached! So much healthiness going on.... and tastiness. 


Be sure to pop over to USA Rice Canada (HERE) for more fabulous rice recipes and information on rice.   

Tuesday, January 2, 2018

Angel Food Dream Cups


For Christmas dinner I was trying to make a fruit pavlova and it just did not turn out. My pavlova cracked and fell apart and left me in a bit of a panic. I went through my cupboards to see what ingredients I had to save dessert. 
And that is the story of how this dessert came about. 
Turns out failing doesn't always mean failing. 
This is a light and fluffy dessert that is perfect for after a heavy meal. 


Angel Food Dream Cups

Ingredients
1 angel food cake
1 pkg strawberry Jello powder
1 cup boiling water
1 pkg (8 oz) cream cheese, room temp
2 cups whipping cream

Topping
fruit

Directions
Cut angel food cake into pieces and evenly distribute among 12 glasses (I used regular size disposable plastic cups). Press down firmly and set aside.
In a mixing bowl, beat the Jello powder and boiling water until Jello dissolves. Beat in the cream cheese. 
In a separate bowl, whip the cream until stiff peaks form. Fold the whipped cream into the Jello mixture. Spoon the mixture evenly into the 12 cups, on top of the angel food cake pieces. 
Top with a few pieces of fruit. Cover and chill until ready to serve, at least 2 hours up to overnight. (They will keep in the fridge for a couple of days)


I used strawberry Jello but you could easily switch it for your favorite flavor! Don't have fruit to top it with? Add a squish of whipped topping to fancy it up. 
My almost dessert disaster turned out pretty darned good. I'm going to be making this again with different flavors of Jello to see which is my favorite!