Pages

Wednesday, February 29, 2012

Hermit Drop Cookies


I love cookies. If you follow Sue and I's blog then you know all about my undying affection for cookies. (And Sue's weird non-affection for cookies)
This cookie is no different.
It is an "old fashioned" drop cookie. I say it is old fashioned because it comes from a United Churches of Canada cookbook ("Let's Break Bread Together") that is full of family recipes that go back generations. This one was submitted by the Merrickville United Church from Merrickville, Ontario.
It is soft and squishy and everything a cookie should be.


Hermits

Ingredients
1 3/4 cup flour
1 tsp baking soda
pinch salt
1/2 tsp cinnamon
1/8 tsp allspice
1/8 tsp nutmeg
1 cup raisins
1 cup chopped dates
1 cup chopped walnuts
1/2 cup shortening
1 cup brown sugar
2 eggs
1/2 tsp vanilla

Directions
Preheat oven to 350. Line a cookie sheet with parchment paper.
Combine flour, baking soda, salt, and spices. Add raisins, dates, and nuts; stir to coat with flour.
In a separate bowl, cream shortening and sugar. Add eggs and vanilla and beat well.
Stir dry ingredients into wet ingredients using wooden spoon.
Drop by teaspoons full onto prepared cookie sheet.
Bake at 350 for 10 - 12 minutes.
Remove from oven and let cool on cookies sheet for 5 minutes. Remove to wire rack to cool completely.


I used a small cookie scoop and they turned out soooooo cute. They don't really spread so you can place them fairly close together. Leave only 1 inch instead of 2 between them.

These are so really tasty. I was worried they would be too spicy.
Nope.
Perfect amount of spice.
Plus, I didn't have walnuts so I substituted chopped pumpkin seeds because that is what I had. I'd like to make them again with the walnuts to see how big of a difference that makes.
Sue says I should start reading the ingredients before I start making recipes so I don't have to make panicked substitutions on the fly.
She's probably right.... but I'm not going to tell her that.
Besides....the pumpkin seeds were a nice addition. 

Tuesday, February 28, 2012

Apple Zucchini Cake


My laptop isn't hooked up to my printer.
"What has that got to do with cake?", you ask.
Well, I often go Googling for recipes to use up ingredients that I have on hand. In this case I was looking up apple recipes and zucchini recipes.
When I find recipes that interest me I like to print them out and put them into a "I Might Make" pile for future reference. Except, of course, when I don't have a printer hooked up. Then I have to write them by hand on little scraps of paper that I can find laying about.
This time I was writing down several different recipes at a time and ended up accidently combining several recipes into one. It was a small piece of paper and I had too many windows open on my laptop.
Turns out it was a brilliant mistake.
I combined an apple cake with a zucchini bread and something else that I still don't know which recipe it came from, and came up with this Apple Zucchini Cake with Browned Butter Frosting.
If anyone asks - I did it on purpose.  


Apple Zucchini Cake with Browned Butter Frosting

Ingredients

1 cup butter
3/4 cup sugar
1/2 cup brown sugar, packed
2 eggs
1 tsp vanilla
1 tsp cinnamon
1 3/4 cup flour
1 1/2 tsp baking powder
1 cup apple, grated
1 cup zucchini, grated
1 cup coconut, shredded
3/4 cup pecans, toasted & chopped

Browned Butter Frosting

1 cup butter
4 - 5 cups icing sugar
1/4 cup milk
1 tsp vanilla

Directions

Preheat oven to 350. Line a 9 X 13 pan with parchment paper and lightly spray with cooking spray.
In a large bowl, cream together butter and sugars. Add egg and vanilla and beat to combine.
In a separate bowl, whisk together cinnamon, flour, and baking powder.
Stir dry ingredients into the wet ingredients until just combined.
Fold in apple, zucchini, coconut, and pecans. Do not overmix.
Spread into prepared 9 X 13 pan. Bake for approximately 25 minutes. Toothpick inserted near center should come out clean.
Remove from oven and let cool on wire rack. When cool frost with Browned Butter Frosting.
Frosting:
Cook butter in heavy saucepan over medium heat, stirring constantly, for 6 - 8 minutes or until butter begins to turn a golden brown. (It took me about 10 minutes)
Remove pan from heat immediately and pour butter into a small bowl. Cover and chill for about an hour or until butter starts to solidify.
Beat butter at medium speed, with an electric mixer, until fluffy. Gradually add icing sugar alternating with milk, beginning and ending with icing sugar. Beat at medium speed until well blended after each addition. Stir in vanilla. (I did 4 additions of 1 cup of icing sugar but then had to add a bit more to get the right consistency)
 
I don't know about you but I like accidental recipes that turn out to be keepers. This is similar to our earlier blog about Apple Cake with Toasted Pecans and Browned Butter Frosting but is still different enough to warrant its own blog.
I actually borrowed the frosting recipe from that blog to put on this cake.
I made this in a 9 X 13 pan because I wasn't sure how evenly it would cook in the oven - I was worried it would be gummy - but now that I know it is okay, I think I would bake it in a 9 X 9 pan for a bit thicker cake. As is it could almost be served as a bar/square.


Monday, February 27, 2012

5 Minute Coffee Cake


So, I was all excited after making the 5 minute chocolate cake and having it turn out so yummy and not gummy and weird that I decided to make it for dessert again last night.
Yay! Right?
Except I didn’t have any cocoa.
I was so sad.
Then I thought…I know…there has to be a non-chocolate cake in a mug that I can make.
Except…I don’t really like vanilla cake. I like chocolate cake.
*sigh*
But then I found this recipe for coffee cake in a mug.
Yeah, I can do that. It’s not chocolate but it is streusel-y. I like streusel.
Except I didn’t have half of the ingredients.
*sigh*
It’s okay….time to start substituting.
Turns out I like my 5 Minute Coffee Cake almost as much as my 5 Minute Chocolate Cake even though there is no chocolate involved.
I know, weird…
.
 
5 Minute Coffee Cake
Ingredients
1 Tbsp butter, softened
2 Tbsp sugar
2 Tbsp egg, beaten
2 Tbsp cream cheese, softened
Tiny splash of vanilla
¼ cup flour
1/8 tsp baking powder
Streusel Topping
1/2 Tbsp butter
1 Tbsp flour
1/2 Tbsp brown sugar
1/2 tsp cinnamon
Directions
Cream together butter and sugar in a microwave safe mug or bowl. Add in egg and mix until well combined. Add in cream cheese and mix until well combined. Stir in vanilla.
Add flour and baking powder, stir until just combined. Do not over mix.
In a separate bowl, combine streusel topping ingredients with your fingers until crumbly.
Sprinkle on top of cake batter. (You have to be very careful measuring the cake batter ingredients but feel free to be generous with the streusel ingredients – ie: I used heaping Tbsps and tsps.)

 
Microwave for 2 minutes, or until cooked.
You can either enjoy this in the mug/bowl you prepared it in or, if you want to be fancier, lift it out onto a plate and drizzle with a little caramel sauce. (Be forewarned – it is HOT when it comes out. Be careful not to gobble it down immediately.)
 

It really is that simple. Now, I know there are those out there who say “but a coffee cake (or chocolate cake) baked in the oven is WAY better”.
Well, yes, of course it is.
But this is pretty darn close if you are hungry and craving cake but are not in the mood to dirty a million dishes. Plus, if you are like me and want cake NOW, then this is for you. Start to finish in under 5 minutes.
Seriously.
I still say it is best eaten a bit warm with icing. Or caramel drizzle. Or ice cream. Or whipped cream.
You know, whatever you have on hand.


I can honestly say I don’t know how good it is cold as it has never lasted that long.
I like eating cake.
Don’t judge me.

Sunday, February 26, 2012

Strawberry Candies (and a St. Patrick's Lime Version Too)


This recipe for coconut strawberries is one that Sue and I have had forever and is one of the recipes that brings back a lot of childhood memories. We got it from the grandma of one of our bestest friends. Truth be told she was like a grandma to us too.
Our friend, Desi, and her brother, Jamie, moved in to our neighbourhood when we were all maybe 4 or 5 years old. I love the story of how we met. It's one of those non-dramatic, chance encounters that changes everything forever.
Desi and Jamie came down to our house and asked to borrow our bathroom as, for reasons I can't recall, theirs was unavailable while they were moving in down the street.
*Boom*
Beginning of one of the strongest friendships on the planet.
We would play outside together, roaming the neighbourhood, creating adventures as only kids can do, until, one by one, the lights from the street lights would flicker on and above our laughter we would hear Desi and Jamie's grandpa calling them home.
"Deeeeeeeeesi......Jaaaaaaaaaaay-meeeeeee", would sound throughout the block, and we would know that if we didn't get home within the next couple of minutes then our names would be called out next by our parents.
I don't know if you are lucky enough to have a forever friend: and by "forever friend" I mean a friend that, no matter how long it has been since you last saw them, no matter how many arguements you have, no matter how life gets in the way, after 5 seconds together and a giant bear hug, it is like you have never been apart and you can pick up right where you left off - but if you do then you know how blessed you truly are.  
Desi and Jamie's grandparents, forever Mr. and Mrs. Lancaster to Sue and I, were amazing people and Mrs. Lancaster was one of the BEST bakers on the planet.
The recipe for these strawberries is hers.


Strawberry Candies

Ingredients

3 pkgs (85 gr each)  Strawberry Jello
1 can (300 ml) Sweetened Condensed Milk
about 2 bags of Coconut, shredded (Maybe 4 cups or so)


Stems
green Tootsie rolls
or
green frosting

Directions
In a medium sized bowl, stir ingredients together with a wooden spoon. Start with about 2 cups of coconut and go from there. You want it to be sticky, but not too sticky. You should be able to easily roll it into a ball if you pinch off a ping pong ball sized piece.


When you get the right texture, pinch off ping pong ball sized amounts of the mixture and form into strawberry shapes. (Roll into a ball then gently flatten one side and pinch the ball into a rounded pyramid to get the basic shape.) 
You can then top with a flattened green Tootsie roll that you can shape into leaves, or pipe a bit of green icing on top to resemble leaves, or you can leave them plain.
Place them on a plastic wrap lined cookie sheet and let them chill in the fridge for 30 minutes.


This recipe, as simple as it is, will always be one of my favorites.
There are not too many recipes that stick with you your entire life, that are able to make you smile and bring back so many great memories every time you make them, that even grow and spread to other family members to help them create memories of their own.
Sue and I's cousin, Karen, used this recipe to help decorate her wedding cake several years ago.


Beautiful, yes?
They had a perfect splash of color to a tray of treats too.


After they are chilled they can sit out at room temp for quite a while. 


Above is piped icing - PS it looks even better if you have piping skills and the proper tip to make leaves. Below is a green Tootsie roll. They both work really well. 


These are super simple to whip up and taste very strawberry-y. 
Kids would have a blast helping you make them!


You may not find this recipe as memorable as our family but I hope that it does make you smile at least a little.
Do you have any special recipes that bring back memories for you?

(On a side note - and I only include this because I know Desi would find it funny - as you may have noticed in the opening paragraph I used the word "bestest" to describe our friend, Desi. Spellcheck asked me if I meant "bustiest".... No...no...I did not mean "bustiest". Sorry Dez....I think we both know who would win that title.)

And now for the green version that works perfectly for St. Patrick's Day!


Simply replace the 3 packs of strawberry jello with 3 packs of lime jello.


Continue as per the above instructions. Shape into whatever shapes you like. 


*Voila* done. 

I used them to decorate my St. Patrick's Day shamrock cake - which was our Guinness Chocolate Cake with Bailey's Buttercream! (Recipe HERE) 


They worked really well and looked so cute!


Be sure to drop us a comment if you give either the candies or the cake a try! We'd love to hear how it turned out. 


Tuesday, February 21, 2012

Peanut Butter Pretzel Truffles


My addiction to Pinterest is paying off in terms of finding really cool homemade candy recipes. I have an amazing Chocolate Chip Cookie Dough Truffle that will forever be my first love but these sounded really, really interesting. Besides, they are peanut butter.
I love peanut butter.
Yes, I would marry it if I could.
.
 
Peanut Butter-Pretzel Truffles
(Slightly adapted from The Brown Eyed Baker)
 
Ingredients
1½ cups pretzel pieces
½ cup creamy peanut butter
1 Tbsp butter, softened
2 Tbsp brown sugar
3 Tbsp icing sugar
1 cup milk or semisweet chocolate chips
1 Tbsp vegetable shortening
¼ cup peanut butter chips, melted
.
 Directions
Put the pretzel pieces into a resealable plastic bag and crush into very small bits (a rolling pin works great for this). In a small bowl, combine the peanut butter, butter, and brown sugar.
Stir until all of the ingredients are completely blended and smooth. Add the pretzel bits to the peanut butter mixture and mix thoroughly. Add the icing sugar and mix until completely combined.
Line a small baking sheet with plastic wrap. Using a small cookie scoop, or about 1 Tbsp worth of peanut butter mixture, gently shape into a ball with your fingertips. Place the ball on the plastic wrap lined cookie sheet and repeat with the remaining peanut butter mixture. Place the baking sheet into the
refrigerator and chill for at least 1 hour. When ready to dip the truffles, microwave the chocolate chips and vegetable shortening together in a small bowl at 50% power in 30-second increments, stirring after each, until completely melted and smooth.
Working one at a time, dip one peanut butter-pretzel ball into the melted chocolate and use a fork to roll it around, ensuring that it is completely coated with chocolate. Let any extra chocolate drip off and place back on the plastic wrap lined sheet. Repeat with all of the peanut butter-pretzel balls.
Return the baking sheet to the refrigerator and again chill for at least 30 minutes. Garnish with a drizzle of melted peanut butter chips and crushed pretzels, if desired.
Store in an airtight container in the refrigerator.
:)
 This is a fairly small batch (about 18 truffles) and can easily be doubled. In fact, you are probably better off to just double it to begin with. Trust me, they will disappear so fast you will wonder why you didn’t make more.
Note – be patient while you are dipping the truffles. It can be fairly time consuming to dip them and shake off the excess chocolate and then slide them onto the plastic lined tray and have them be all pretty and not lumpy. If you try to hurry you will make it worse.
Take a deep breath and just go with the flow.
Put the truffles back in the fridge if they get too soft.
A more advanced technique for dipping - what I do for mine (because I’ve made a bazillion truffles) - is dip a toothpick in a bit of melted chocolate and then stick it in a truffle. Repeat this until all of the truffles have toothpicks in them. Chill them in the fridge for several hours.
When they are good and cold you can them dip them in the melted chocolate using the toothpick as a handle. Gently shake off excess chocolate. You have to work fairly quickly though because the toothpick will become loose as the truffle warms up. After they are all dipped, gently wiggle the toothpick and it will come out of the truffle. Chill truffles until chocolate is set. Drizzle with the melted peanut butter chips and/or crushed pretzel bits. The drizzle and bits will cover the little hole left by the toothpick.

Monday, February 20, 2012

5 Minute Chocolate Cake


Looks delicious, does it not?
It is. And you know what? You could be eating this in less than 5 minutes.
It's true.
I wouldn't tease you about something like that. That would just be cruel.
This is the BEST version of the Cake-In-A-Mug recipe you will find.
. Trust me....I've tried a bunch of them.
This one is moist without having that weird microwave chewy - stickiness that many of the microwave cake-in-a-mug recipes have.
As you can tell, I have chosen to make mine in a cereal size bowl instead of a coffee cup just to be different. I find the coffee mug ones just look weird.
Maybe it's just me....


5 Minute Chocolate Cake

Ingredients
4 Tbsp flour
4 Tbsp sugar
2 Tbsp unsweetened baking cocoa
2 Tbsp whisked egg
3 Tbsp milk
3 Tbsp oil
1 - 3 Tbsp chocolate chips

Directions
Mix ingredients together in coffee mug or cereal bowl (that is microwave safe) until well mixed. Sprinkle with chocolate chips just as you are putting it in the microwave. If they sit they will sink to the bottom. (FYI - For the cake pictured I just used 1 scant Tbsp of chips and it was really chocolatey)


Microwave on high for 3 minutes. It may rise above the rim of the cup but don't panic - it will shrink back down again.


Run a knife around the edge to loosen and dump out cake onto plate.


Best eaten warm with a bit of frosting on top.


Do you hate me yet?
I mean... with this you can now have warm, moist, delicious, chocolate cake anytime you want it.
ANYTIME. YOU. WANT. IT.
I used to think that the Cake-In-A-Mug cakes were okay but not great. They would do in a pinch but were nowhere near as good as a from scratch, oven baked chocolate cake.
This one comes pretty darn close. Especially eaten warm with icing melting on top.
*Drool*

IMPORTANT NOTE - Measure very carefully. The reason this works so much better than the other recipes out there is that it has just the right balance of ingredients.
For example - whisk your egg and use 2 Tbsp of it. DO NOT just use the yolk or the white thinking it will save steps. It changes the texture if you do that. 

Berry Scones with Berry Honey Butter


I came up with this recipe for Valentine's Day. I wanted to have pink scones and pink strawberry butter. As it turned out I didn't have strawberries at home, all I had was frozen mixed berries. So, we got purple scones and purple butter instead.
They tasted really good PLUS the color was pretty cool.
I know, I know, I need to invest in a better digital camera. My poor old thing just doesn't do the color justice. At least you get the idea!


Berry Scones with Berry Honey Butter

Ingredients
Scones
1/2 cup diced berries, thawed and drained (or fresh)
1/4 cup sugar
2 Tbsp cream
1 egg
2 tsp vanilla
2 cups flour
pinch salt
1 Tbsp baking powder
6 Tbsp butter, chilled

Berry Honey Butter
1 cup butter, softened
3/4 cup mixed berries (thawed and drained if you used frozen)
3 Tbsp honey

Directions
Preheat oven to 375. Line cookie sheet with parchment paper.
In a food processor, mix together first 3 ingredients (berries, sugar, cream) until smooth. Mix in egg and vanilla. Set aside.
In a large bowl, combine flour, salt, and baking powder. Cut in chilled butter into mixture resembles coarse crumbs.
Add the berry mixture to the flour mixture. Stir until dough barely comes together.
Drop by spoonfuls onto cookie sheet OR gently pour out dough onto a lightly floured surface and pat to about 1 inch thickness. Cut out using cookie cutters, then place on cookie sheet.
Bake at 375 for 15 - 20 minutes. 
Remove from oven and serve warm or room temp.
Directions for butter: Whip butter with beaters until fluffy. Add berries and honey and beat only until berries are mixed through the butter. Do not over mix.


Mmmm....look at all that berry goodness!
You can store the unused butter in the fridge but remember to bring it back up to room temperature before serving.

I think this butter would be fantastic served on pancakes, or french toast, or...well, pretty much anything.
And, the scones are very moist and sweet. Great with tea in the afternoon, or breakfast, or late night snack, or... well, pretty much anytime.

When strawberries are back in season I want to make these with only strawberries to see how pink they are. Until then these purple ones will have to do.
*sigh*
I will do my best to suffer through.


Be sure to stop by Carole's Chatter for tons of tasty links!

Sunday, February 19, 2012

Heart Attack Mac & Cheese with BBQ Ribs


Sometimes you just have to splurge.
You can fight the urge for only so long and then you have to just give in and indulge. You have to eat a billion calories in one sitting.
A billion delicious calories, might I add. So it's totally worth it.  
I've been doing so good with my healthy eating and watching my calories and blah, blah, blah that I figured I earned my calorific, heart stopping, ooey-gooey, but-a-little-healthy-because-it-has-spinach-in-it meal.
I have been searching for a mind blowing, homemade macaroni and cheese recipe forever.
They always just come out so bland and lifeless. This one, however, has flavor. Actual honest-to-goodness flavor.
I'm excited. Maybe more excited than one should be over a macaroni and cheese recipe, but still, I think you will be excited too.
Especially when you pair it with sticky, fall-off-the-bone BBQ ribs.


Spinach and Artichoke Macaroni and Cheese
(AKA Heart Attack Mac & Cheese)
Ingredients
2/3 of a 900 gr bag of pasta
1 Tbsp unsalted butter
1 Tbsp vegetable oil
¼ of a large onion, diced
5 cloves garlic, crushed
4 cups chopped, fresh spinach
1 398 ml can artichoke hearts (in water), finely chopped
salt & pepper
4 Tbsp flour
1 cup milk
1 cup chicken stock
1 – 2 cups water
1 – 8oz brick cream cheese
2 cup shredded Swiss cheese
2 cup shredded Mozzarella cheese
2/3 cup grated Parmesan cheese
 Topping
1 cup crushed saltine crackers
2 cups cheese, shredded (I used the rest of my Swiss, mozza, and parmesan)

Directions
Preheat oven to 350.
Bring a pot of water to a boil and cook pasta to al dente, according to directions on box. Drain and set aside.
While the pasta is cooking, heat the oil and butter in a stock pot or dutch oven over medium heat, until the butter is melted. Add the onion and cook until translucent, about 4 minutes. Add the garlic and cook until fragrant, about 30 seconds.
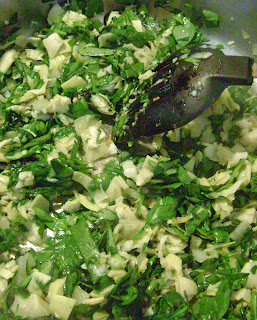
Next, stir in the spinach and artichoke and season with salt and pepper.


Cook for 2-3 minutes (until spinach is reduced), then sprinkle in the flour and cook, while stirring, for another minute. Add the cream cheese and stir until mostly melted. Slowly add the milk, stirring constantly. Slowly add in 1 cup of chicken stock. Bring to a simmer and cook until the milk starts to thicken, about 2-3 minutes, keep on stirring. Slowly add in 1 cup of water to thin down sauce a little.


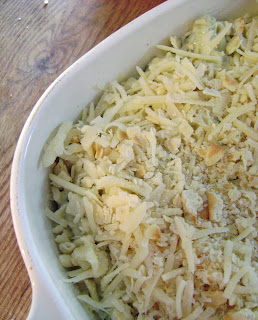
 Remove the pot from the heat and add the cheese in several increments, waiting until each increment is melted before adding the next. Finally, add the pasta. Spoon pasta into a large oven safe casserole dish, well sprayed with cooking spray, and top with crushed saltines and extra cheese.


Place in oven at 350 for about 20 – 30 minutes, until cheese is melted and dish is heated through.
**Note – If you find the pasta is a little too dry and sticky when you spoon it into the casserole dish then simply pour a little water over it and give it a little stir. It will absorb into the pasta as it bakes in the oven. Do this before you put the topping on. You want it to be creamy and not dry! (If in doubt, add a little water)
Can you see why it has a few calories?
Trust me...it is soooo worth it!
Now, here is my method for cooking BBQ ribs. I'm not sharing a BBQ sauce recipe here, just my cooking method. I am still on the lookout for that one in a million BBQ sauce recipe. I use my favorite sauce (Anna Mae's Sweet and Smoky Oven & Grill Sauce from Sunset Gourmet - it's amazing!)

Place a large pot of water over high heat. Fill with uncooked ribs. Bring to a boil and then simmer for about 30 minutes. This will get rid of a lot of the grease. You can skim the pot as it simmers if you like.
Preheat oven to 350. 
Place ribs on a cookie sheet lined with parchment paper. Place in 350 oven for about 30 minutes.
After 30 minutes - take your favorite BBQ sauce and baste ribs generously. Place back in oven for 10 minutes.
After 10 minutes - flip ribs over and baste again with BBQ sauce. Place back in oven for another 10 minutes.

Oh my gosh.... so yummy.
By the way, this recipe makes A LOT. Like enough to feed a dozen or so people. I like to make this much because I make it in 2 casserole dishes and then freeze one for another day.

If you feel like indulging then this is the recipe for you.
Just remember I didn't nick name it Heart Attack Mac & Cheese for nothing. Too much could explode your heart.
Just warning you.

Be sure to stop by Carole's Chatter for some great links to more deliciousness! 

Friday, February 17, 2012

Cauliflower Prawn Fried Rice & Cauliflower Sushi


I am a recent convert to the whole "cauliflower can be rice" way of thinking. I can't believe I have gone my whole life without ever having had cauliflower cooked this way.
It really is quite unbelieveably rice-like but without the carbs and starchiness.
When I made the above dish (Cauliflower Prawn Fried Rice) I couldn't believe it wasn't rice. The people that tasted it had no idea it was cauliflower.
I started my "eating healthier" plan in January and am still doing pretty good. Eating dishes like these ones makes me feel like I am totally indulging.
All it involves is taking a head of cauliflower and grating it using a hand grater or using the grating blade on a food processor (just be careful not to over-process)


Cauliflower Prawn Fried Rice

Ingredients
3 cups shredded cauliflower, not cooked
1 Tbsp oil
1/2 red onion, finely diced
4 cloves garlic, minced
1/2 tsp ginger, finely grated
1 medium carrot, finely chopped
1 Tbsp black bean sauce
1/3 cup frozen peas
1 cup chopped prawns, cooked

Sauce
1 Tbsp low-sodium soy sauce
1 Tbsp water (or chicken broth)
1 Tbsp Oyster Sauce

That's all you need :)

Directions
Place shredded cauliflower in a covered microwave safe bowl. Microwave for 4 minutes. Allow to rest with the cover in place for 5 minutes.
Whisk sauce ingredients together in a small bowl. Set aside.
Place 1 Tbsp oil in a heavy skillet on high heat. When just starting to smoke, add the onion, garlic, ginger, and carrot. Saute for about 2 minutes, stirring constantly. Add the black bean sauce and cook another 2 - 3 minutes, until carrots are just tender. (Add a bit of water if mixture becomes too dry.)
Add the prawns and frozen peas. Cook until peas are done, about another 2 minutes.
Add the cauliflower and sauce and stir to combine.
Serve immediately.

That was the easy dish.
Sue and also made Cauliflower Sushi. It was really tasty and, again, if you weren't told you probably wouldn't have known it was cauliflower. The texture was a little different than regular sushi but the taste was spot-on.
Rolling the sushi and all that good stuff was incredibly easy....we had high hopes that this was going to be fantastic in every way....until it came time to try and slice them.
Then everything kind of fell apart. Literally.
Out of 3 rolls we only managed to salvage 1 1/2 rolls. The rest just crumbled and didn't stick together at all. Not that they went to waste....they tasted great....I just ate the residual mess from a bowl with a spoon.
It is hard to say where the trouble lay - Sue and I have never made sushi before - regular or otherwise. It may have been our method that was in need of improving.


Cauliflower Sushi

Ingredients
2 cups shredded cauliflower, not cooked
2 tsp rice vinegar
1 tsp sugar (or other sweetener)
1 pinch sea salt
1 tsp olive oil
sushi fillers - sliced cucumber, carrots, shredded crab meat mixed with a little mayo, avocado, etc...
Nori Sheets

Directions
Mix together vinegar, sugar, oil, and sea salt. Heat in microwave just to warm up.
Mix into cauliflower. You want the mixture to be dry but sticky.
Continue to prepare as you would regular sushi.


Here is a photo of it layed out on the Nori sheet. We used cucumber, carrot, and shredded imitation crab meat. We also made ones without the crab meat but with avocado.


See... so far so good. It was just that final cutting step that messed us up. We used a super sharp knife and everything but it still went kaflooey.

Oh well, we managed to get enough to bring some samples for others to try.
And, to get some photos so it looks like we knew what we were doing.


I used Fitday to figure out the nutritional info as best I could. (Of course there is a lot of variables that will change this so consider this an educated guess)

Regular sushi, per piece - 31 calories, 6.7 carbs, 0.6 protein
Cauliflower sushi, per piece - 10 calories, 2 carbs, 0.8 protein

Regular Fried Rice, 1 cup - 410 calories, 51 carbs, 26 protein
Cauliflower Fried Rice, 1 cup - 330 calories, 22 carbs, 27 protein

Pretty impressive, right? Especially if you are counting your carbs and calories.

I wanted to add this last photo as a warning to those of you who will be grating your cauliflower on a hand grater instead of using  the grating blade on a food processor.


It can get a little messy :)

Be sure to head over to Carole's Chatter for some great links!