
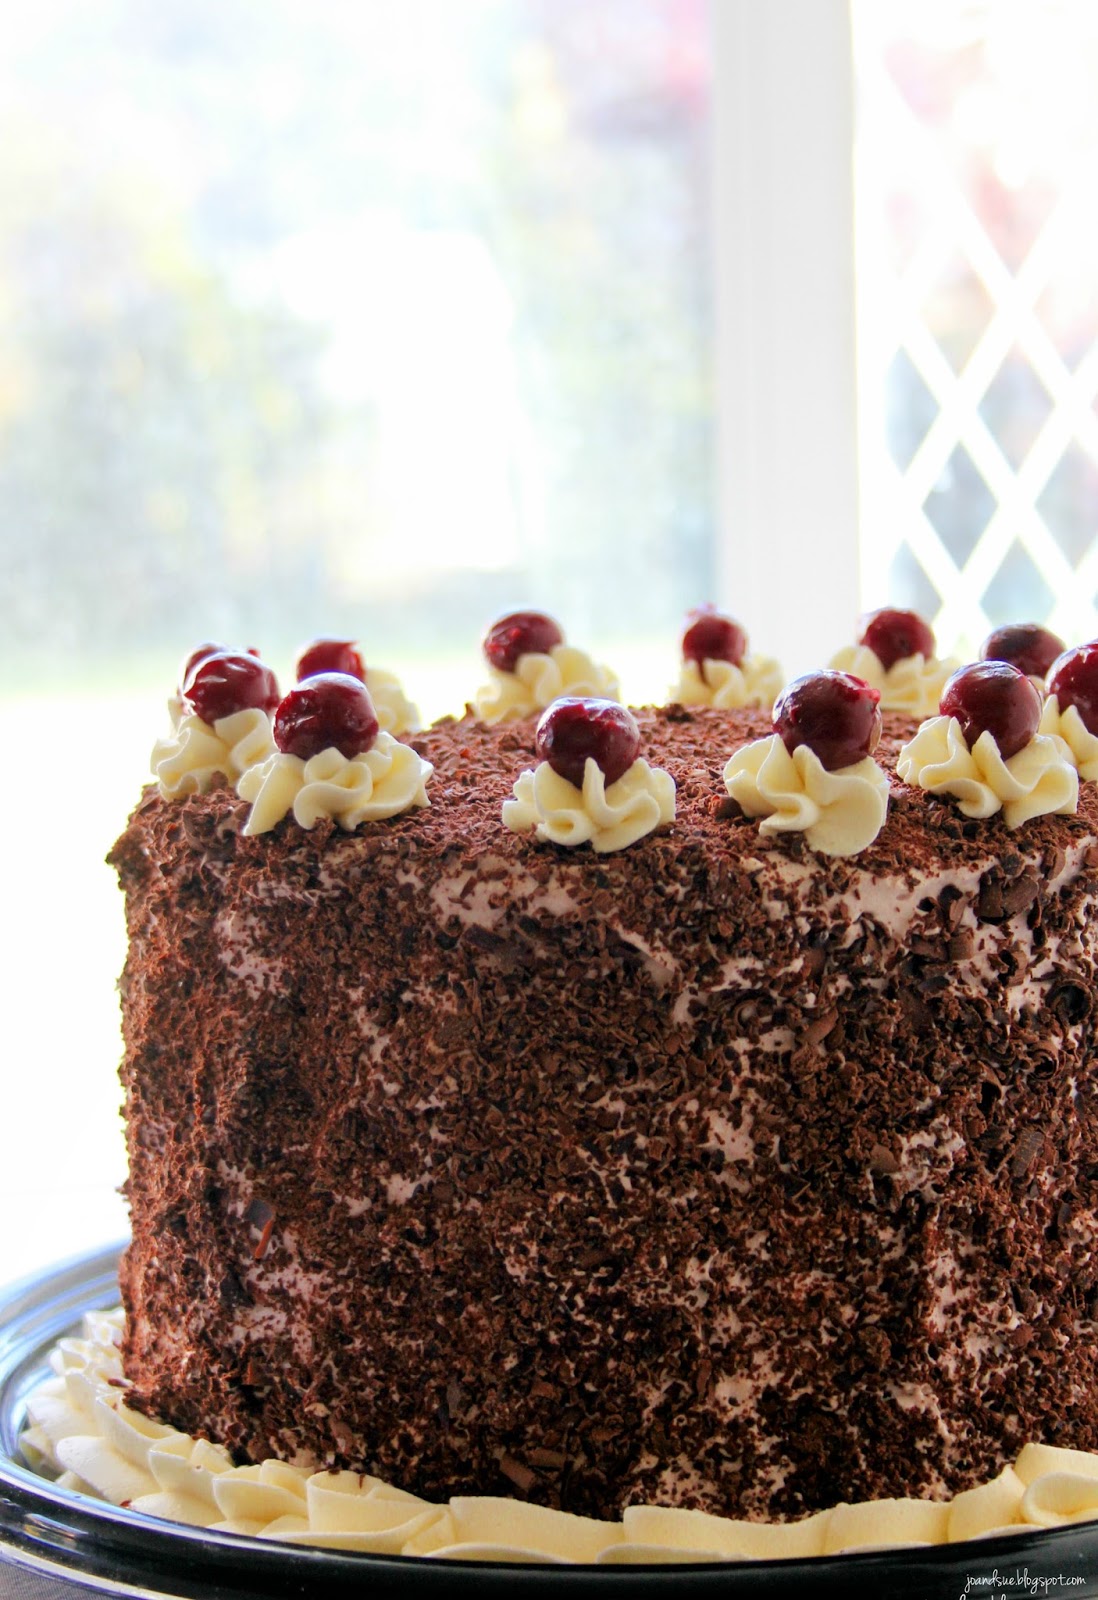
This is probably one of the best cakes I have made in a very long time. It is a traditional black forest cake with some decidedly modern updates.
It is very moist, very chocolaty, very tall, very delicious, and very majestic. (If I do say so myself)
I was going to try and be modest about this cake but...well...that quickly went by the wayside.
It's just too pretty.
And, I made it...
So, therefore, I'm pretty cool.
Anyways...lets move on to the photos, shall we? There is a billion. I had to take lots of pics.
It's sooooooo pretty...

Jo's Black Forest Cake
Ingredients
Cake
1 2/3 cup cake flour
1 cup baking cocoa
1 1/2 tsp baking soda
1/2 tsp salt
1/2 cup shortening
1 1/2 cups sugar
2 eggs
2 tsp vanilla
1/2 cup plain Greek yogurt
1 cup chocolate milk
1 cup cocoa nibs
Filling
1 cup butter, softened
3 1/2 cups icing sugar
pinch salt
1 Tbsp coffee (very strong)
1/2 cup Kirsch (cherry liqueur)
2 x 14oz cans sweet cherries, well drained
Topping
2 cups whipping cream
1 tsp vanilla
2 Tbsp sugar
2 tsp baking cocoa
1 - 2 cups of chocolate curls
Directions
Preheat oven to 350. Line 2 - 8 inch round cake pans with parchment paper cut to fit the bottom. Spray with cooking spray. Set aside.
In a small bowl, whisk together flour, cocoa, baking soda, and salt.
In a large bowl, beat together shortening and sugar until creamy. Beat in eggs, one at a time, until well combined. Beat in vanilla and Greek yogurt.
Alternately beat the dry ingredients with the chocolate milk into the wet ingredients until well combined. Stir in cocoa nibs.
Spread evenly amongst the 2 prepared pans. Bake at 350 until cakes are done - toothpick inserted near center should come out clean - about 30 minutes.
Remove from oven and let cool in pans for 5 minutes. Run a knife around the edge of the pan to loosen cake then invert cake onto wire cooling rack to remove from pan. Let cool completely.
When cakes are cool, slice in half horizontally using serrated knife - OR - I find dental floss works like a charm.
Prepare filling - beat together butter, icing sugar, salt, and coffee until smooth.
Place one layer of cake, cut side up, on serving platter.

Brush with 1/4 of the Kirsch liqueur. Spread with 1/3 of the filling.

You can see that it is not that easy to spread filling onto the cut side of a cake that has just been soaked with cherry liqueur. I discovered a trick for the next layer...keep reading!
Layer 1/3 of the cherries over layer.

Repeat with 2nd layer of cake, cut side up, soak in 1/4 of the Kirsch liqueur, then spread with 1/3 of the filling.

This time - instead of trying to spread the filling with a knife, I dipped my fingers in a bowl of water and gently spread the filling with my fingers. This works like a charm. When it starts to get sticky simply wet your fingers in the water and keep going.
Now layer with more cherries.

And then, another layer of cake, cut side up, soaked with 1/4 of the Kirsch.

Spread the last of the filling.

And now, add the last of the cherries.

Top with the remaining layer of cake, brushing that layer with the last of the Kirsch.

Place in the fridge while you prepare your topping.
Whip together cream, vanilla, sugar, and cocoa until stiff peaks form. Frost sides and top of cake.

Press the chocolate curls onto the sides and top of the cake. We had to shave a bar of fancy schmancy chocolate with a vegetable peeler as, of course, you cannot buy chocolate curls in Lillooet.

This takes forever and you may end up recruiting helpers. I got Sue's daughter, Kenzie, to help me out.

I had to keep a close eye on her....she kept going for the cake....
Anyway...here is what it looks like with the curls...

Ooooooh! But it's not done yet! Now you can fancy it up with a bit of whipped cream and a few cherries. (Oh, yes, by the by, if you are like me and forget to save a few cherries to put on top it will mean a quick run to the store to by another can of cherries. SO, the lesson here would be - save a few cherries to put on top. I happened to have a can of whipped cream in the fridge that I used to make a few swirls on top.

You know the movie Despicable Me where the little girl says "It's so fluffy, I'm gonna die!"? Well, I had one of those moments with this cake except it was, "It's so pretty, I'm gonna die!".

Look at all those layers of deliciousness. The cocoa nibs add a little crunch and a LOT of chocolat-iness to the cake. The Greek yogurt helps make it moist, the chocolate milk helps add even MORE chocolat-iness. The tablespoon of coffee - which you must make extra, extra, extra strong - is extremely subtle but does add to the flavor. And...I found the little bit of cocoa powder added to the cream when you whip it also adds a more chocolaty flavor.
Overall, a new spin on a classic dessert that is definitely worth the little bit of effort it takes.
Very rich, very decadent, very tasty!
Ms. en Place and Six Sister's Stuff and Carole's Chatter have some fantastic links - be sure to check them out!
Don't forget about Adorned From Above and Or So She Says either. :)
Beautiful job! This look delicious!
ReplyDeleteThank you Cindy :)
DeleteOh. Wow. This is one gorgeous cake. And tall too!
ReplyDeleteI like that you used your fingers to spread the filling--sometimes hands are the best tools.
Thank you for linking!
Delicious and a very beautiful cake
ReplyDeleteI think you did a great job!
Have some questions!
ReplyDelete(1) How do you cut that cake - and keep it in a slice?
(2) How do you spread the cream - without licking it all of the finger?
(3) How do you stop yourself having more than one slice!
It's not often I drool when reading a recipe: I just did.
Thanks for sharing the recipe and pics! Isobel www.ColdhamCuddliecalling.blogspot.com
1.) it's tricky! You use a large knife and then lean the cake slice against the knife until you can get it to the plate.
Delete2.)that's tricky too...*sigh*
3.) even trickier than the last 2... *siiiigh*
Thank you :)
Thanks so much for the amazing recipe! Made a gluten-free version of this cake for Fourth of July (all I did was switch the flour) and everyone loved it! http://t.co/L0x81V0vUj
ReplyDeleteSo glad you enjoyed it!! :)
Deletewow….Amazing cake !!!! these cake look very delicious .Online cake shops offer their customers a full series of choices to buy the cake. I would like to buy black forest cakefor my near and dear ones as its time saving.
ReplyDeleteLooking yummy. Nice Recipe of black forest cake.
ReplyDeleteThanks for sharing it. I will try this recipe.
Such patience and technique! You can open your own bakery with these skills!
ReplyDeleteMarlene
Informative URL for ICD 10 Chiropractic